Design Portfolio
The following is a design and process portfolio during my time at university and working for RAAFT
Ma in Design - 2:1 Upper Class
UnderGraduate in Product Design - 2:1 Upper Class
Software
Solidworks
AutoCad
Keyshot
Adobe Suite
Office Suite
Hands-On
3D Printing
Hand-tools/Rapid Prototyping
Workshop Experience
Experience
November 2025 - Present: Product Innovation
November 2024 - November 2025: CAD Technician
January 2023 - November 2024: Research and Development
Contents
1. Who are RAAFT? - a brief introduction
2.RAAFT - Product Innovation
November 2025 - March 2026
4. RAAFT - Research & Development
February 2023- November 2024
5. Final Year Project
September 2020 - September 2021
3. RAAFT - Draughting
November 2024 - November 2025
6. First and Second year projects
September 2018 - September 2020
Who are RAAFT
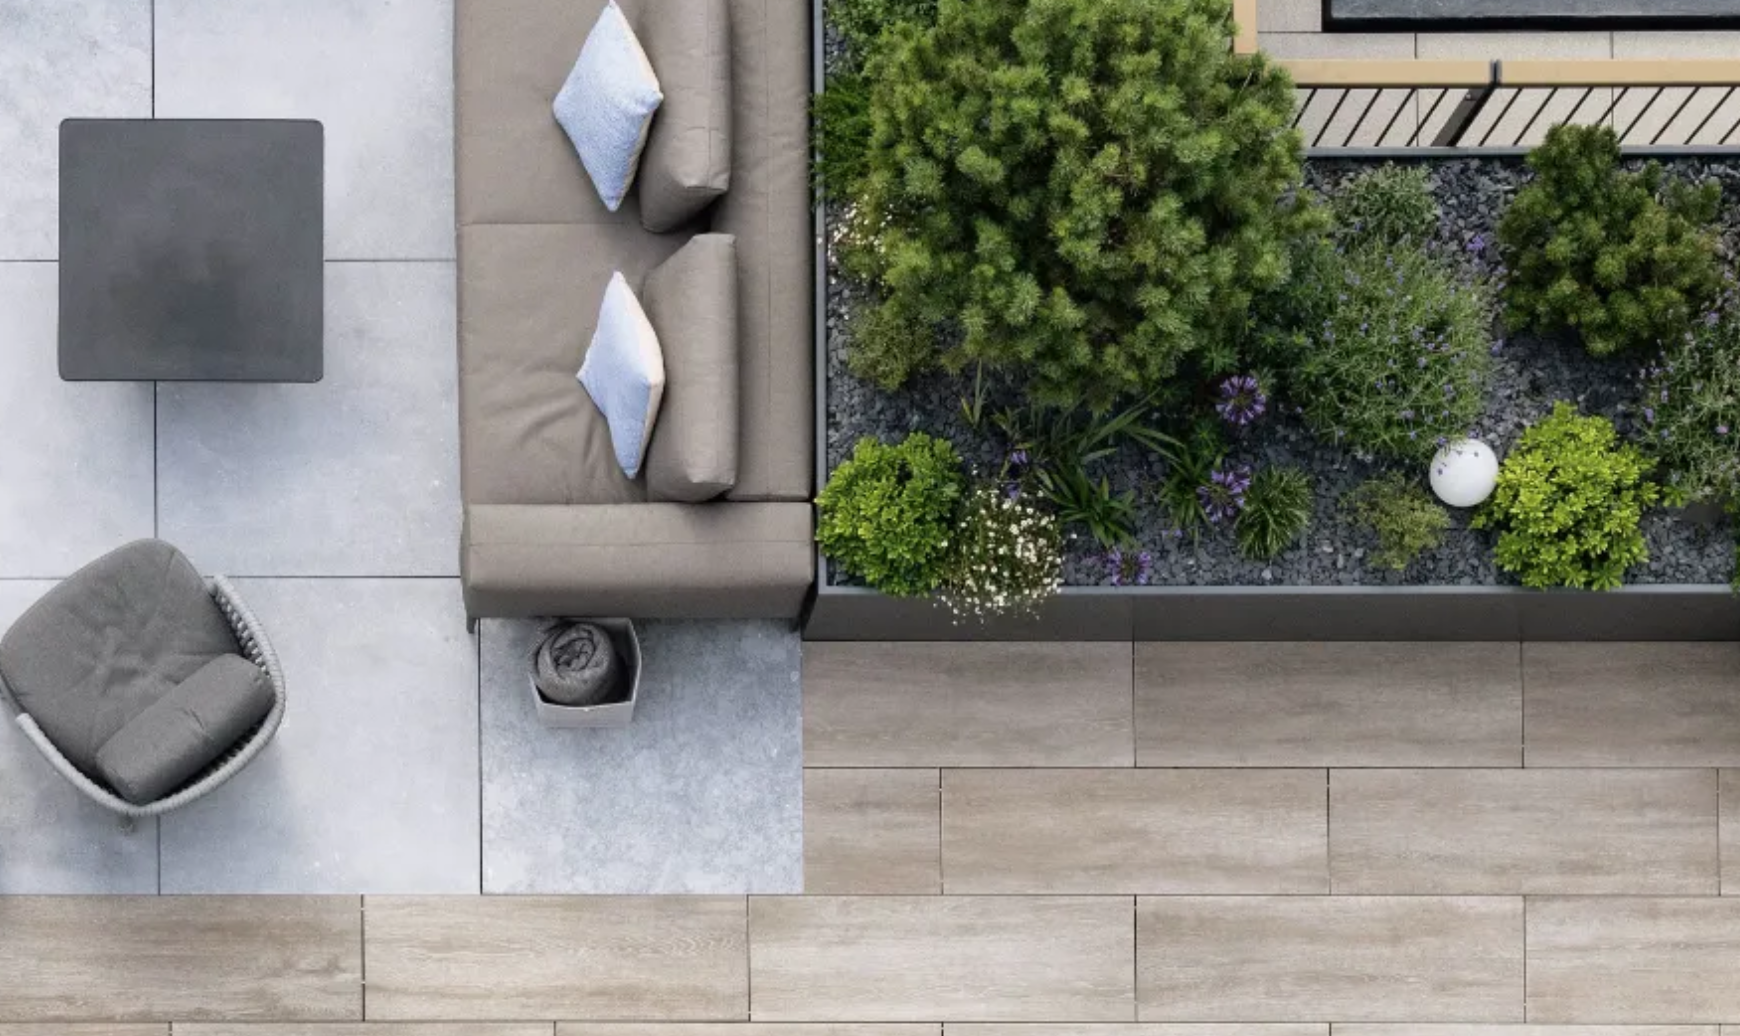
RAAFT designs terrace systems for commercial properties across the world, with a recent expansion into the USA.
Their system is versatile, creative, and innovative, whilst RAAFT themselves are one of the leaders within their market space.
I have had 3 different promotions over the past 3 years at RAAFT, and they will be detailed in the following portfolio.
2. Product Innovation
November 2025 - March 2026
About
Every day looks different - it is one of the main reasons why I chose this practice. Working with multiple departments and clients, and using various software tools or machinery to create a solution that addresses and solves a problem, is the embodiment of Product Design.
Market research and having the foresight to spot new and emerging trends with a particular view towards sustainable practices are key passions and skills I bring to this position.
Projects
There were 3 categories of projects undertaken in this role:
Small - These would typically be projects that could be undertaken in a day or less, and would often be refining a clip/fixing, building a mock-up test rig, or adjusting a product slightly to improve it (e.g., a better connection or fit).
Medium - Projects that would take several weeks, oftentimes interspersed amongst each other whilst waiting for others to confirm/provide key information. This was a fantastic experience to learn to deal with multiple projects at once.
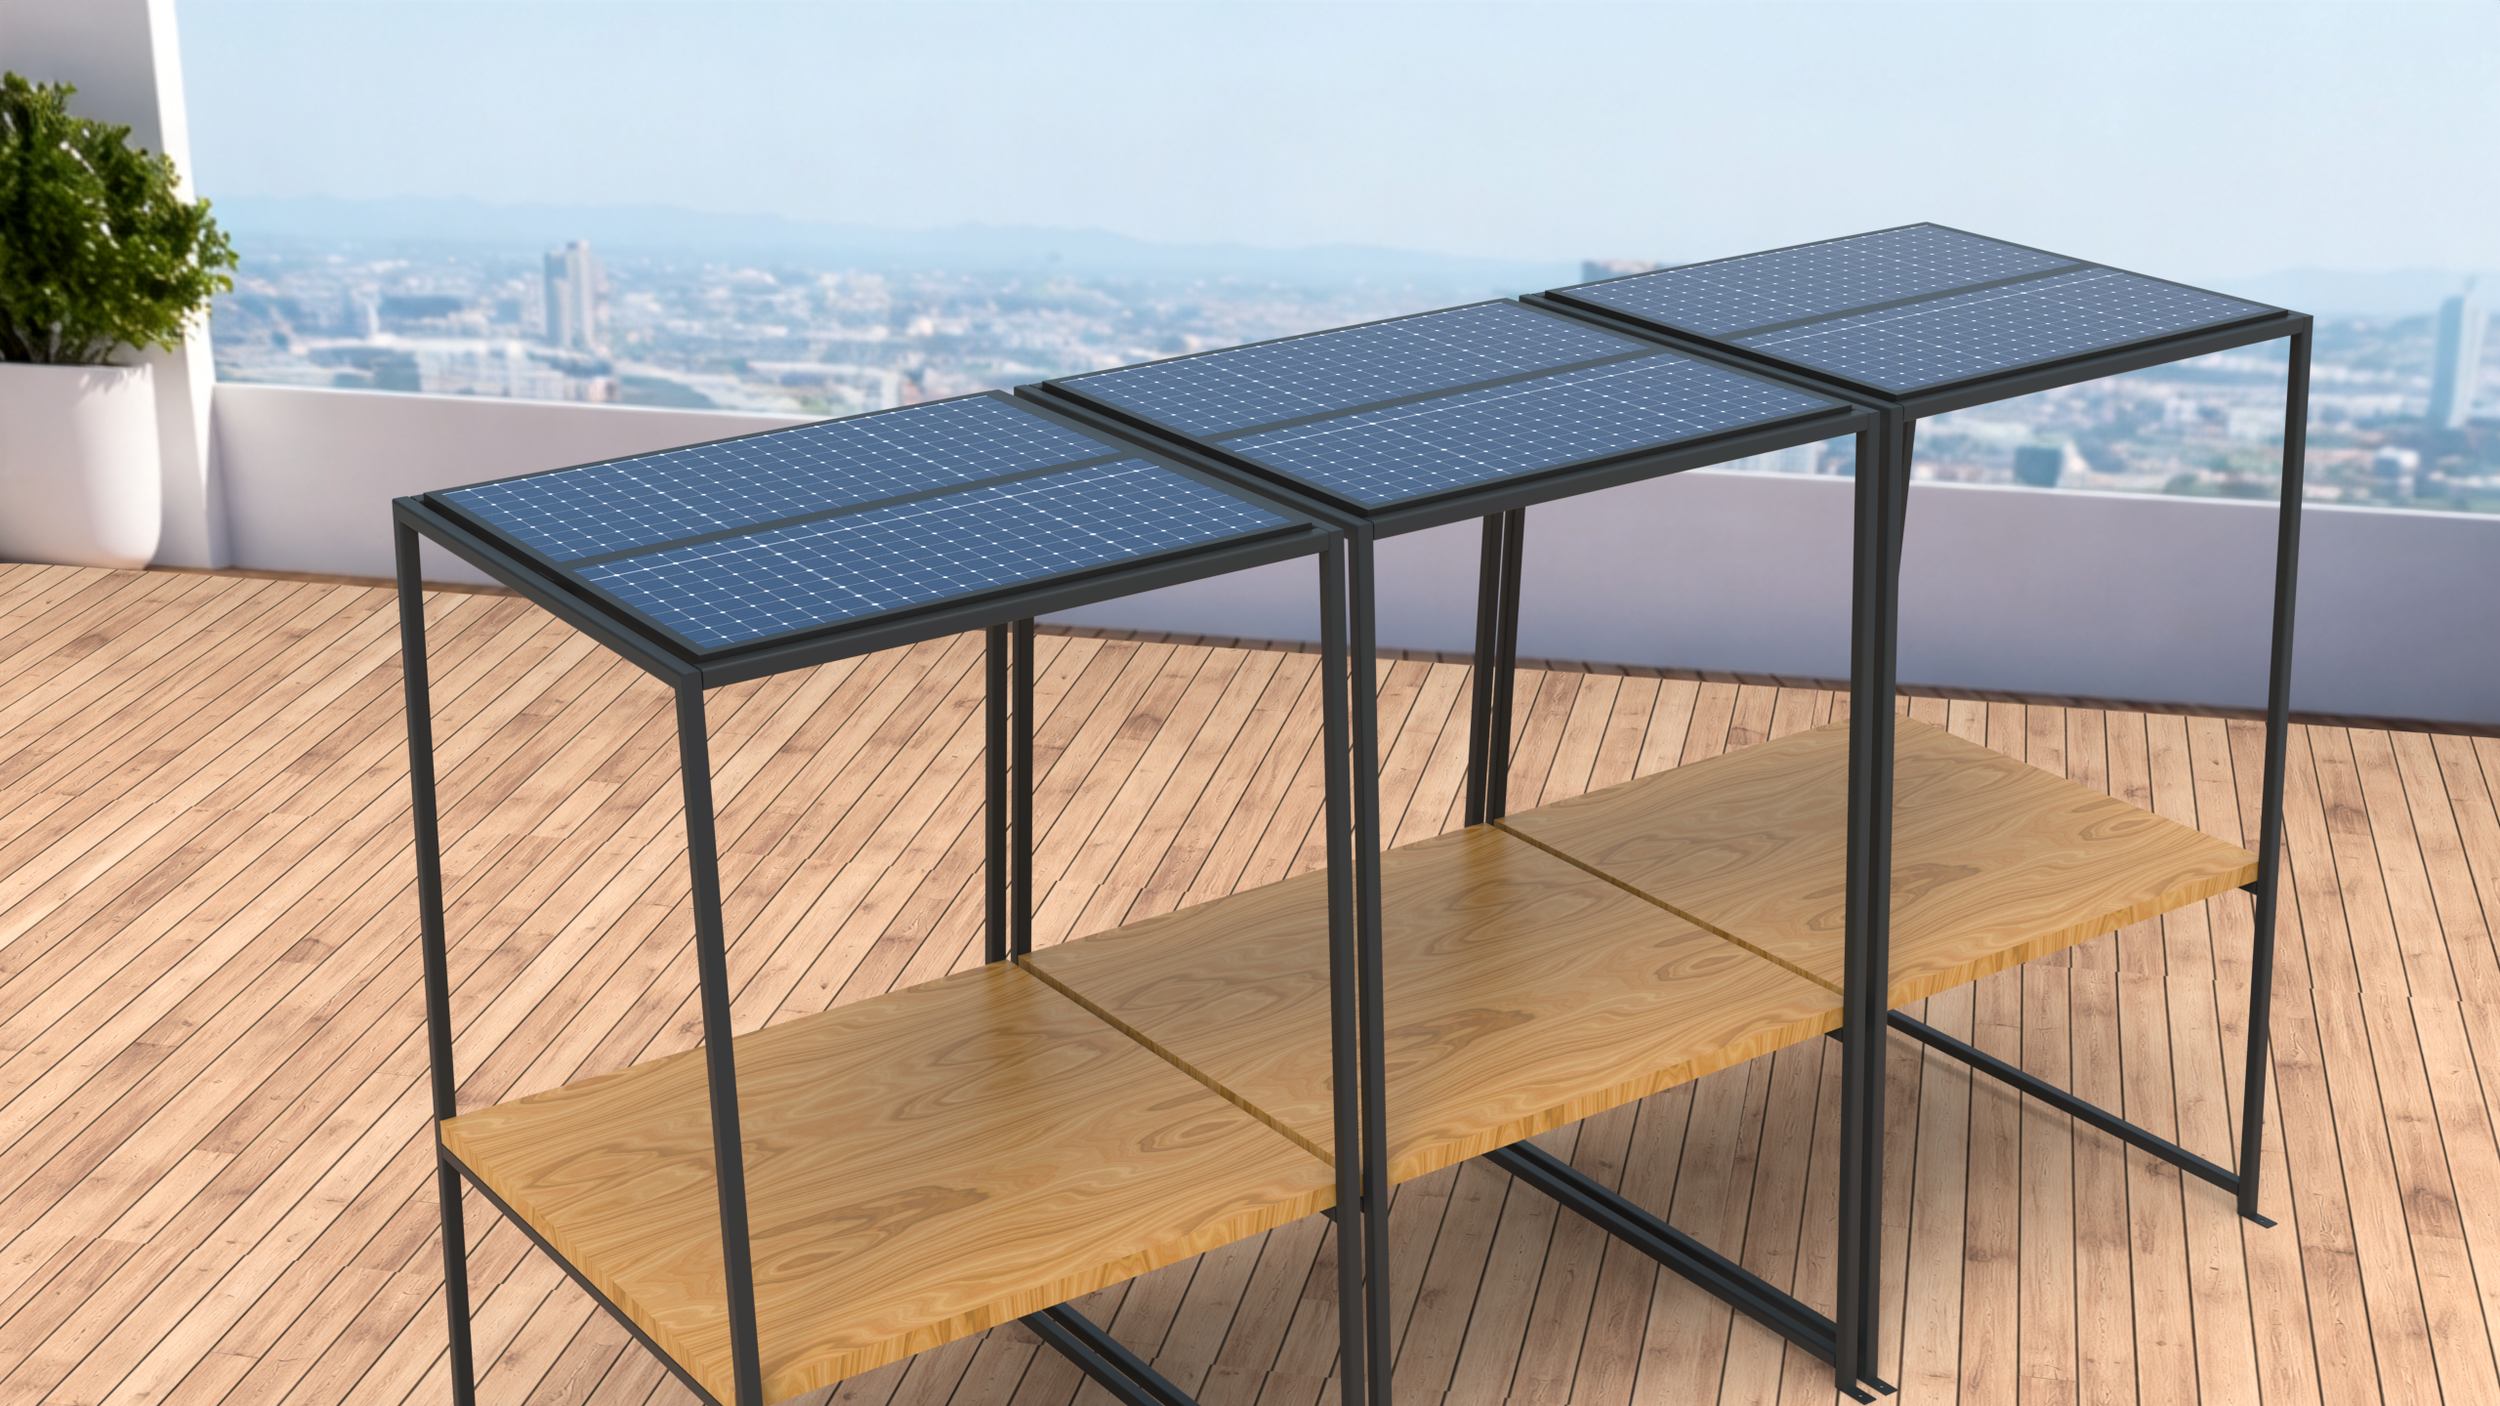
Large - these would be projects that would define Product Innovation, with the current works focusing on a sustainable furniture range.
Skills Developed
Market Research
Analysis identifying Sales Opportunities
Hands-on Building
Testing Concepts
Rendering for Initial visual impact
Collaboration across multiple departments
3D Printing

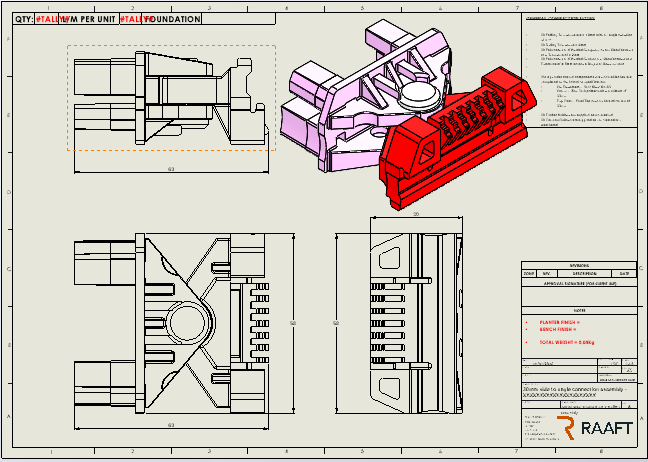
3. Draughting
November 2024 - November 2025
About
Draughting is not a particularly visual part of my design scope, yet the skillset it created became invaluable.
Draughting taught me many skills, such as being able to design for manufacture and use design intent. Understanding this quickly and implementing it into all the work I did ensured that I got given increasingly difficult projects that would test my skills each day.
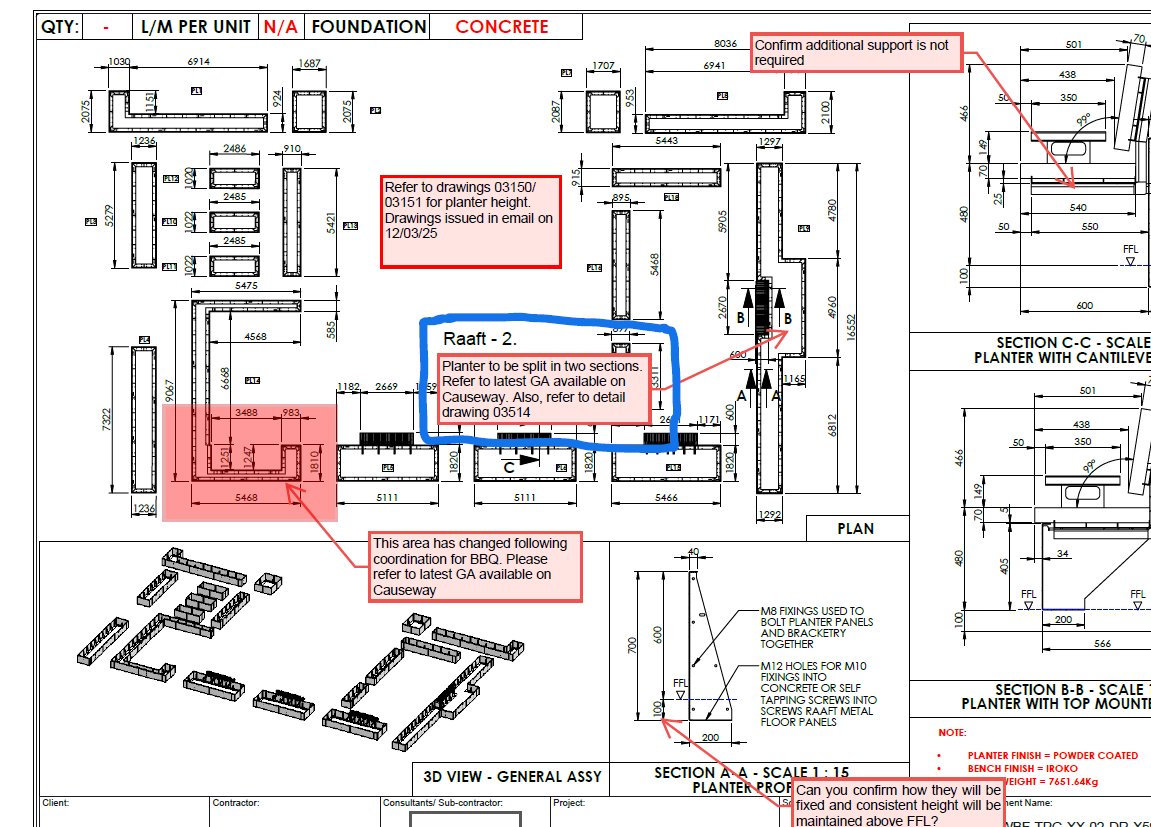
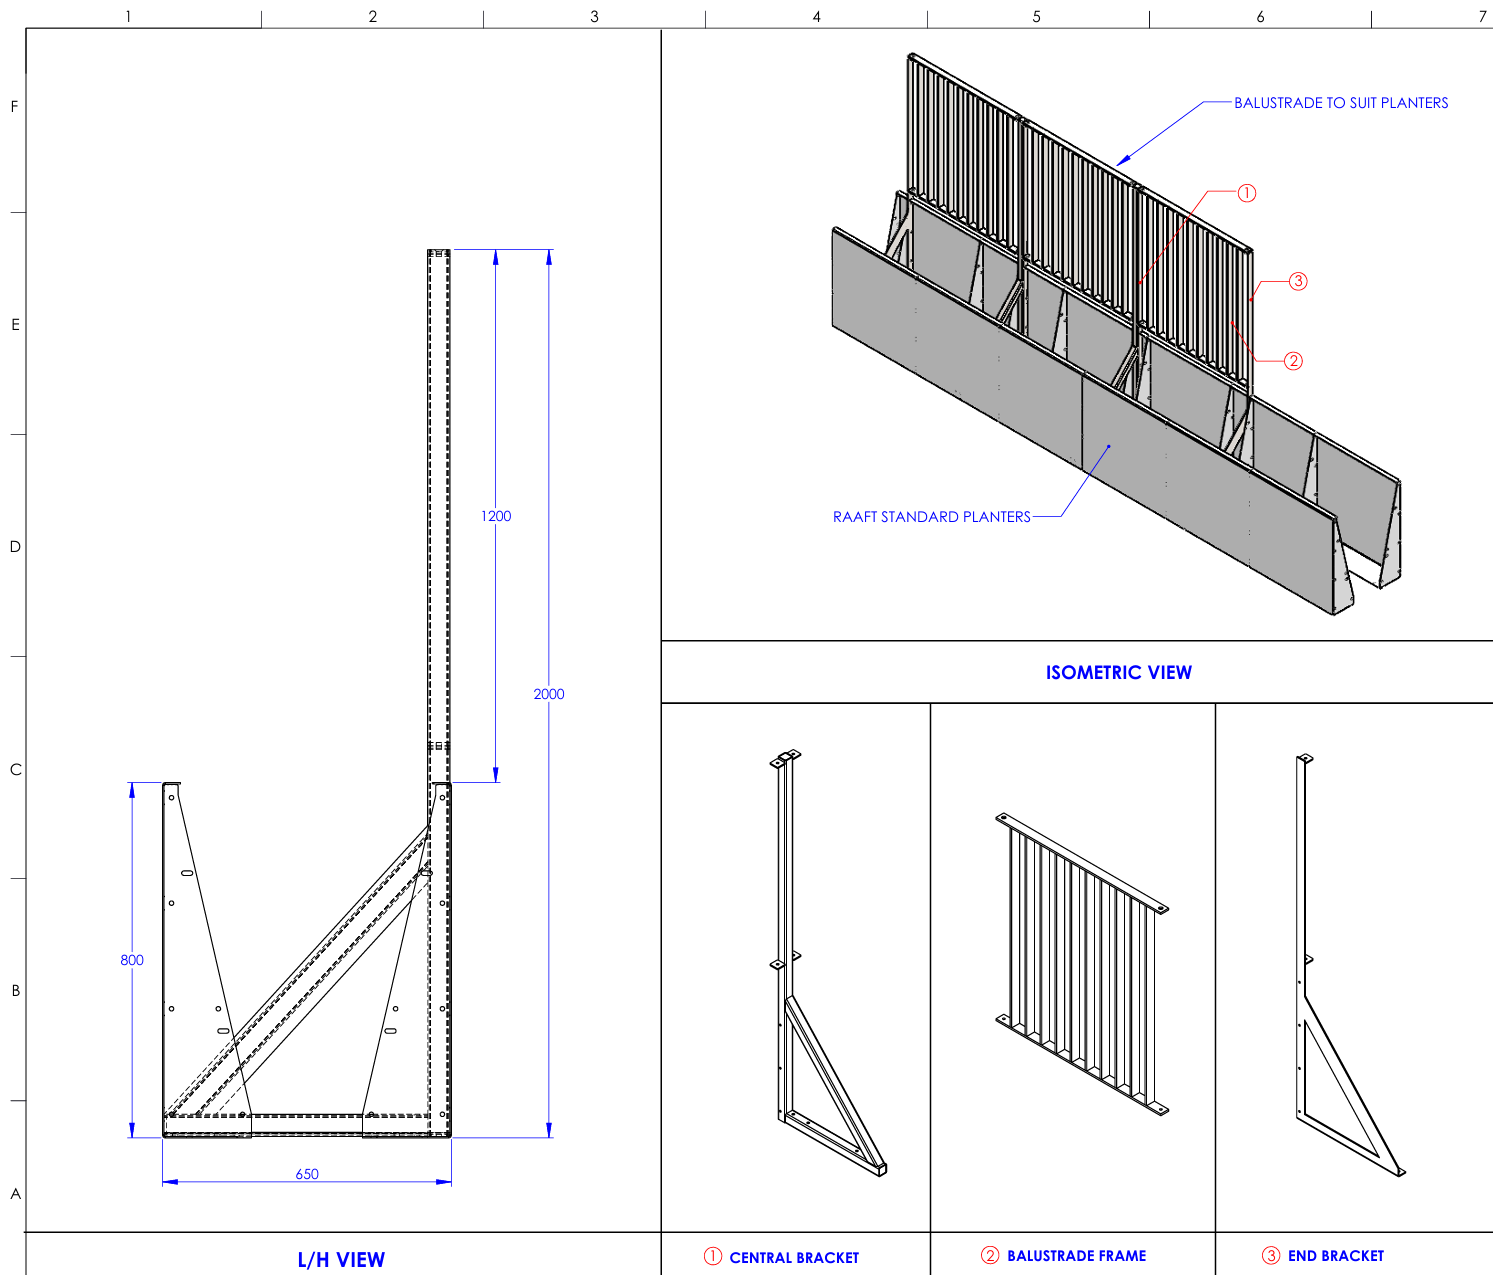
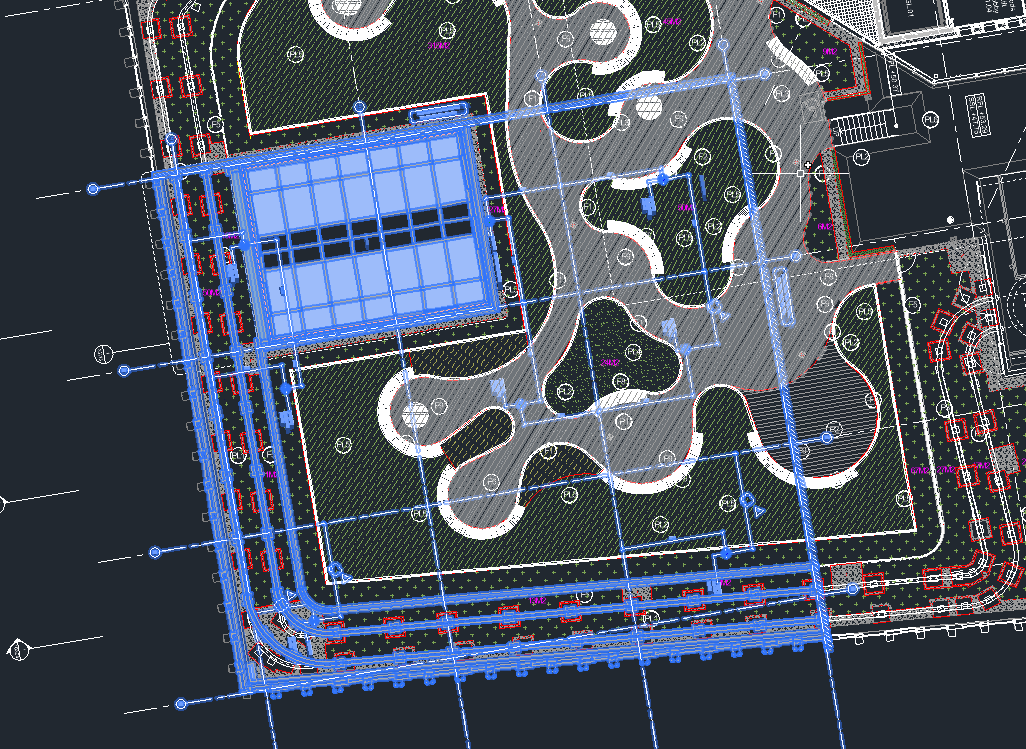
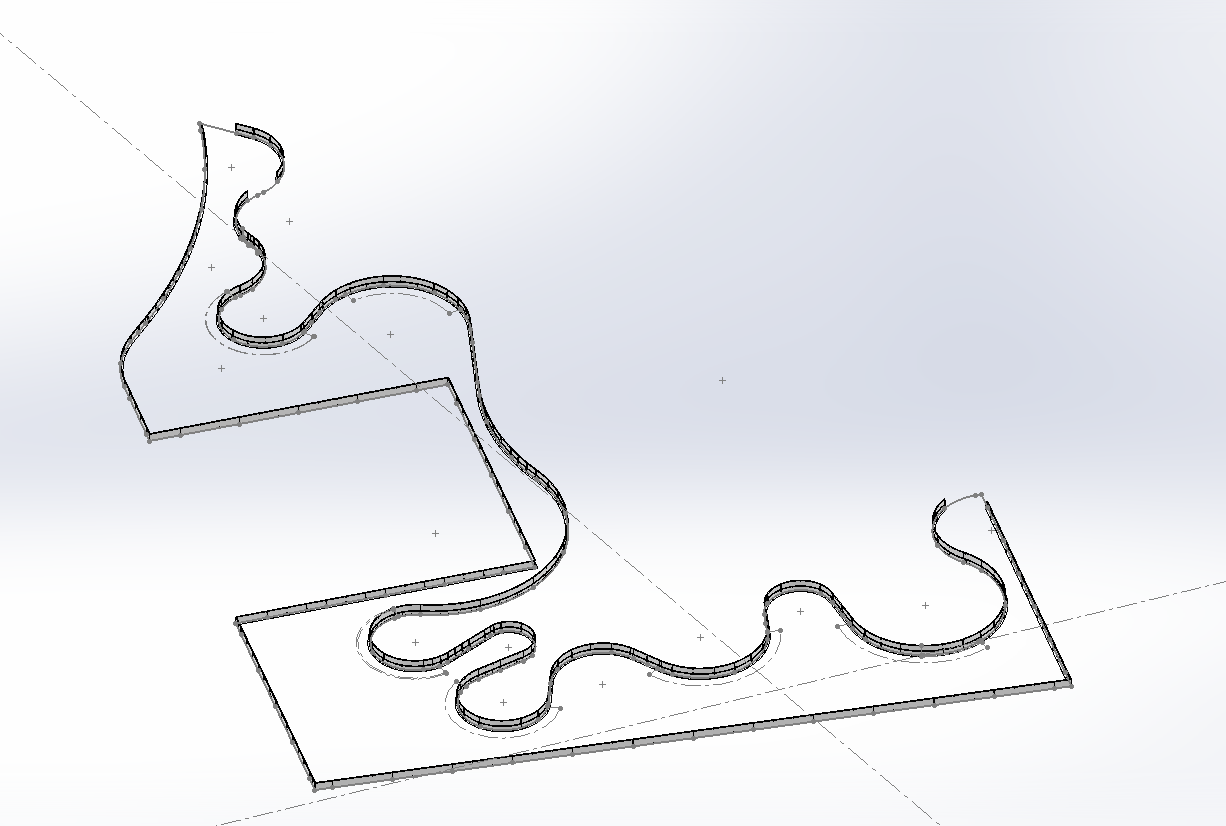
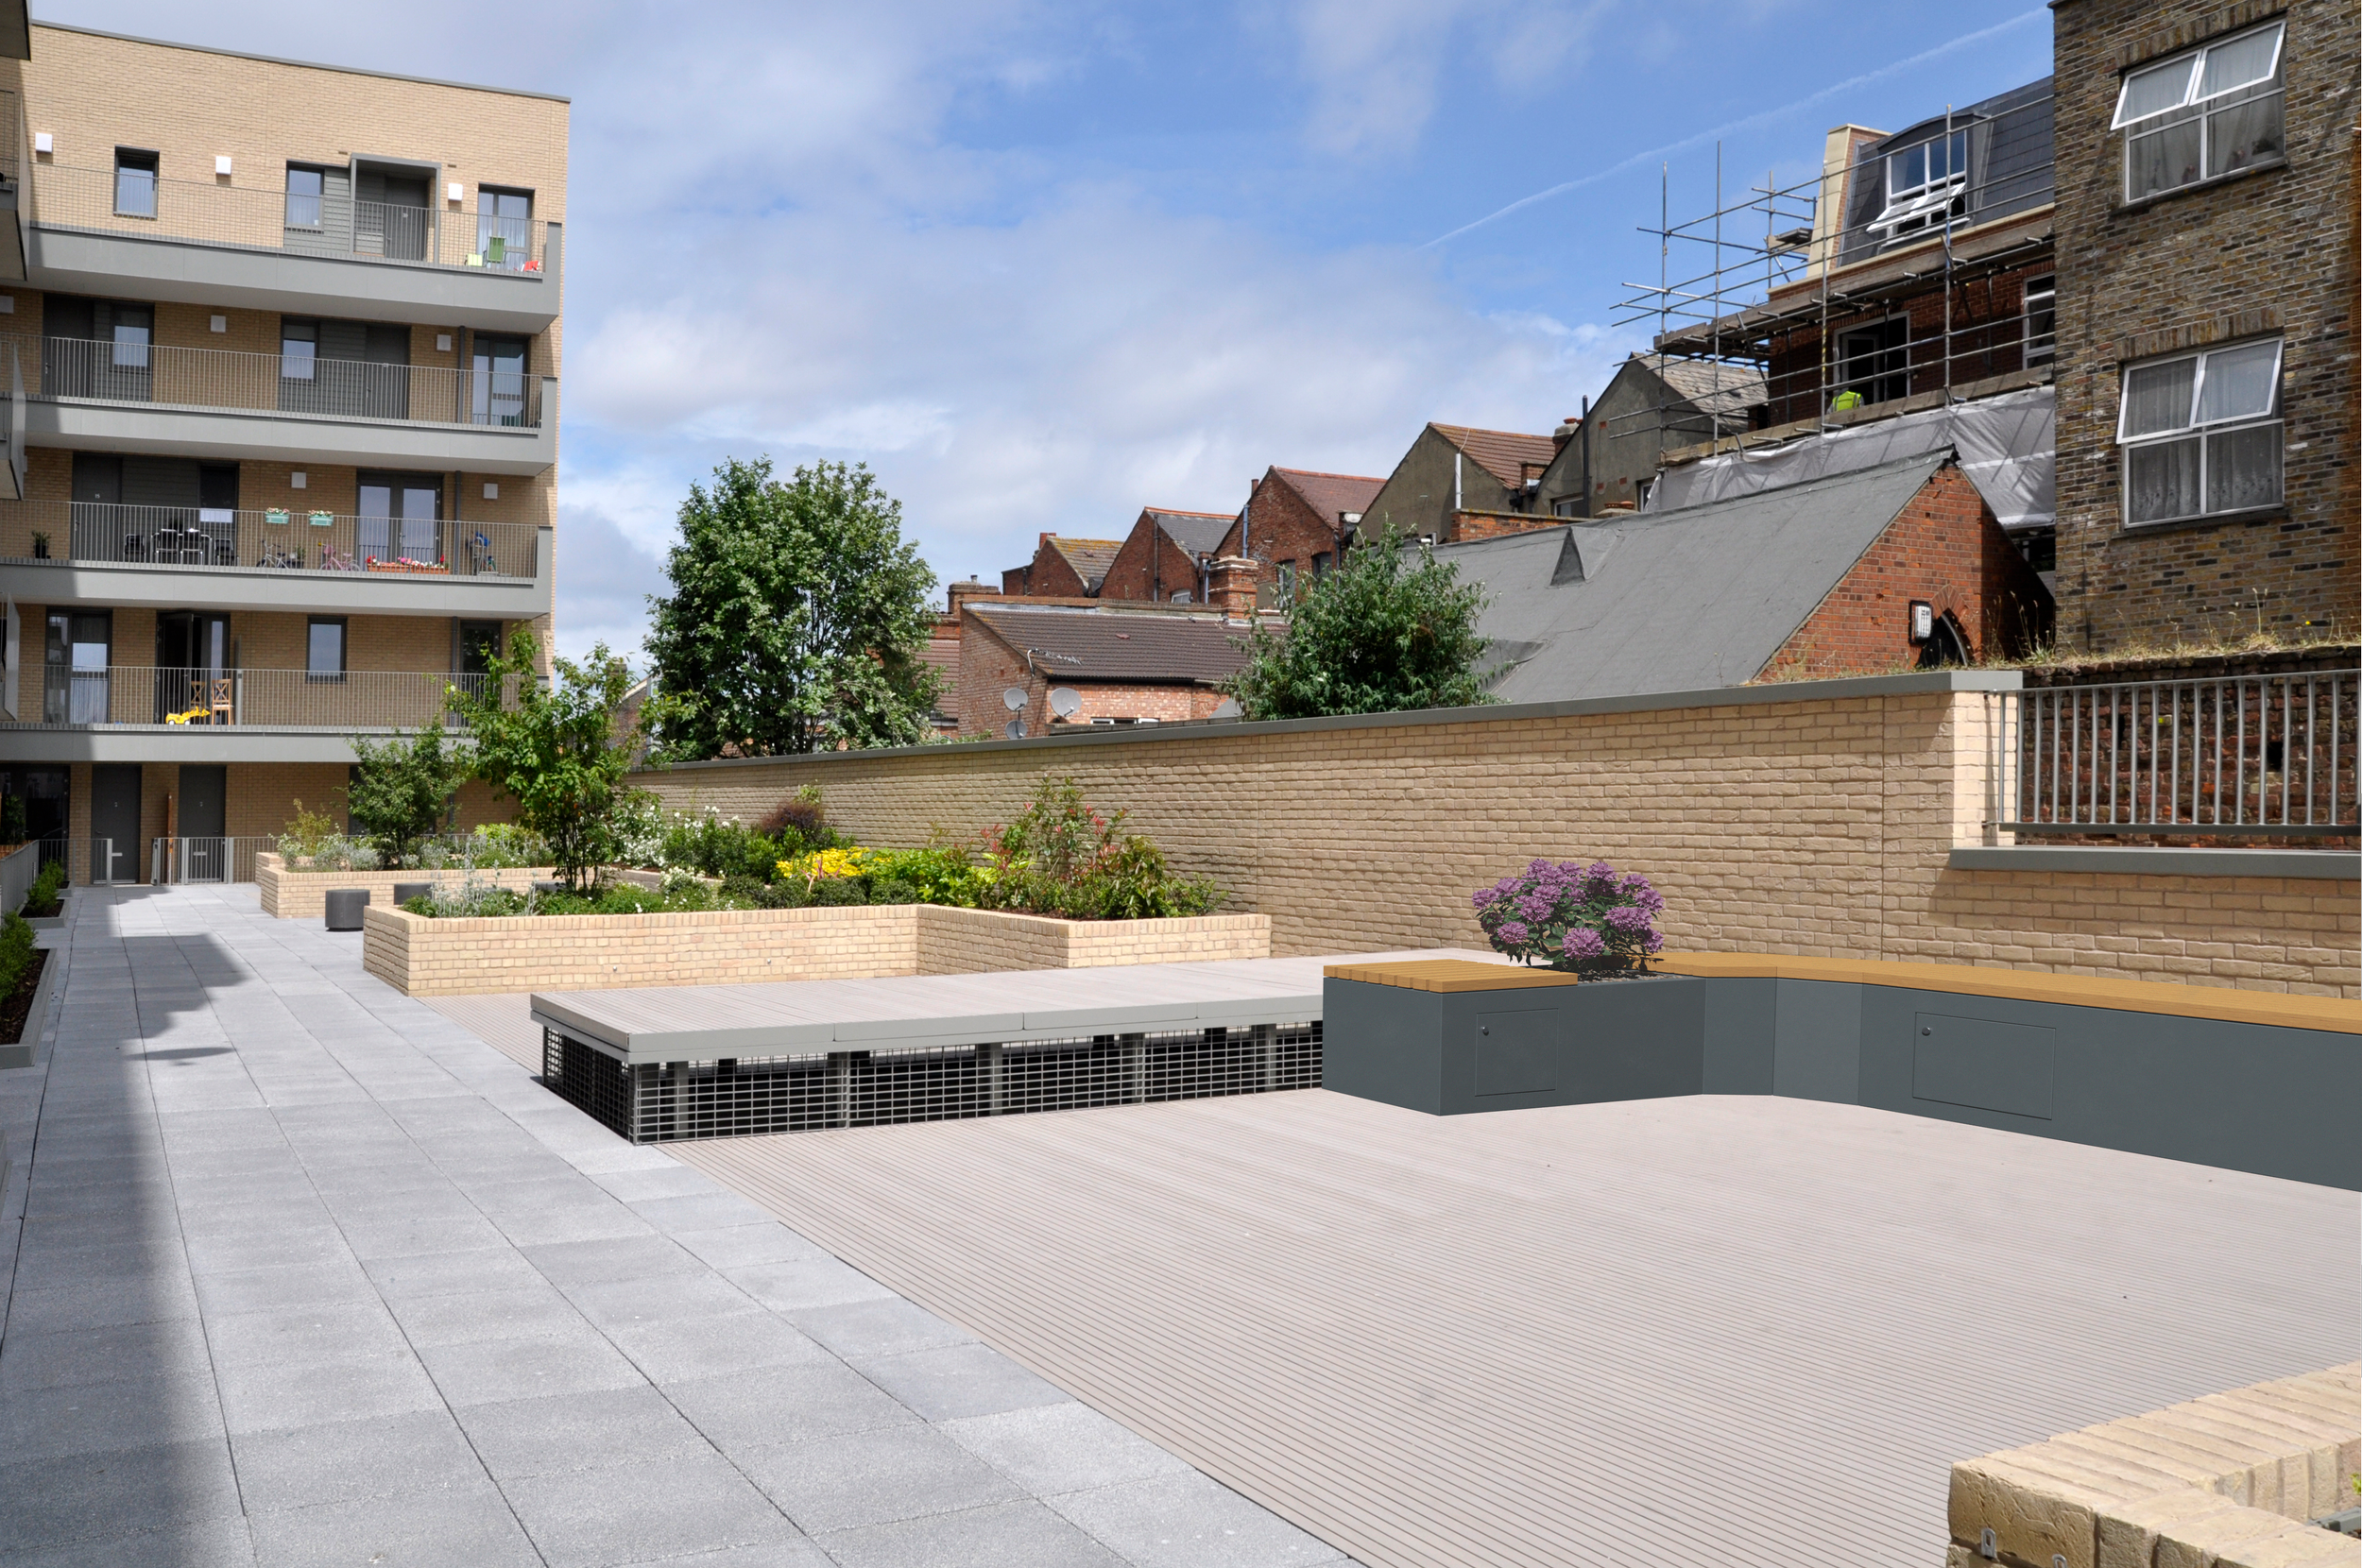
The images below show one of the most complex projects RAAFT had, which I was the lead designer on - Holborn Viaduct - and the project had a total value of over £1,000,000
My Role
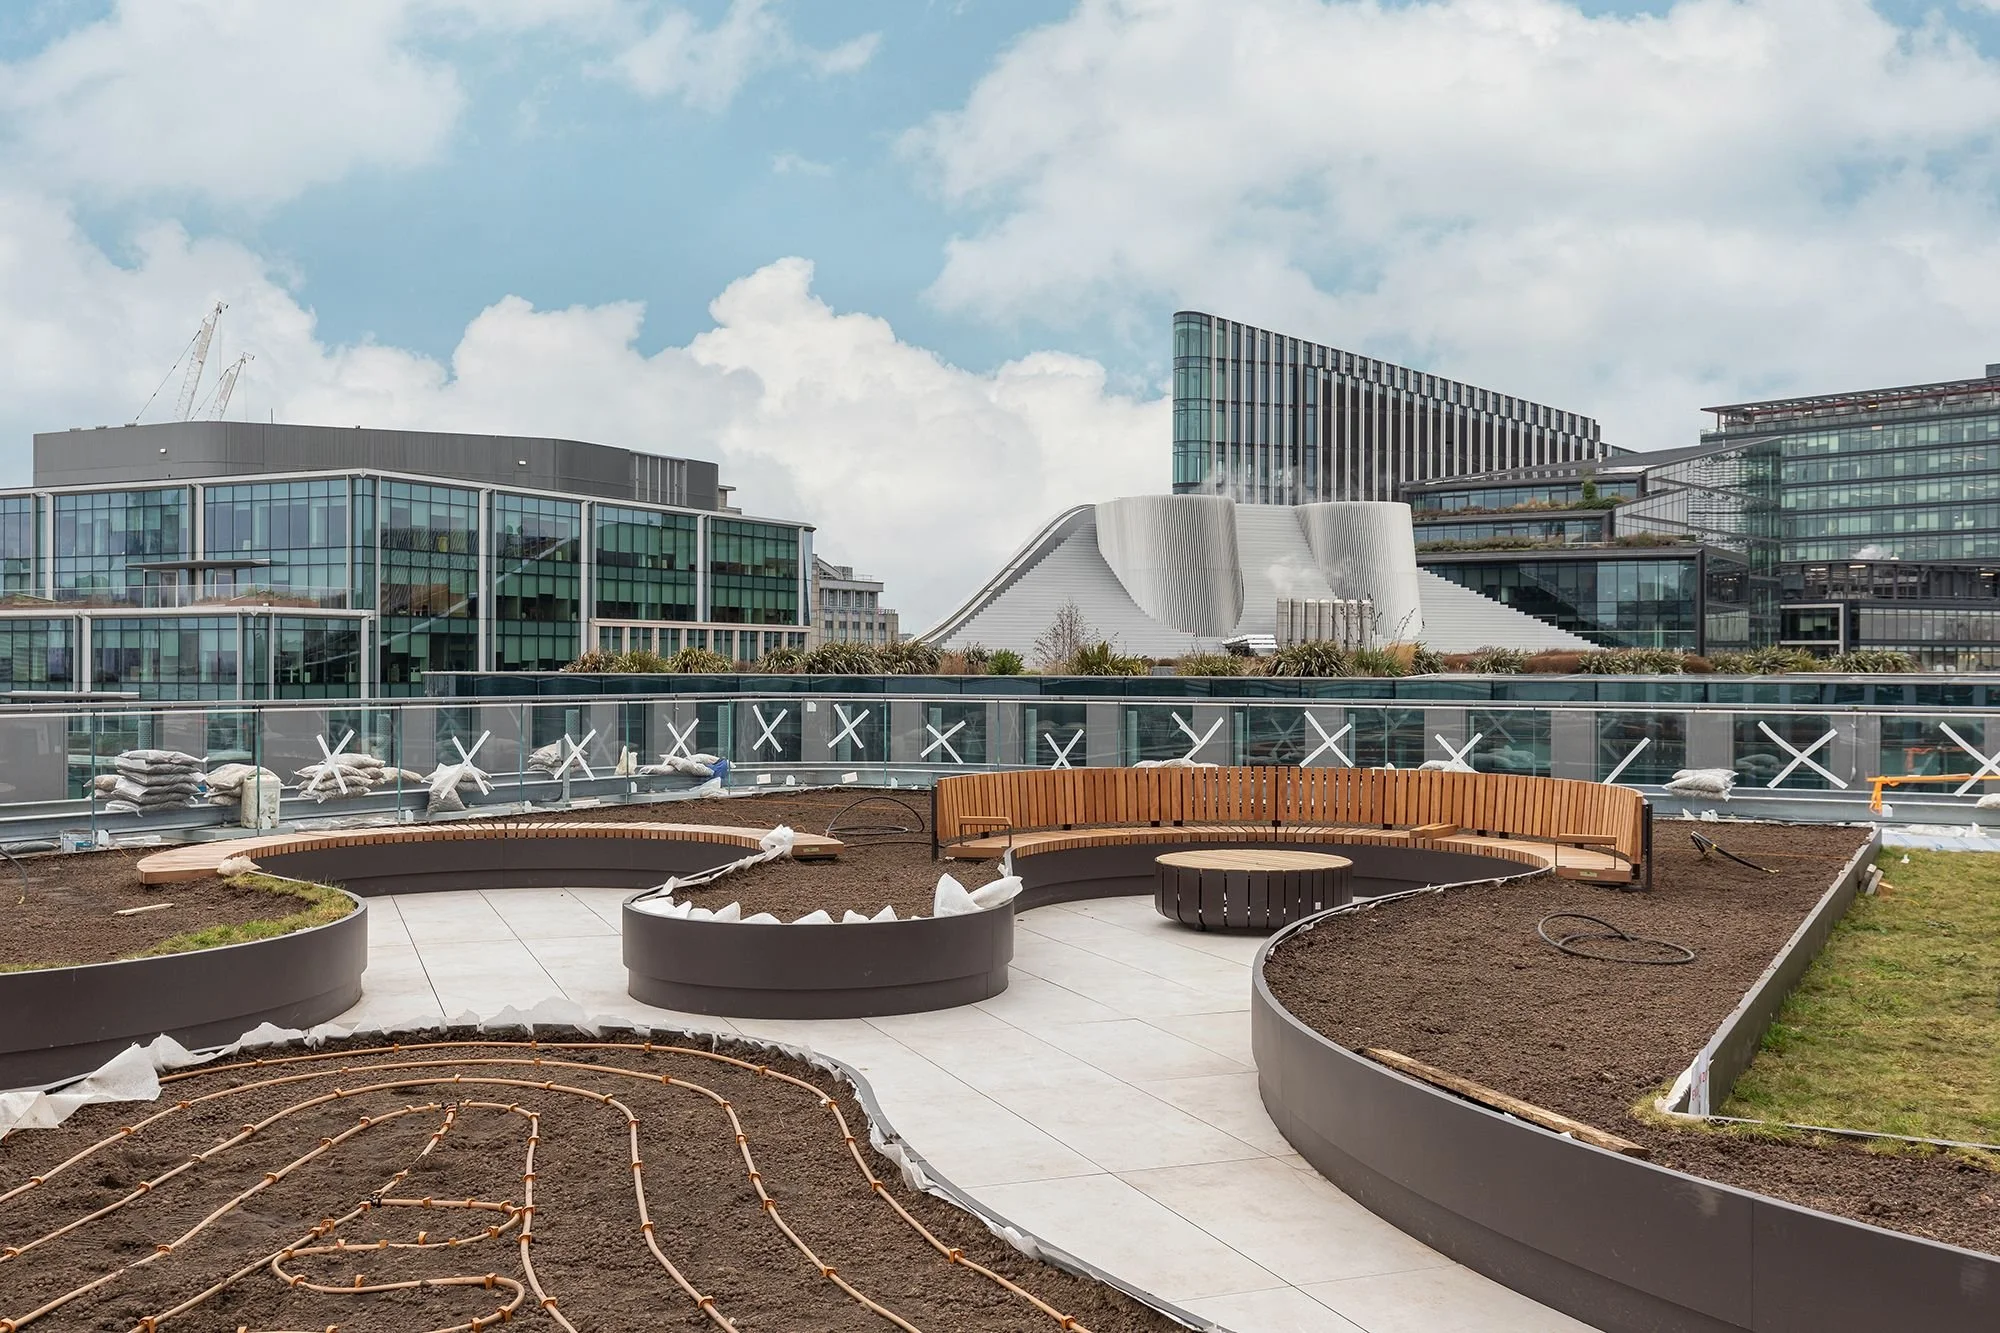
The role of the draughtsman in RAAFT was to liaise confidently and swiftly with clients, and to deliver the results needed for an ideal roof terrace layout.
This ranged from simple box planters, all the way through to incredibly complex curved shapes with various benches, cut-outs, and bespoke features demanded from the customer.
Being able to obtain complex DWGs, communicate with several other teams within the operations department, hold key client meetings, understand their live changes, and create the bespoke layout in CAD to produce drawings were all part of the day-to-day in draughting.
Skills honed
Sheet metal (within SolidWorks and in a workshop environment)
Design for manufacture (DFM)
Design intent
SolidWorks modelling (“in part” and “in assemblies”)
Interdepartmental communications
AutoCAD basics
Understanding of budgets and commercial decisions
Creating detailed manufacturing drawings
Teamwork
4. Research and Development
February 2023 - November 2024
Taking a project right through the design stages was (and still is!) a real passion of mine throughout my time at University. Upon beginning R&D at RAAFT, I was keen to demonstrate these skills throughout. Below highlights 2 that have been through the entire process - from concept all the way through to being put onto site:
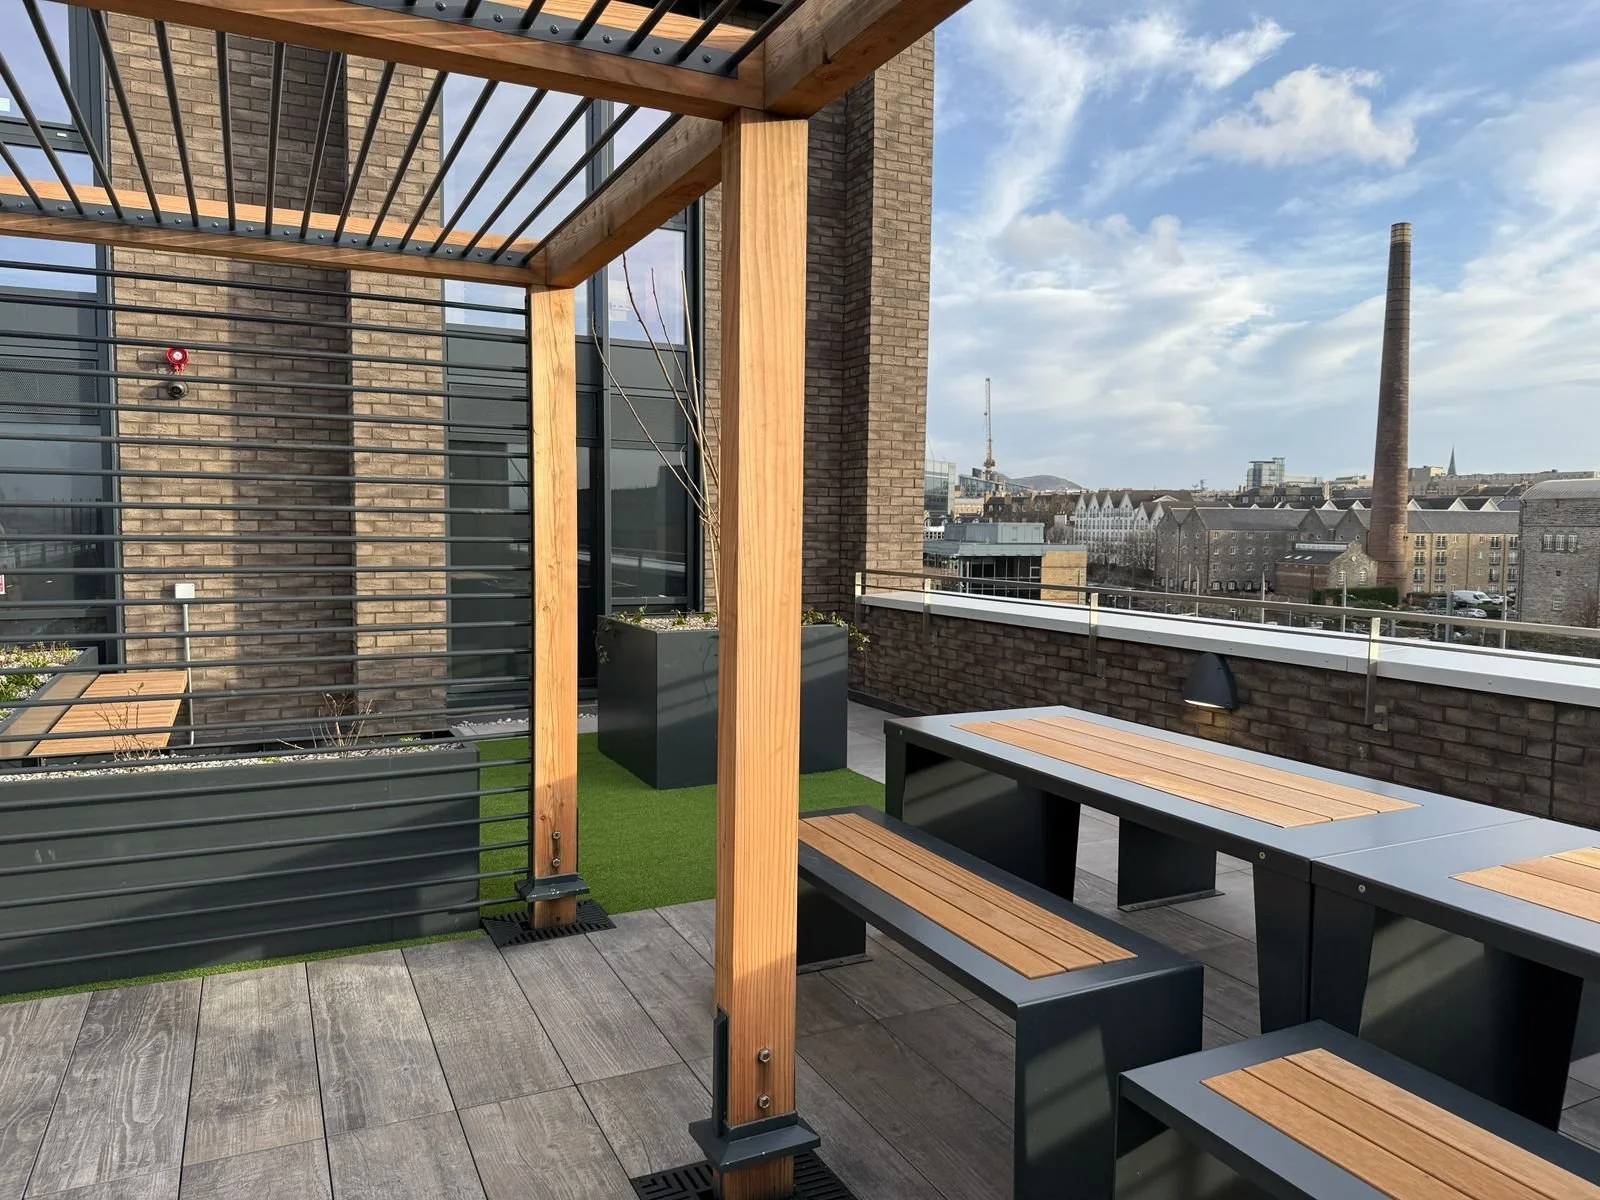
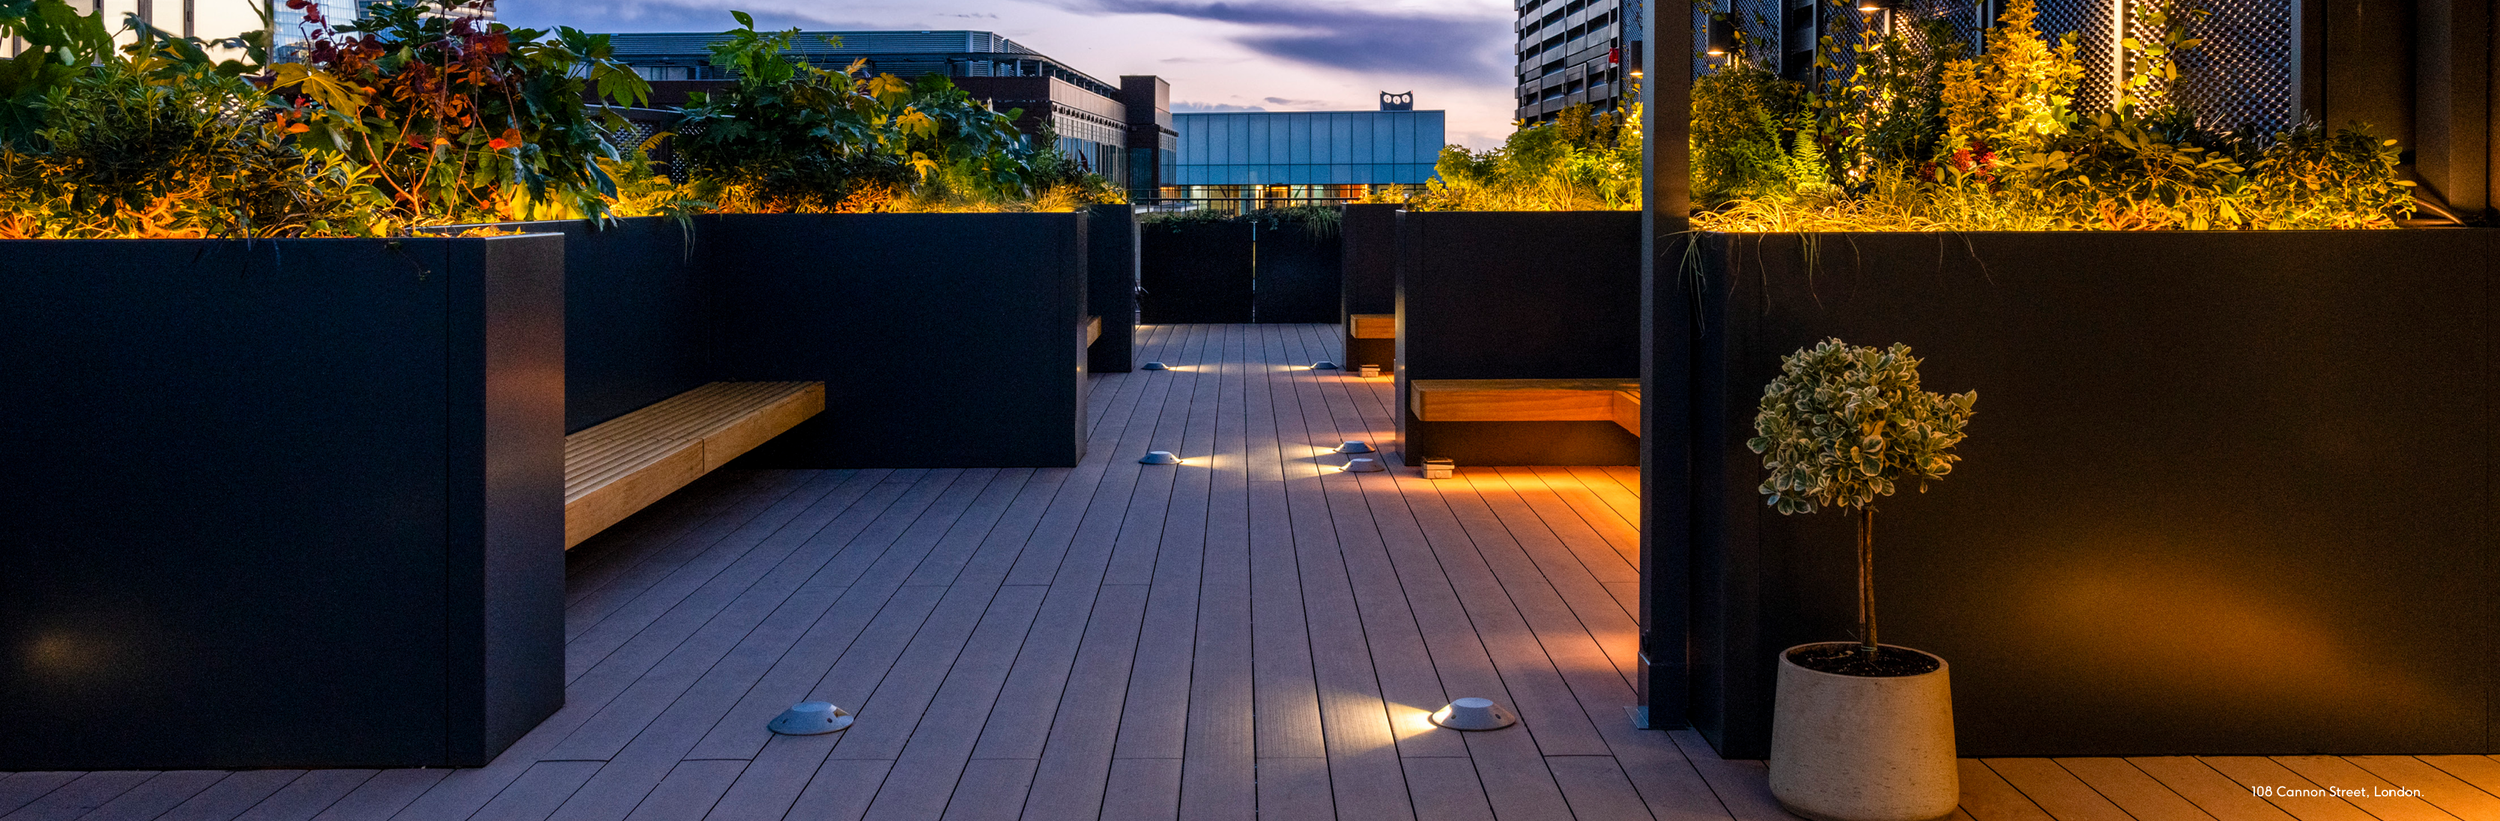
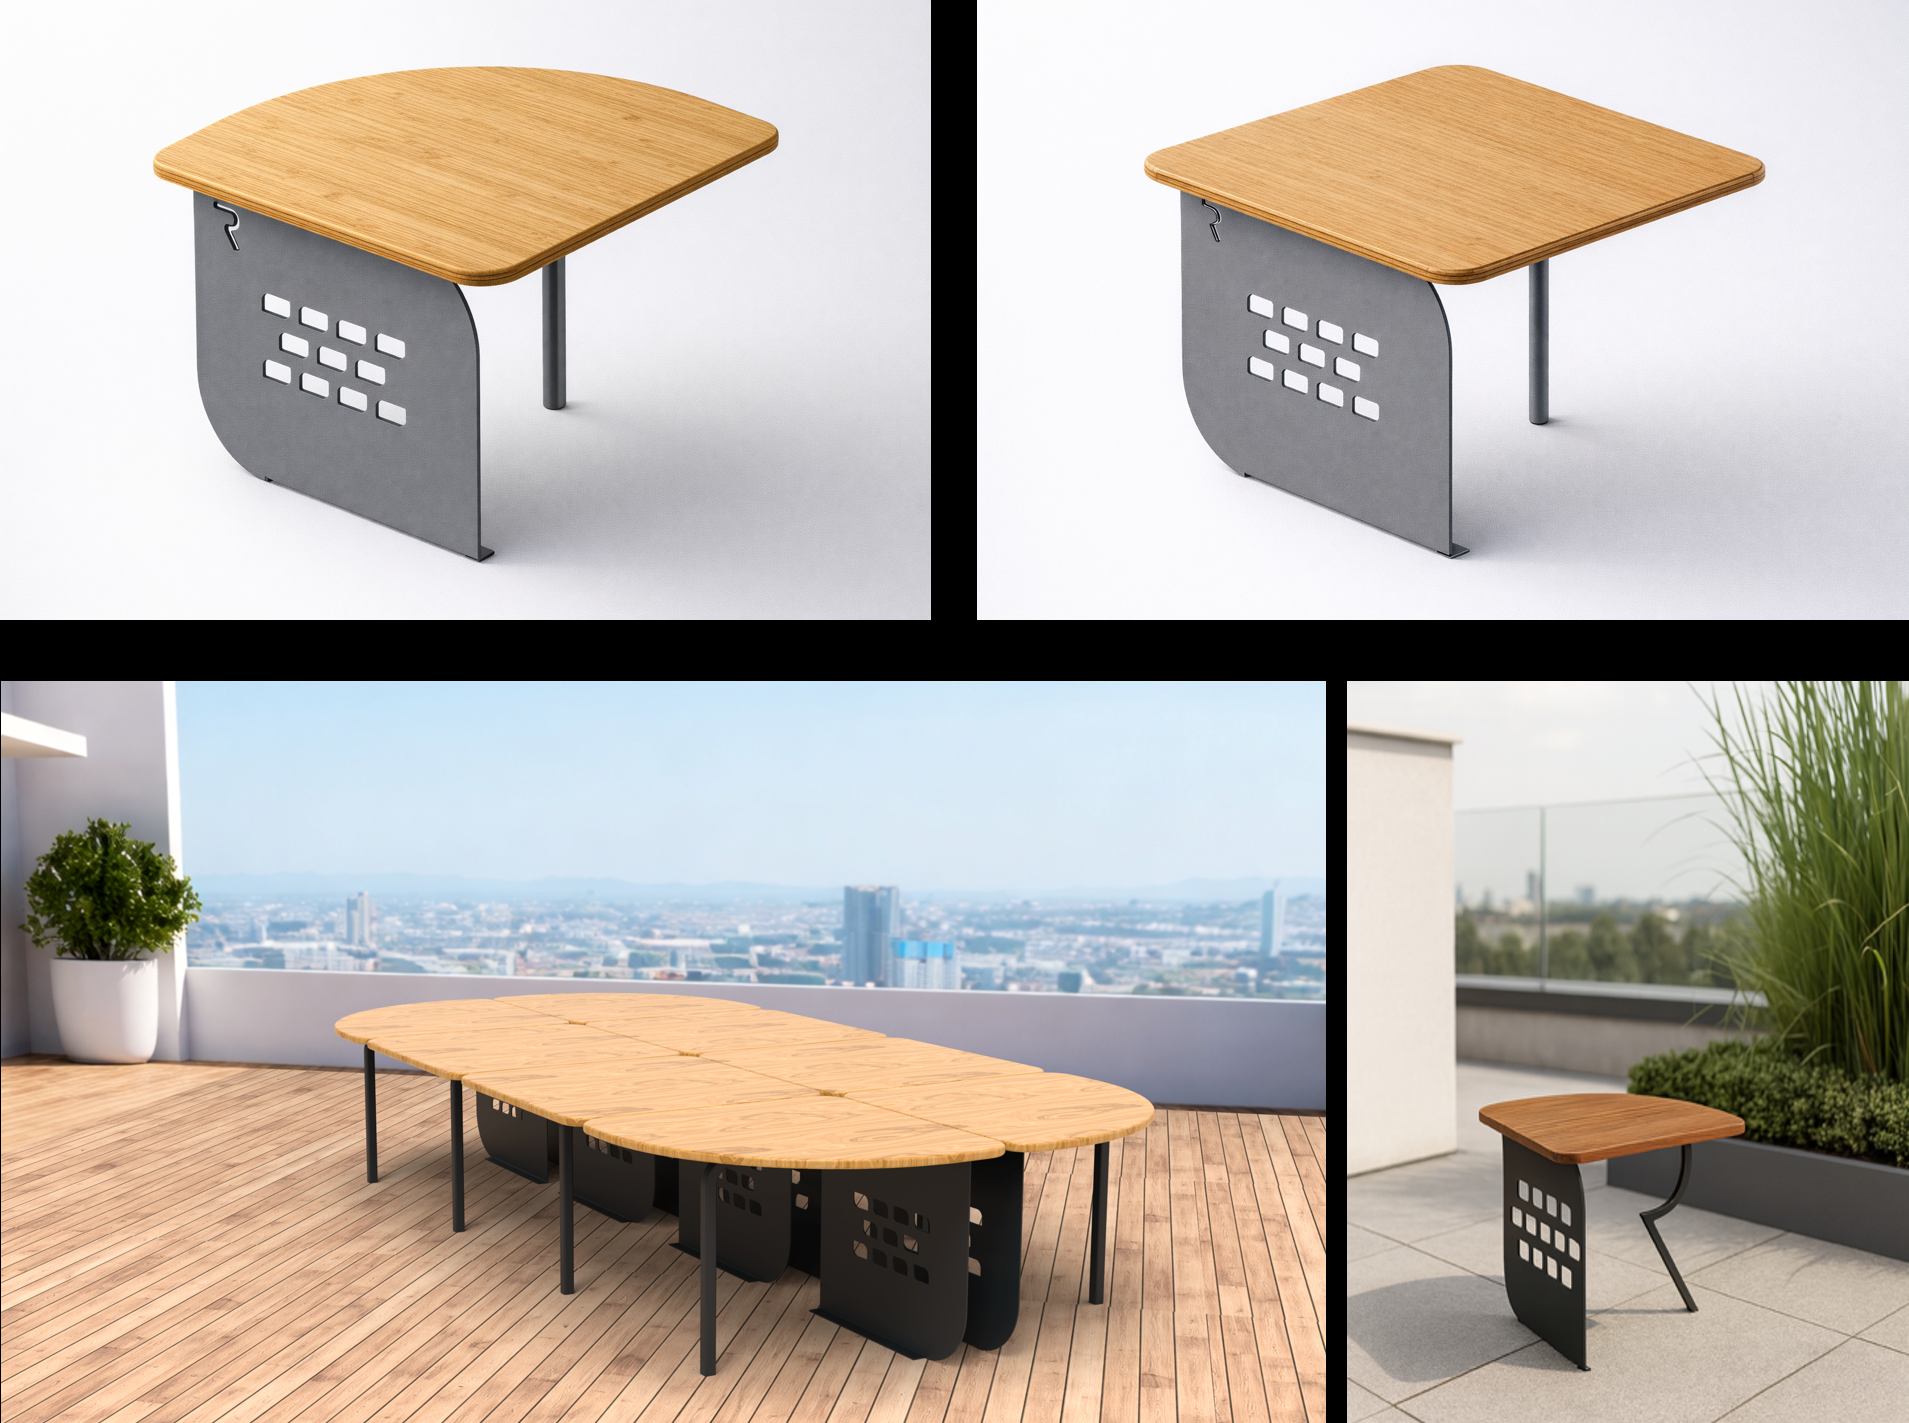
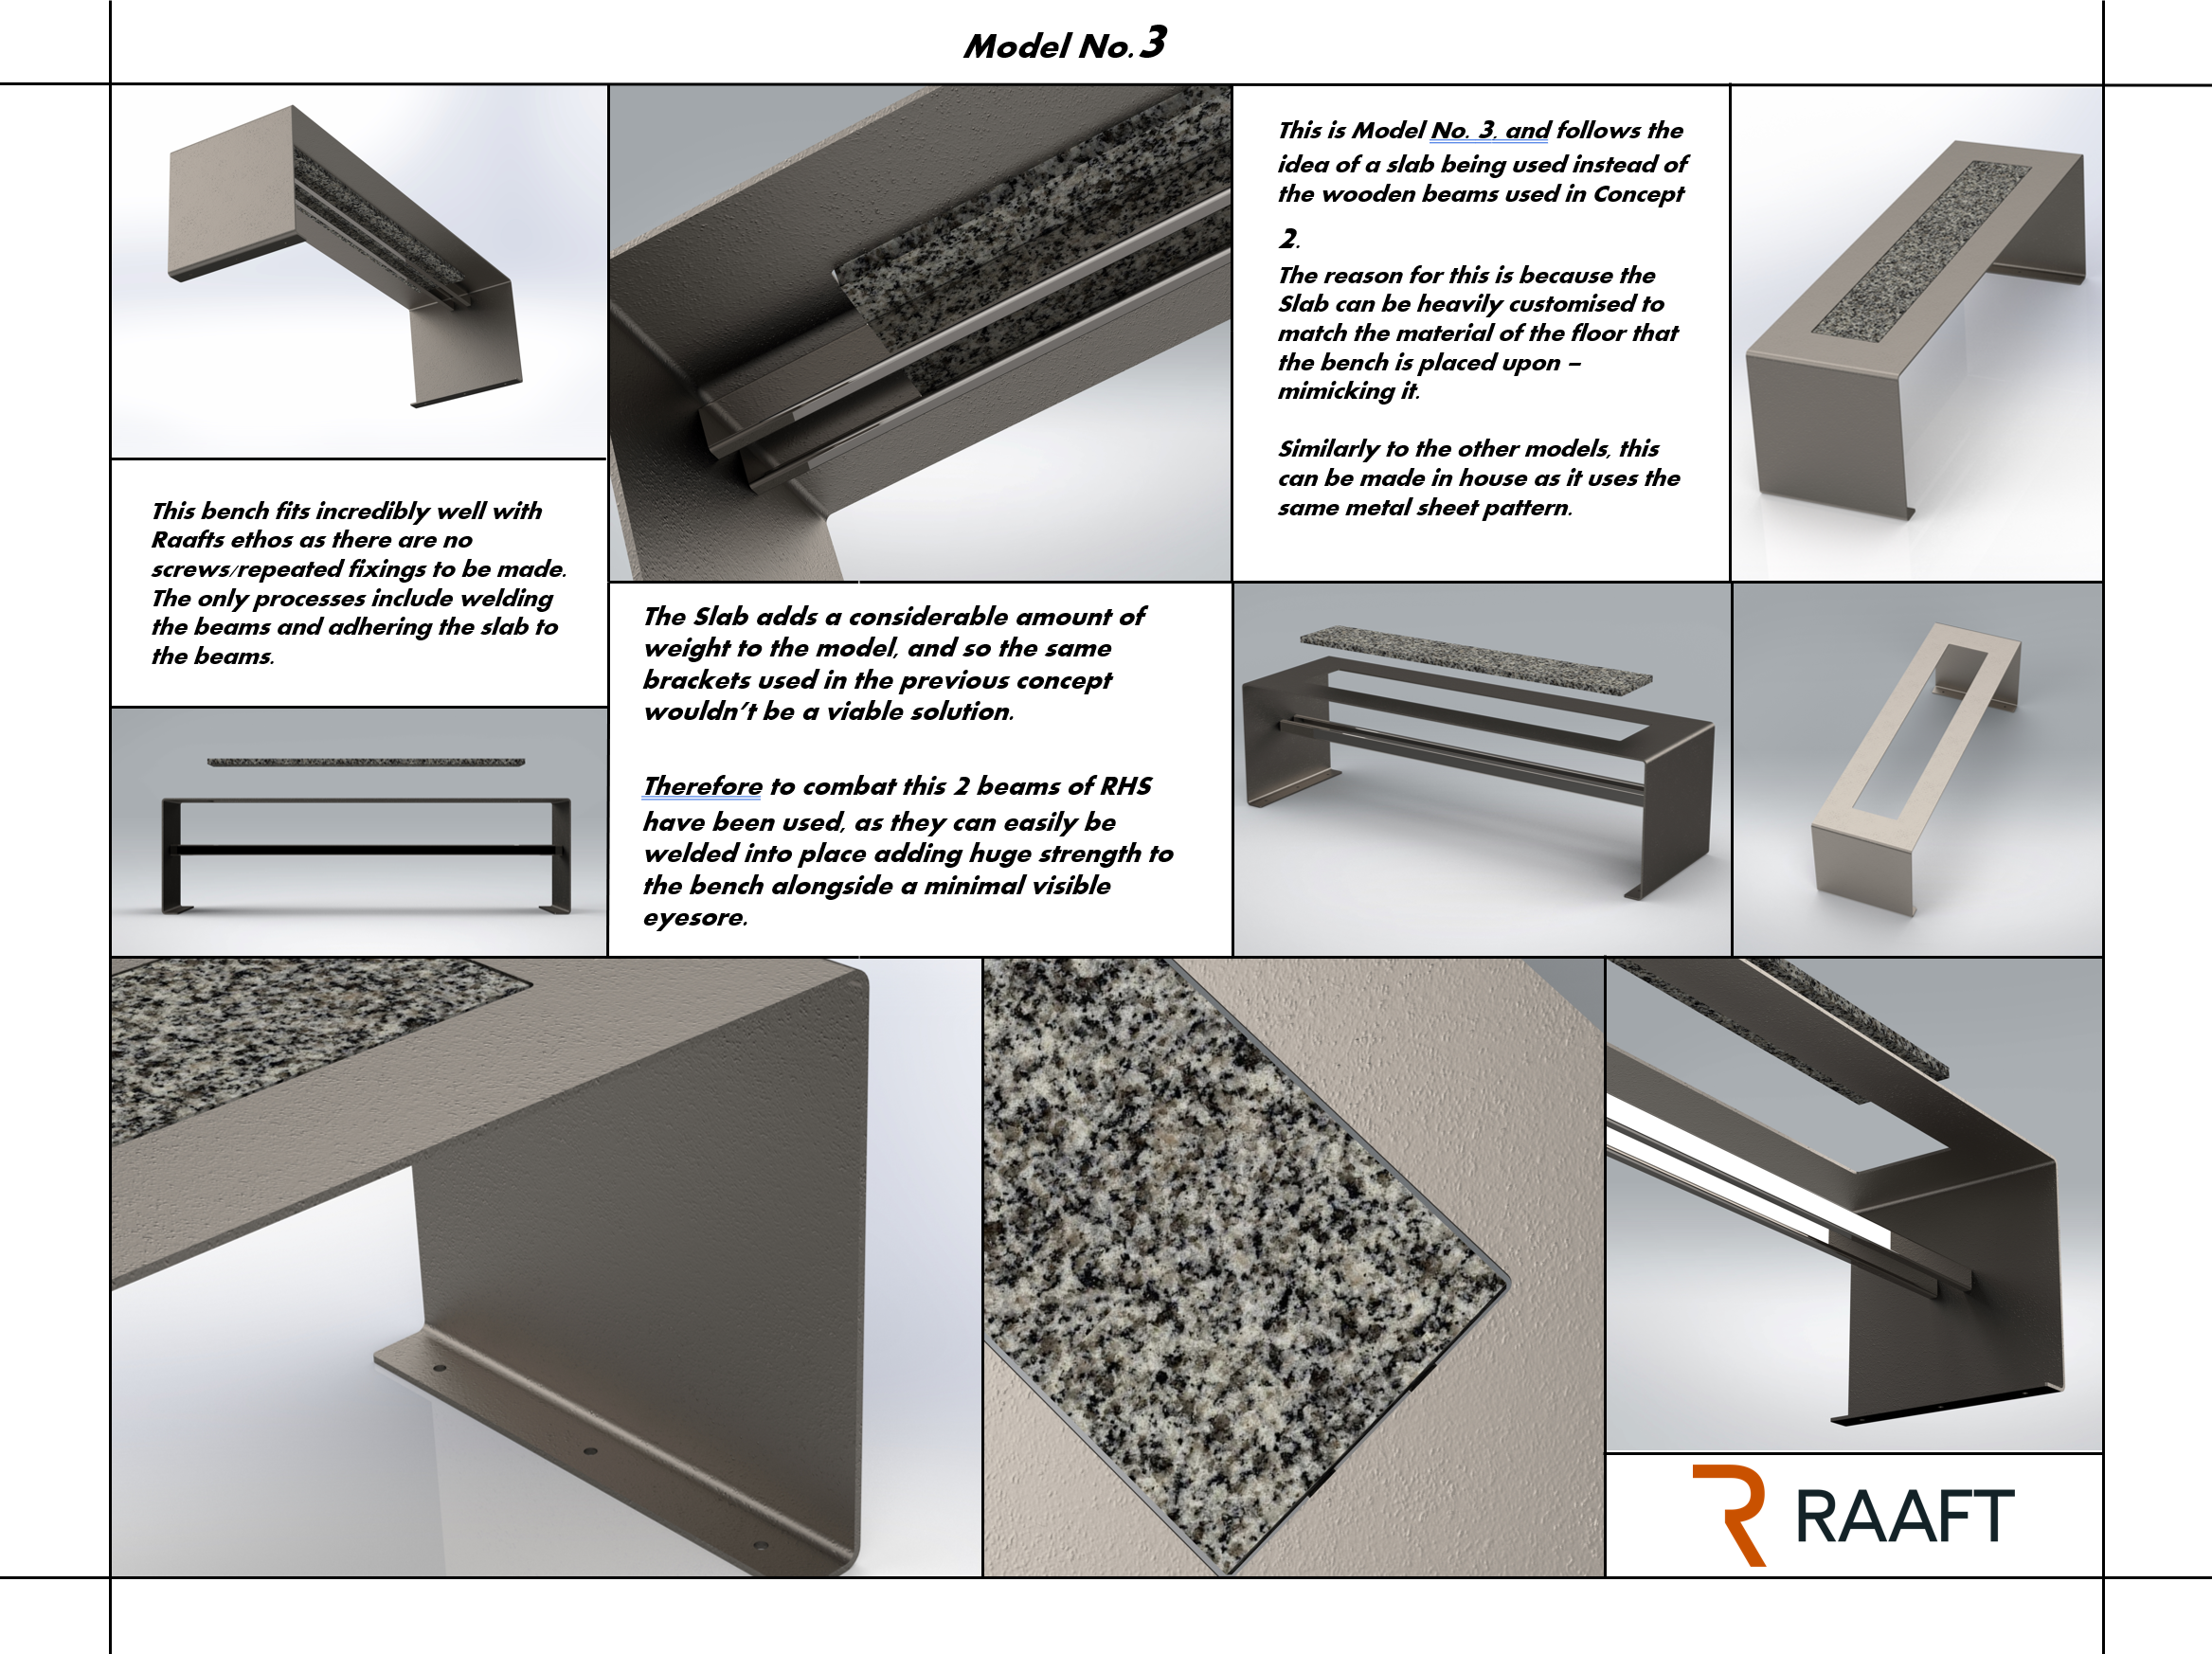
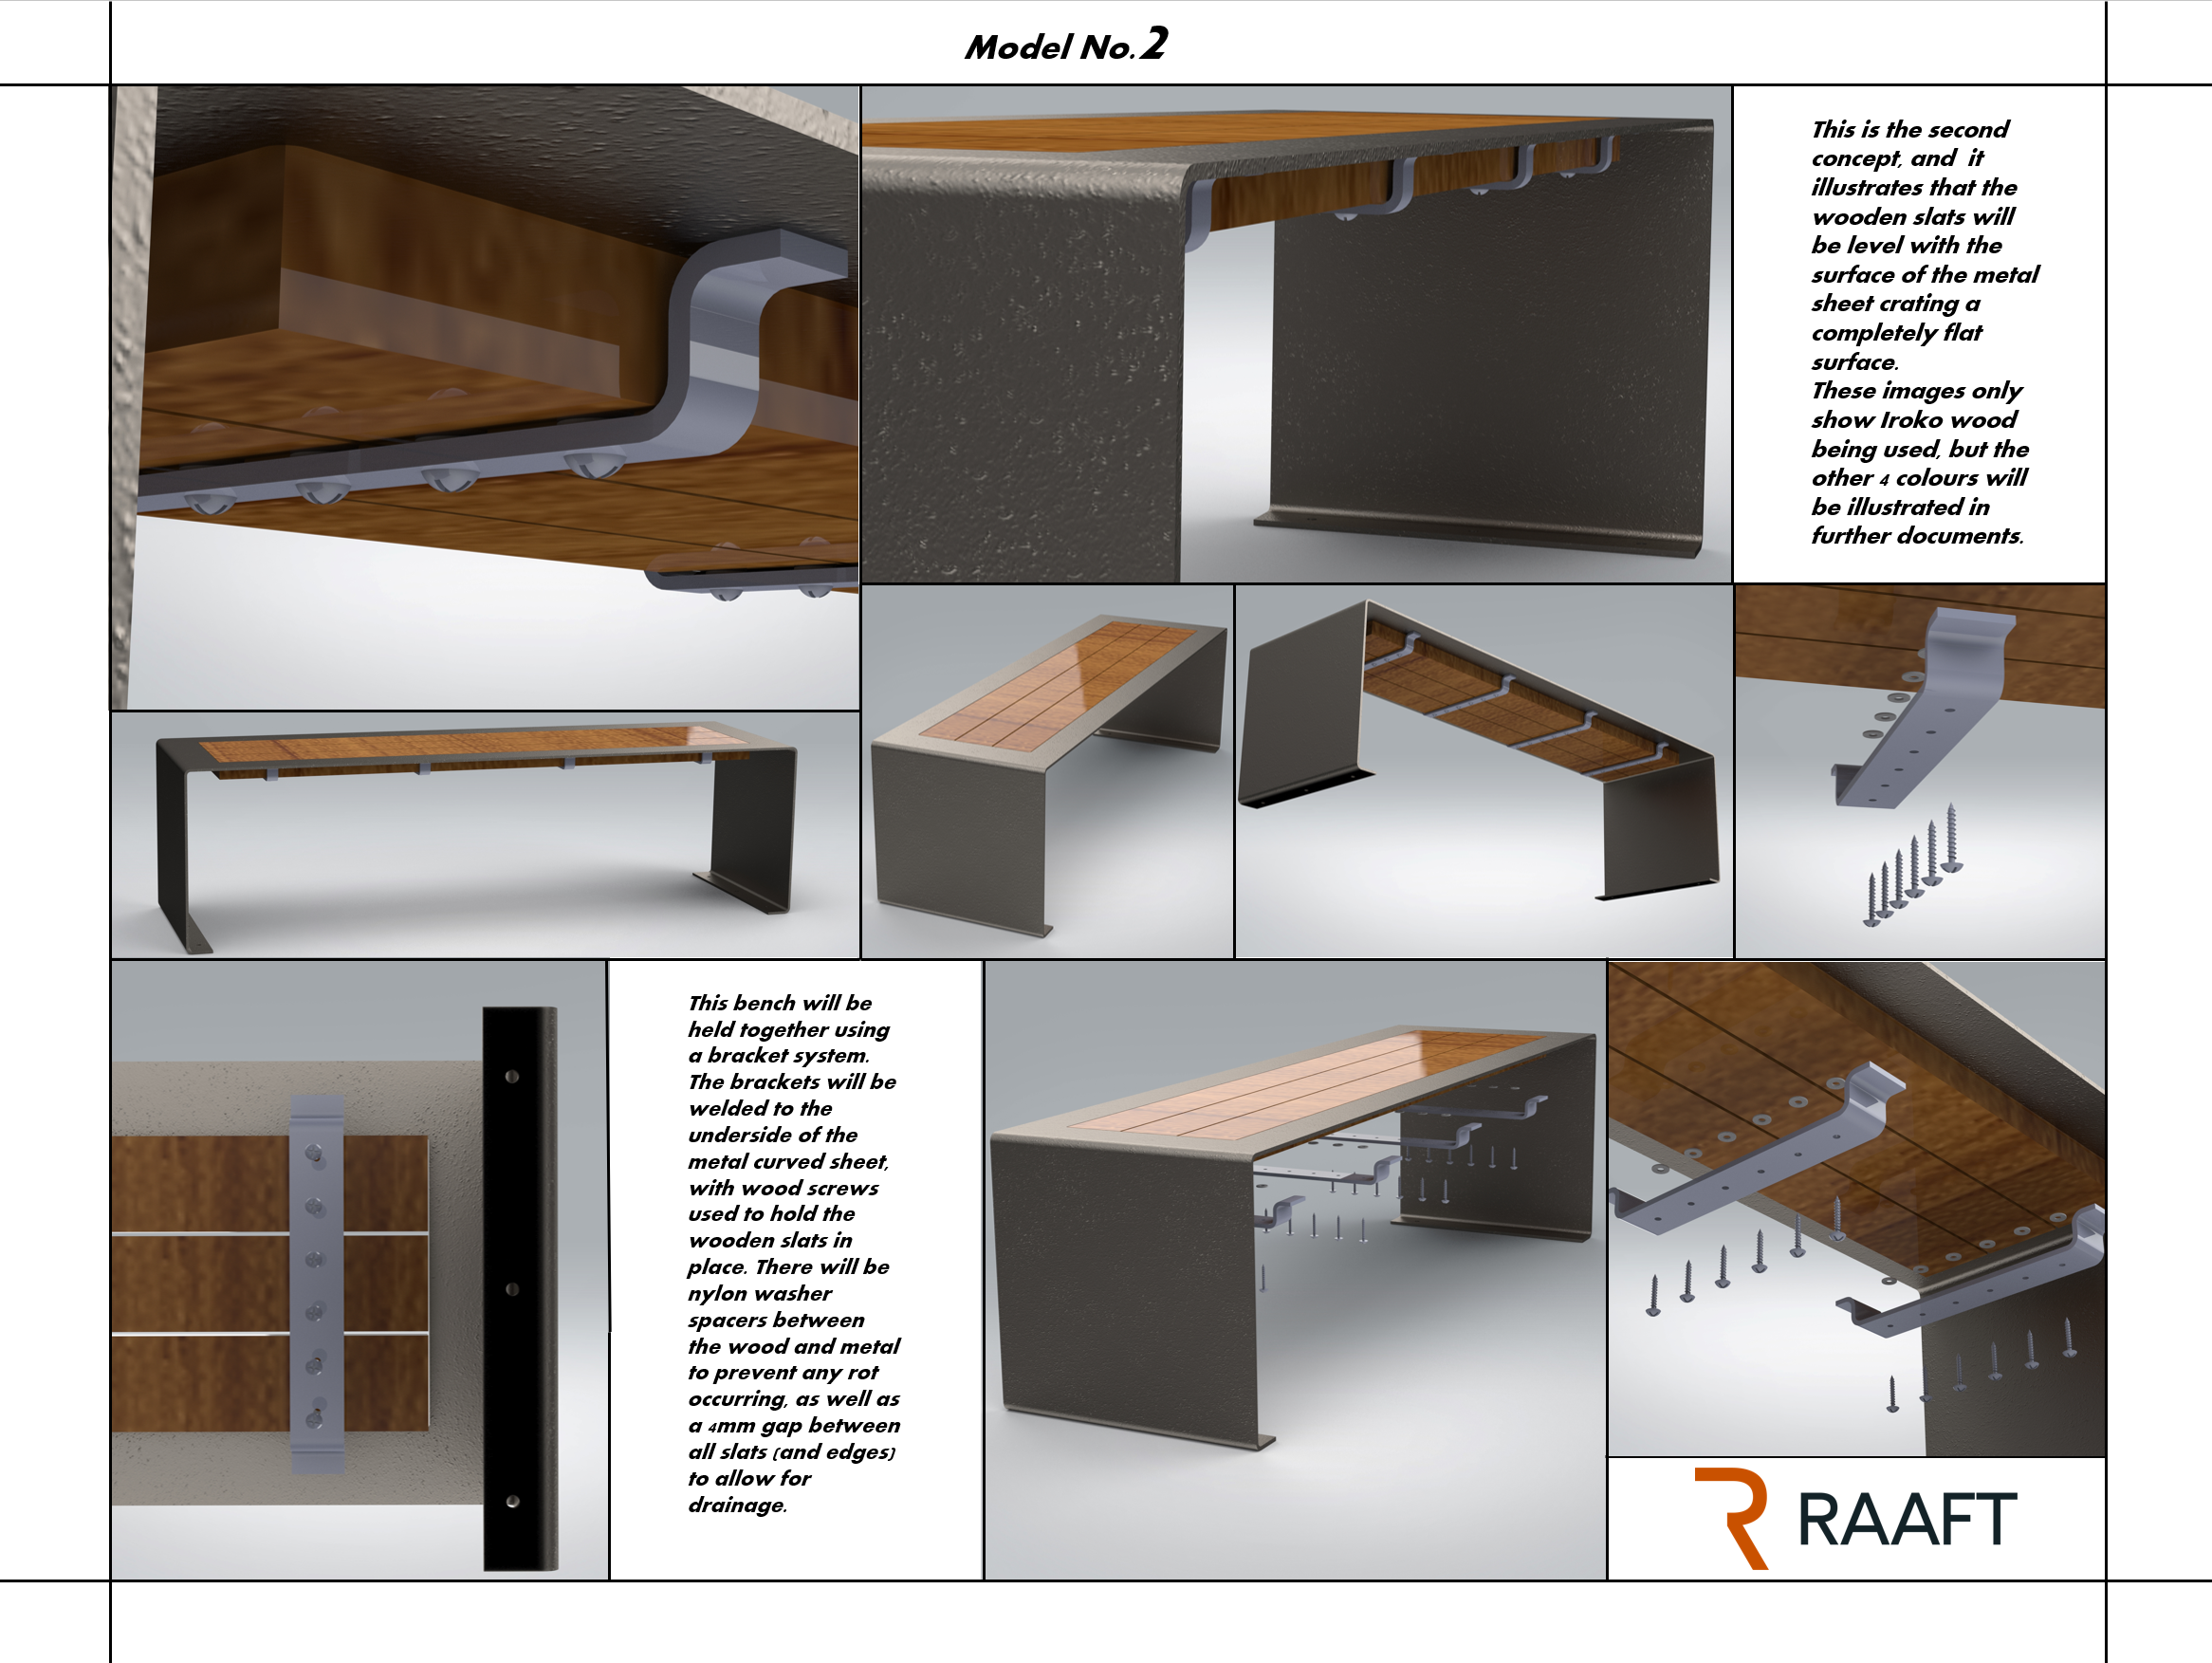
4.1. Bench Range
Concept Iteration and Development
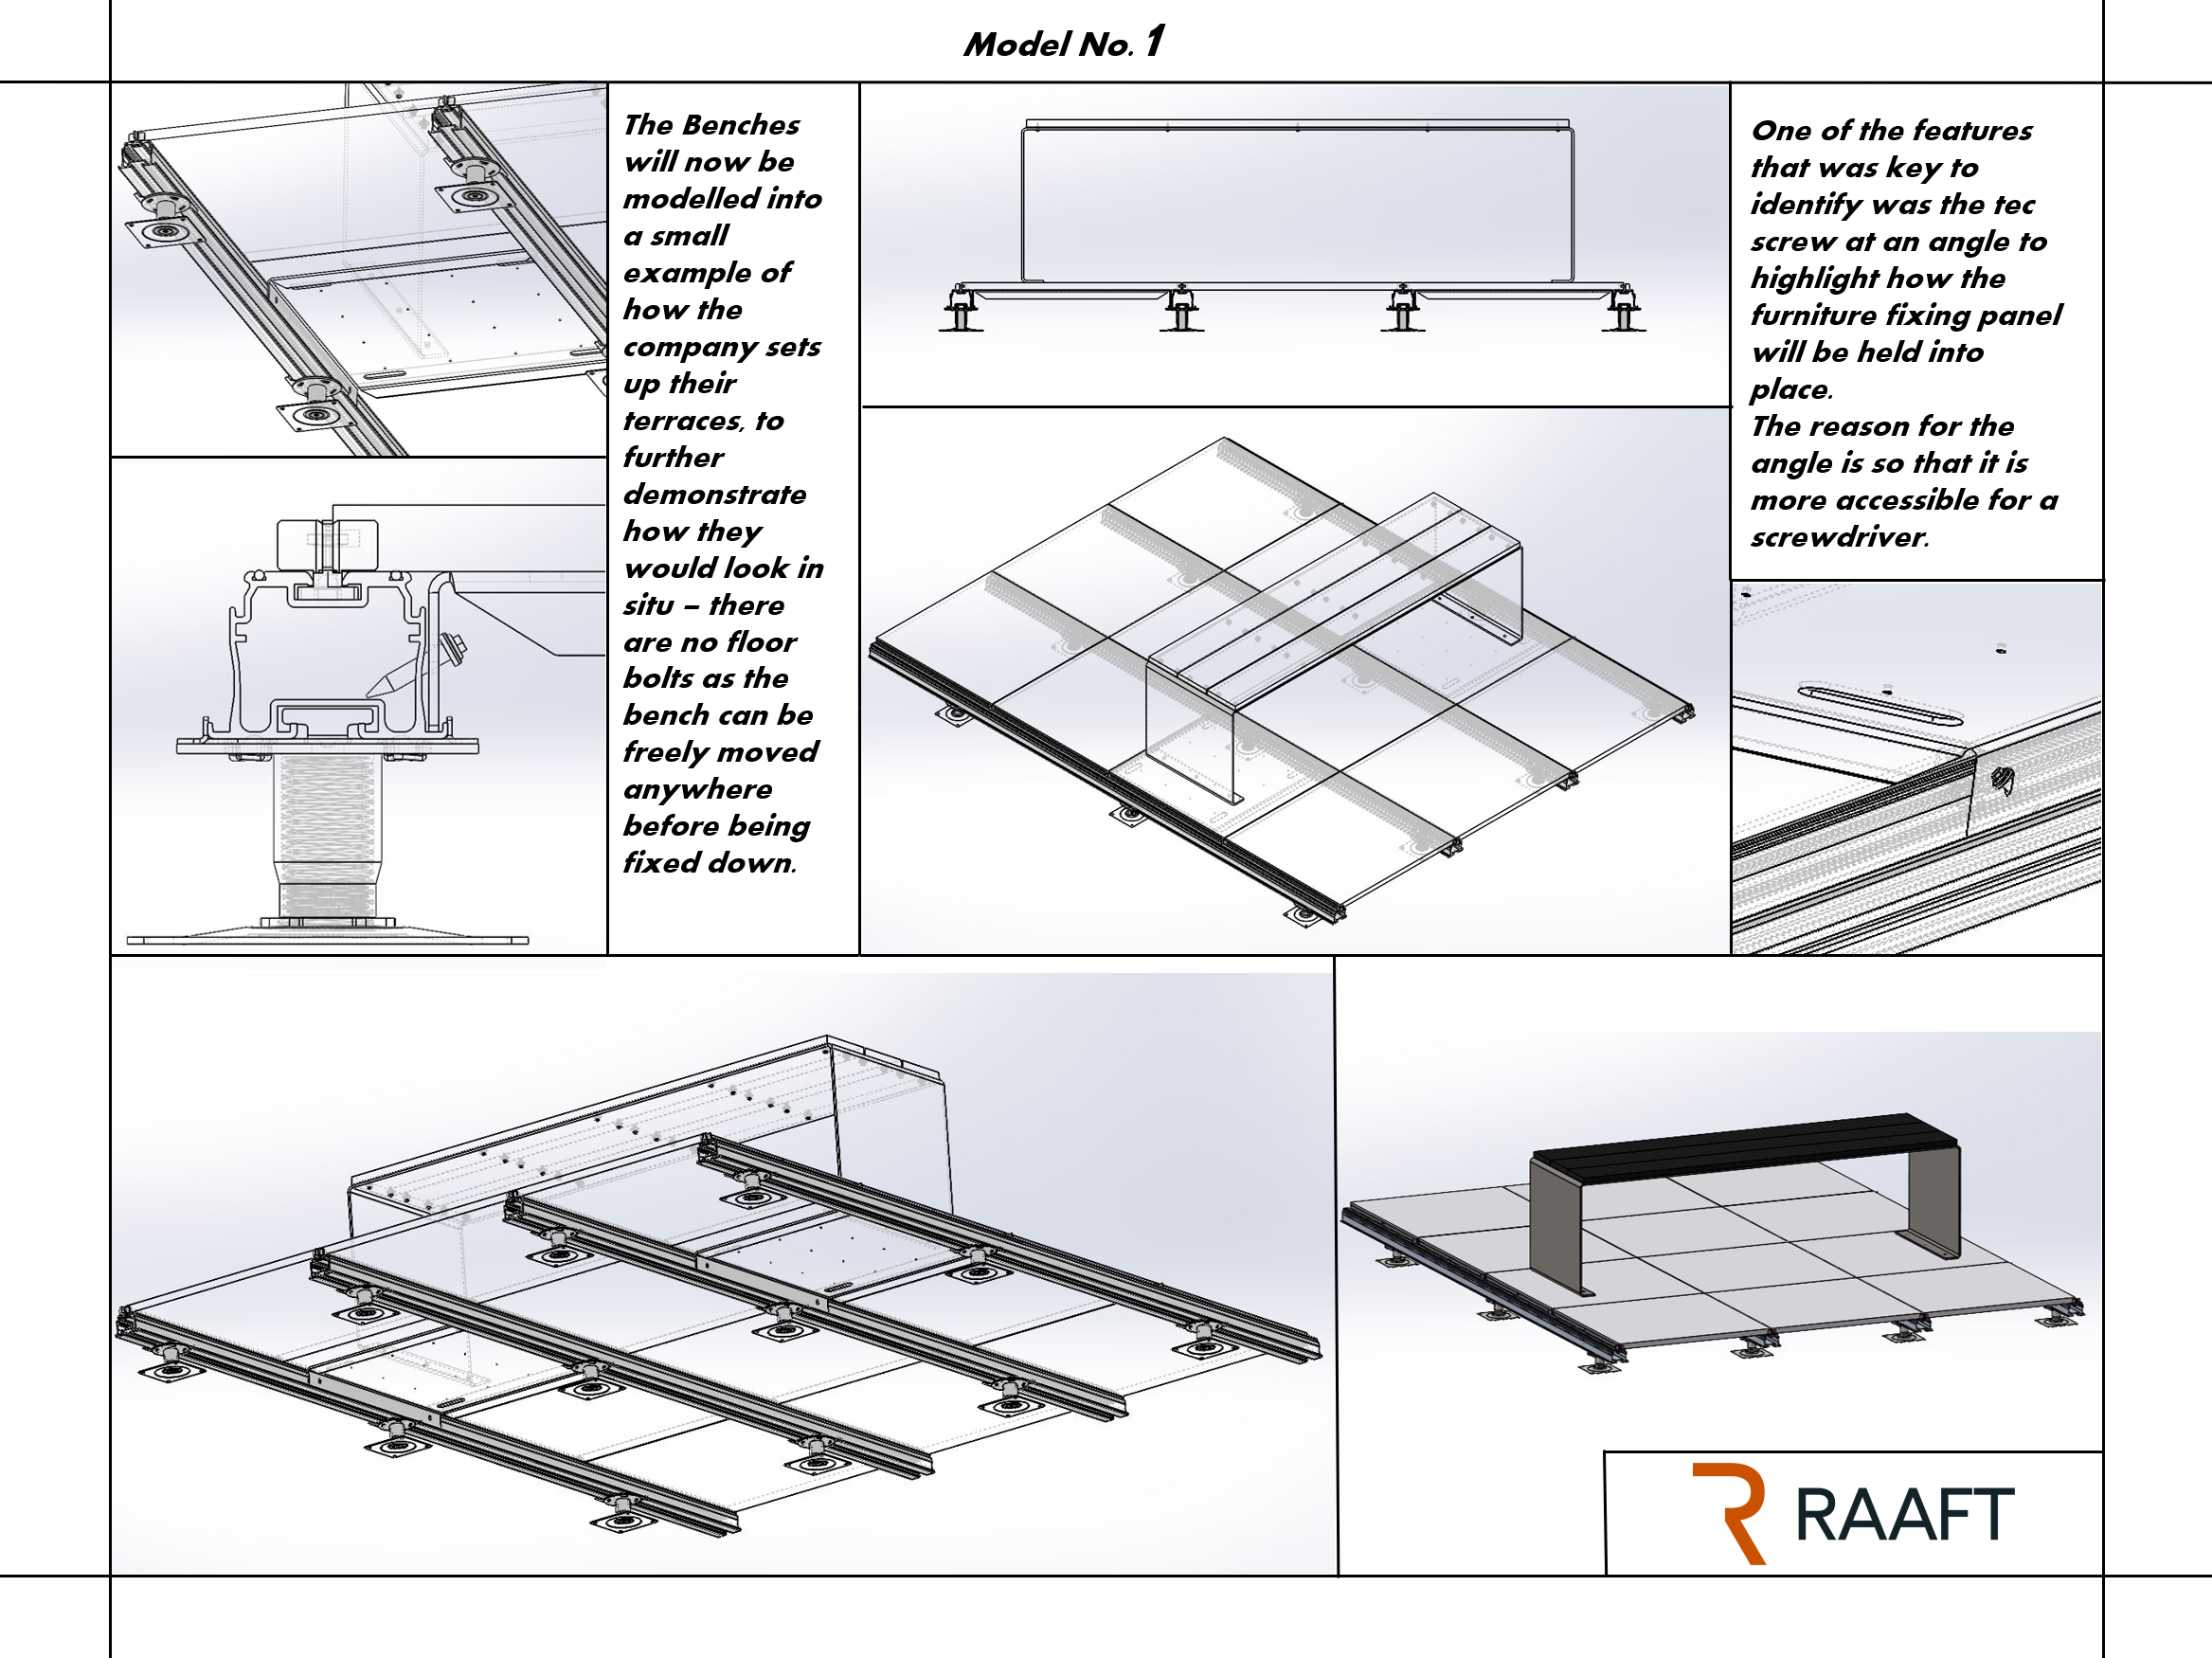
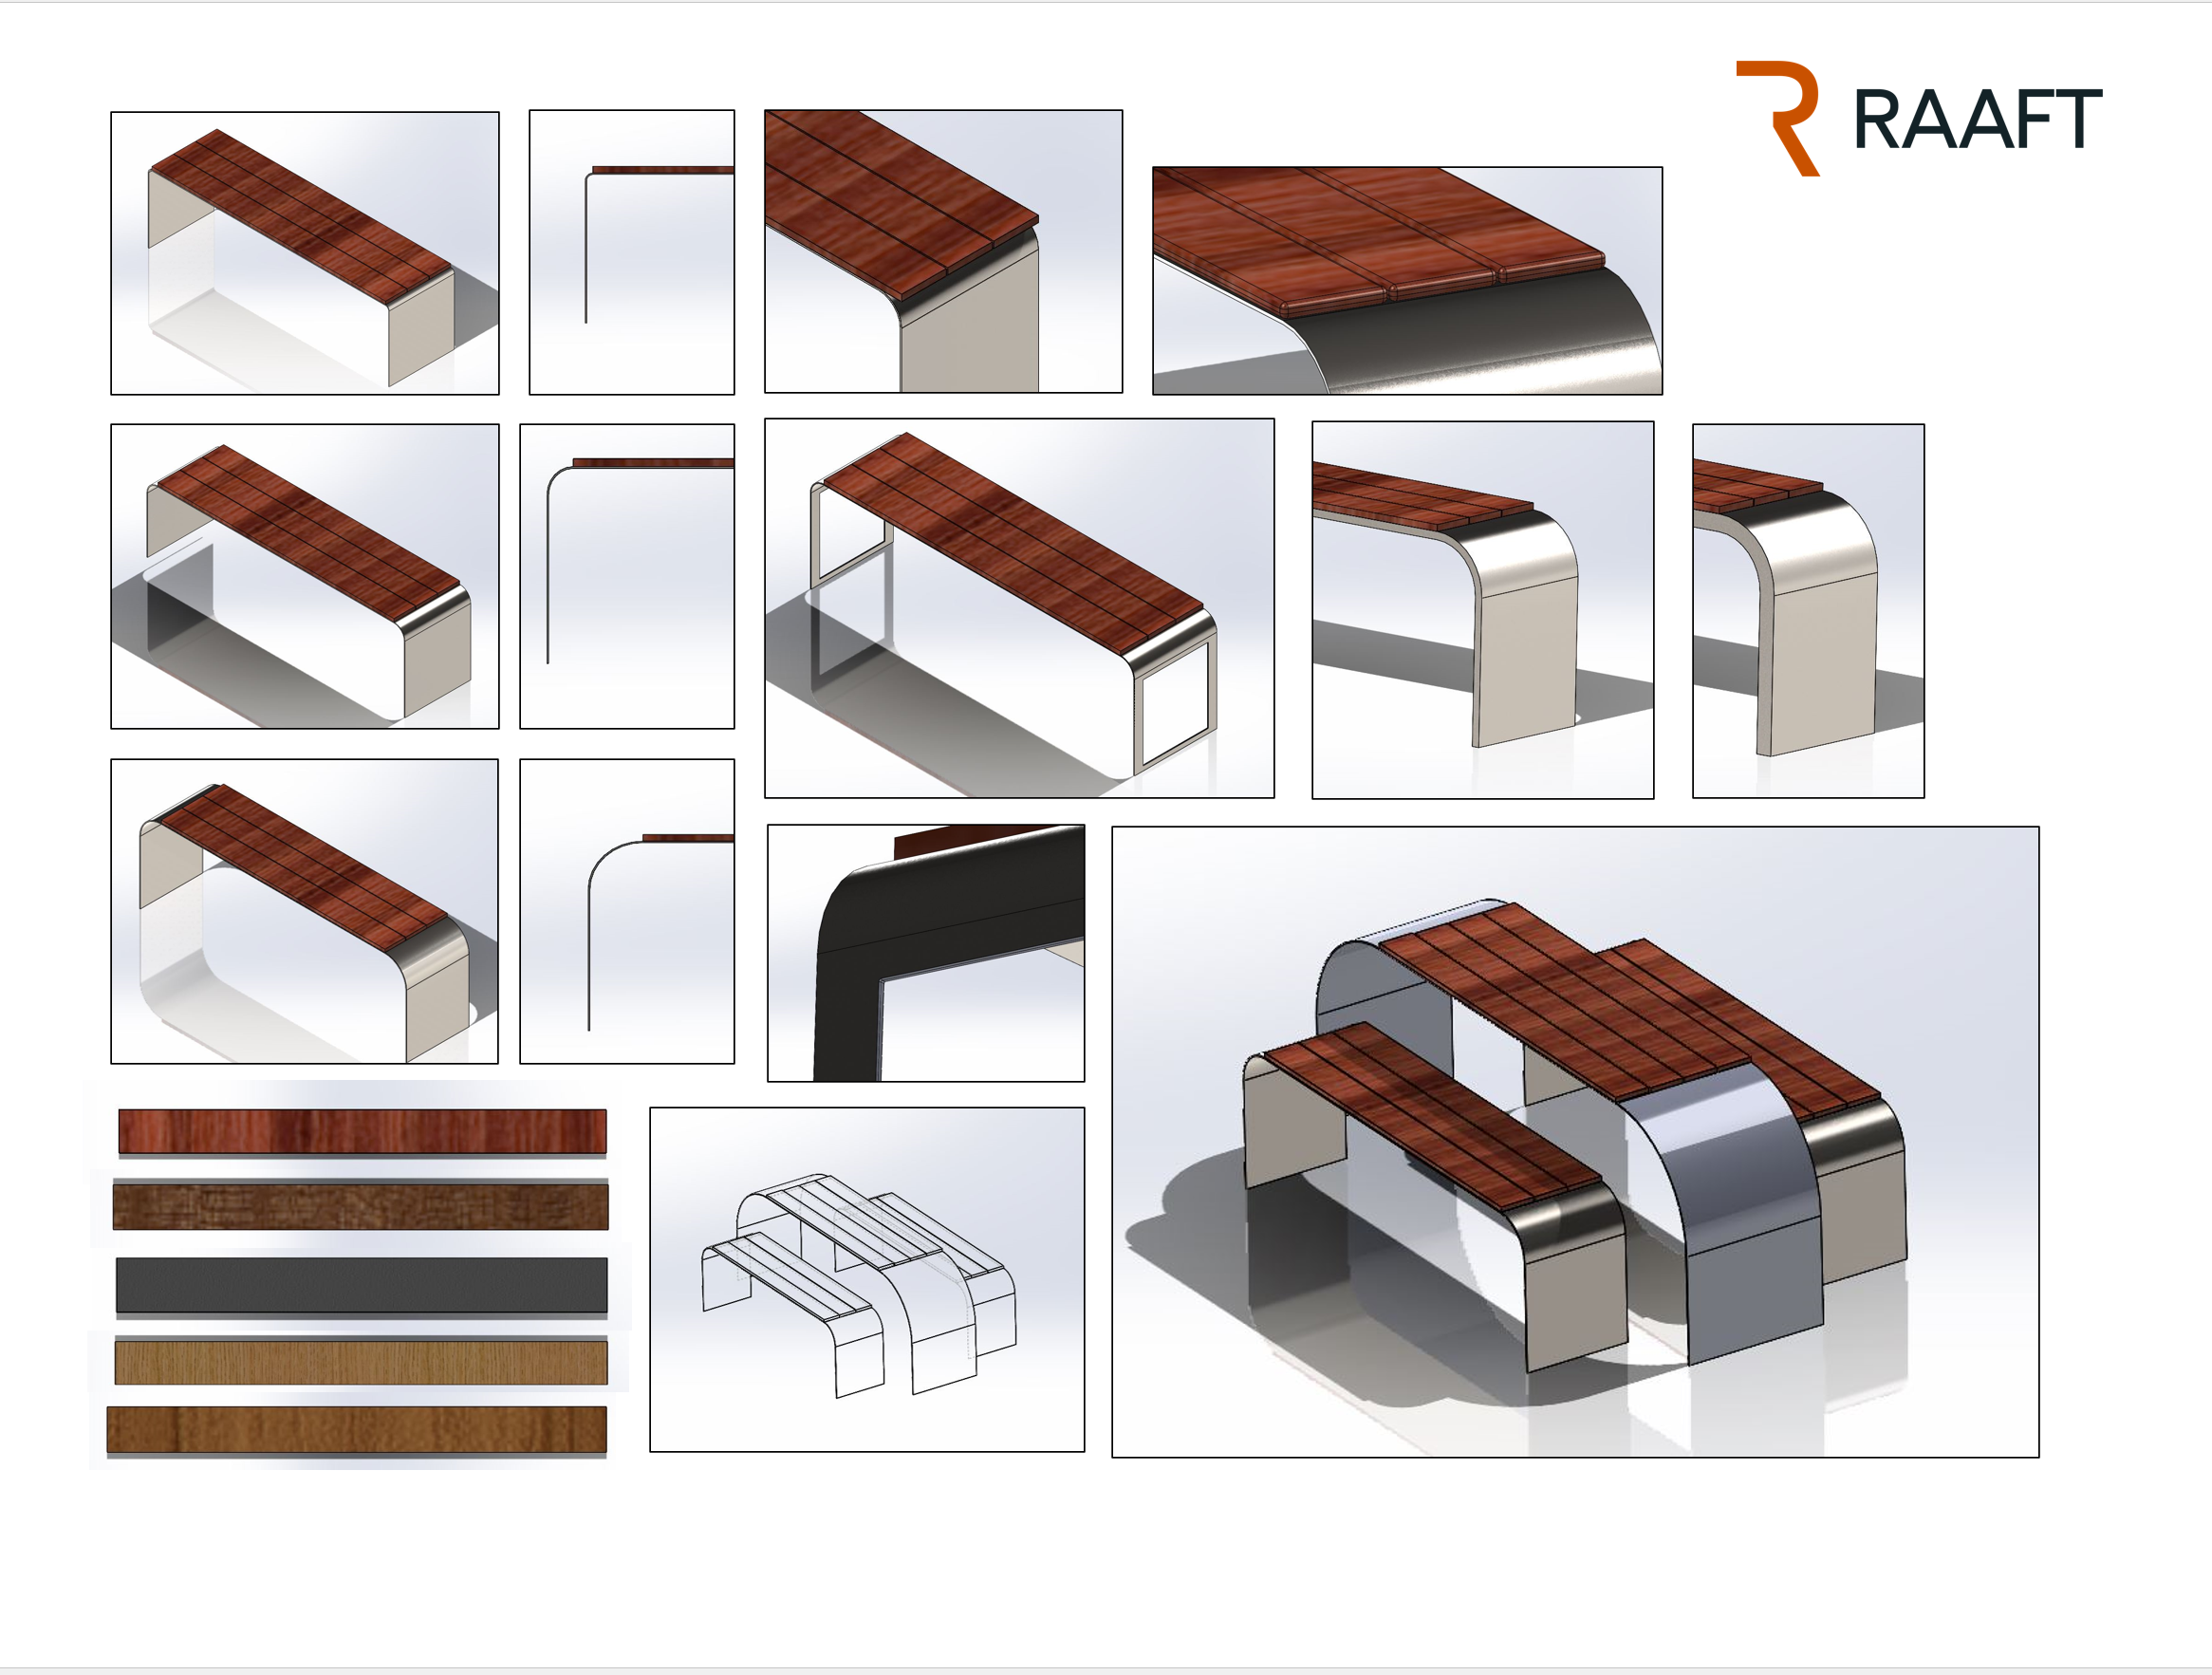
For this process, I heavily used CAD concepts to explore a range of possible shapes and ideas. This also included looking at a wide range of materials, such as various timbers and natural stones. Visuals for how the product would be assembled and attached to the system are also shown.
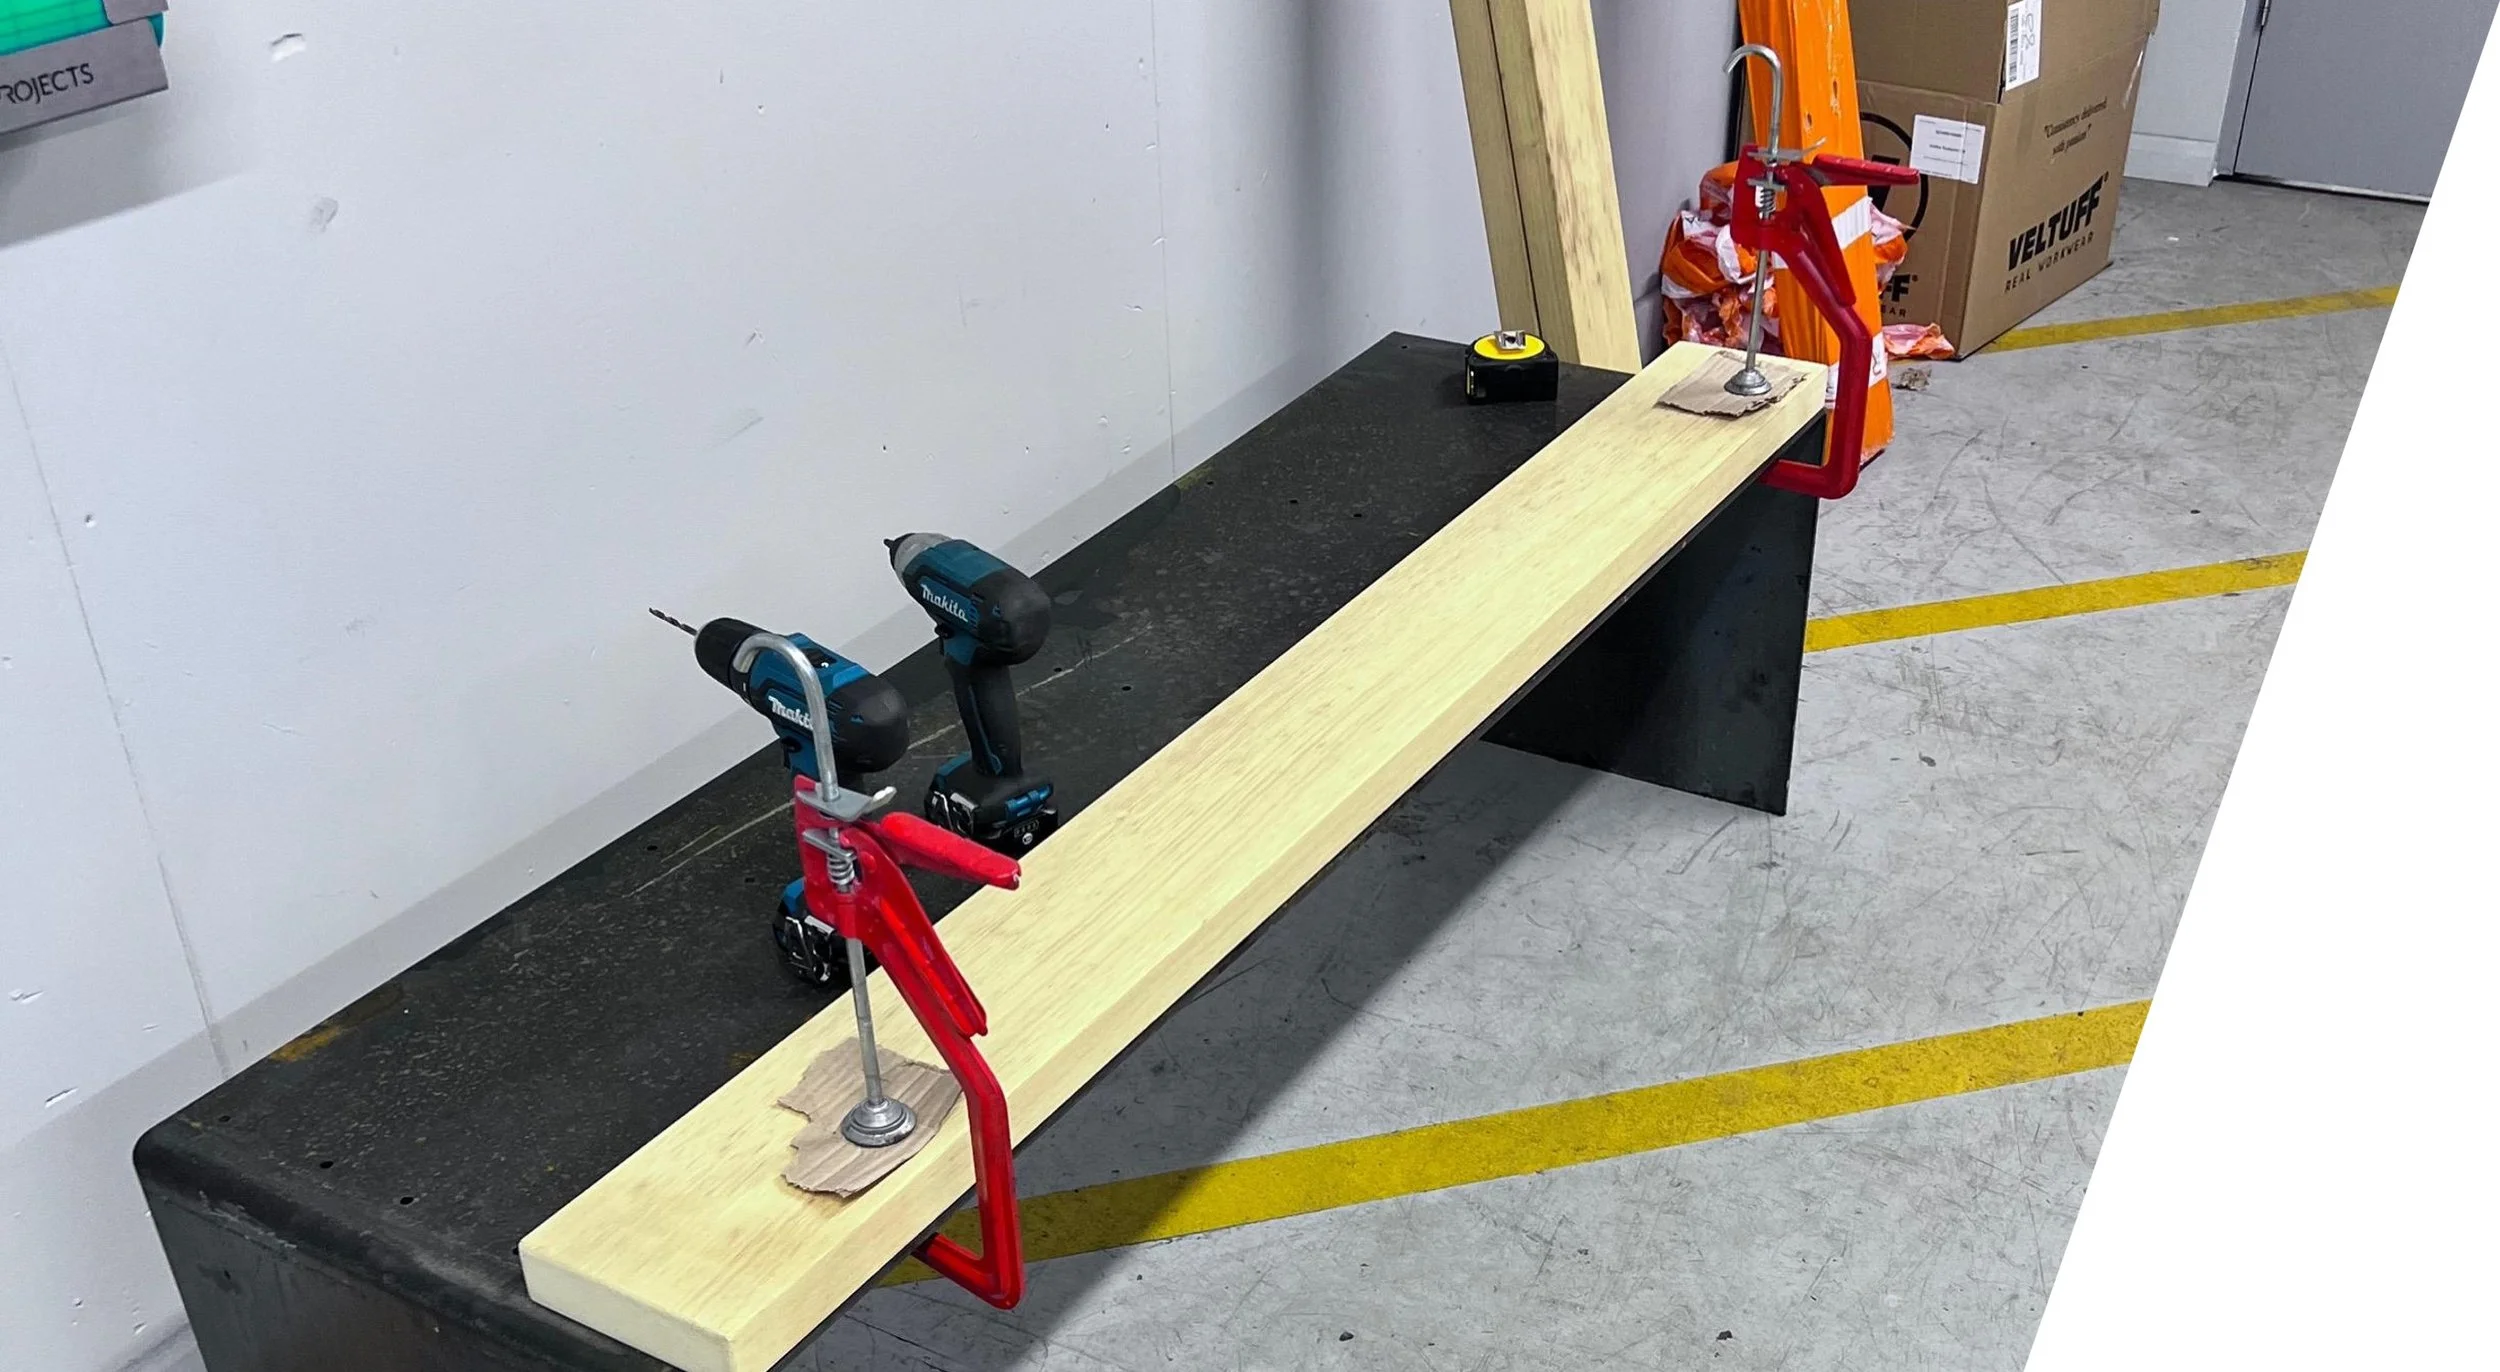
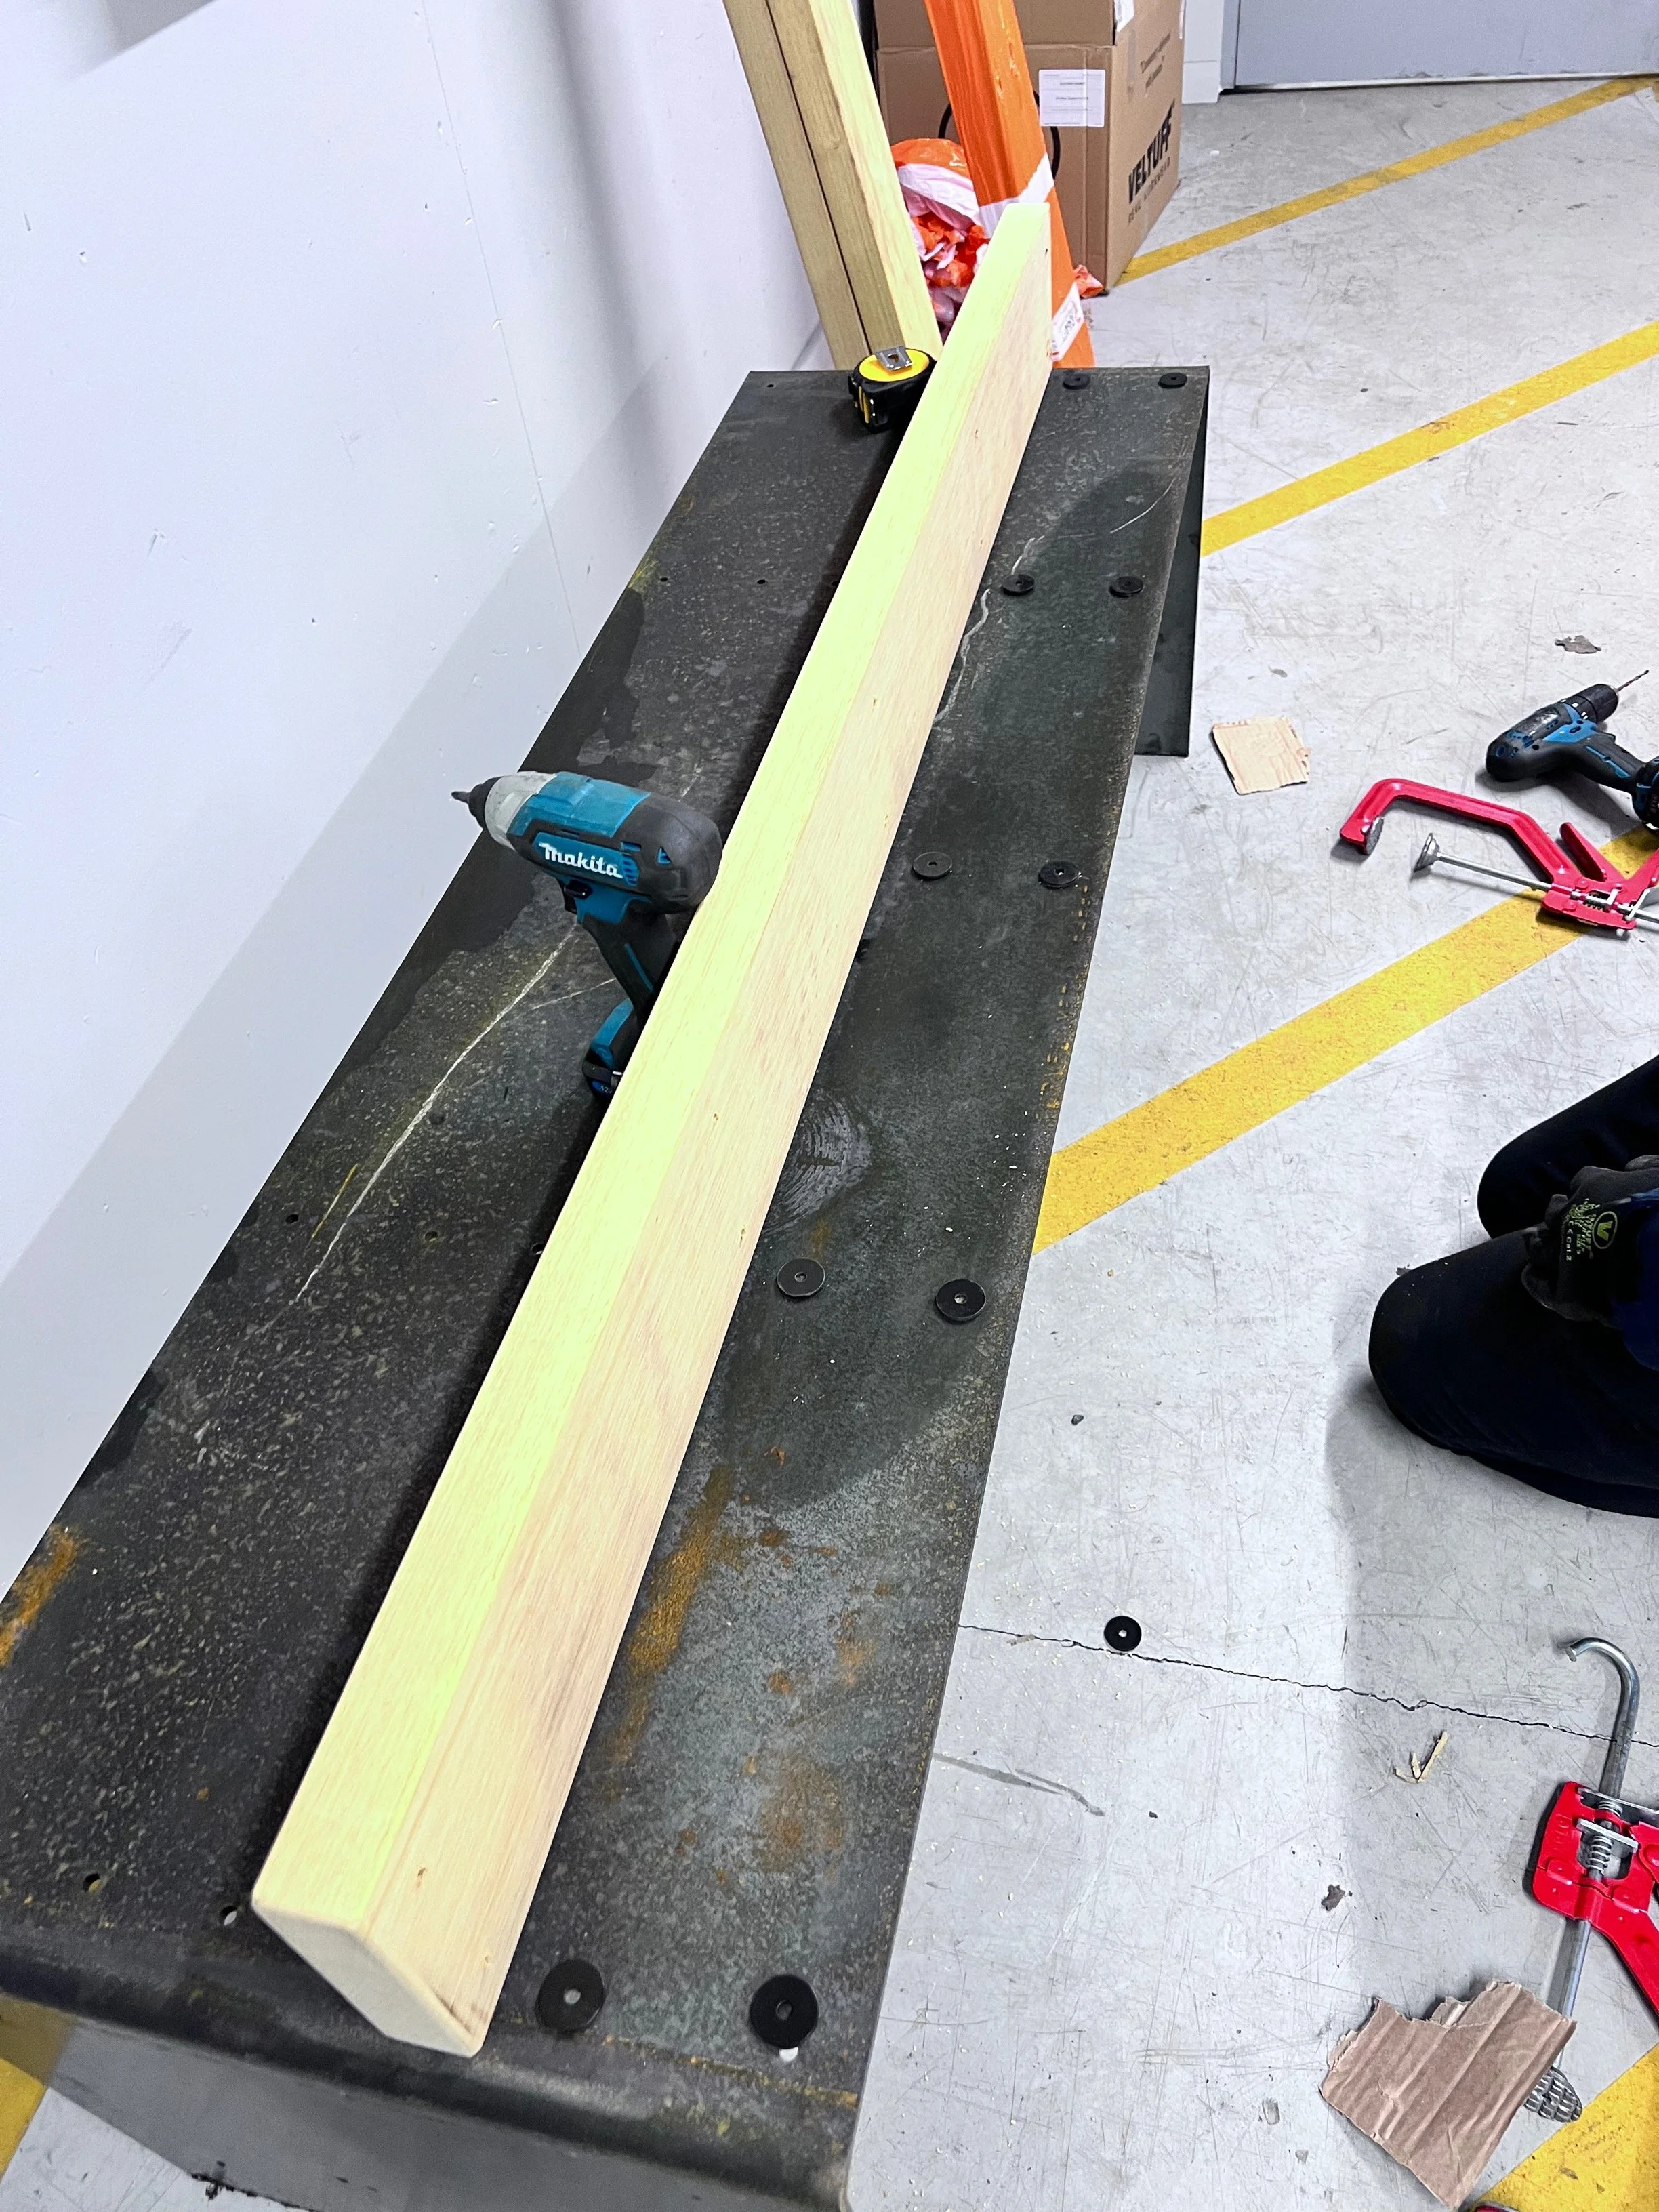
Prototyping and Rendering
To understand further, I decided to build a prototype of the bench, which allowed for further understanding of strength, material selection (thickness, stability, etc), and assembly.
Once key dimensions, thickness of material, and final design were established, I was able to render the bench, alongside a table and stools.
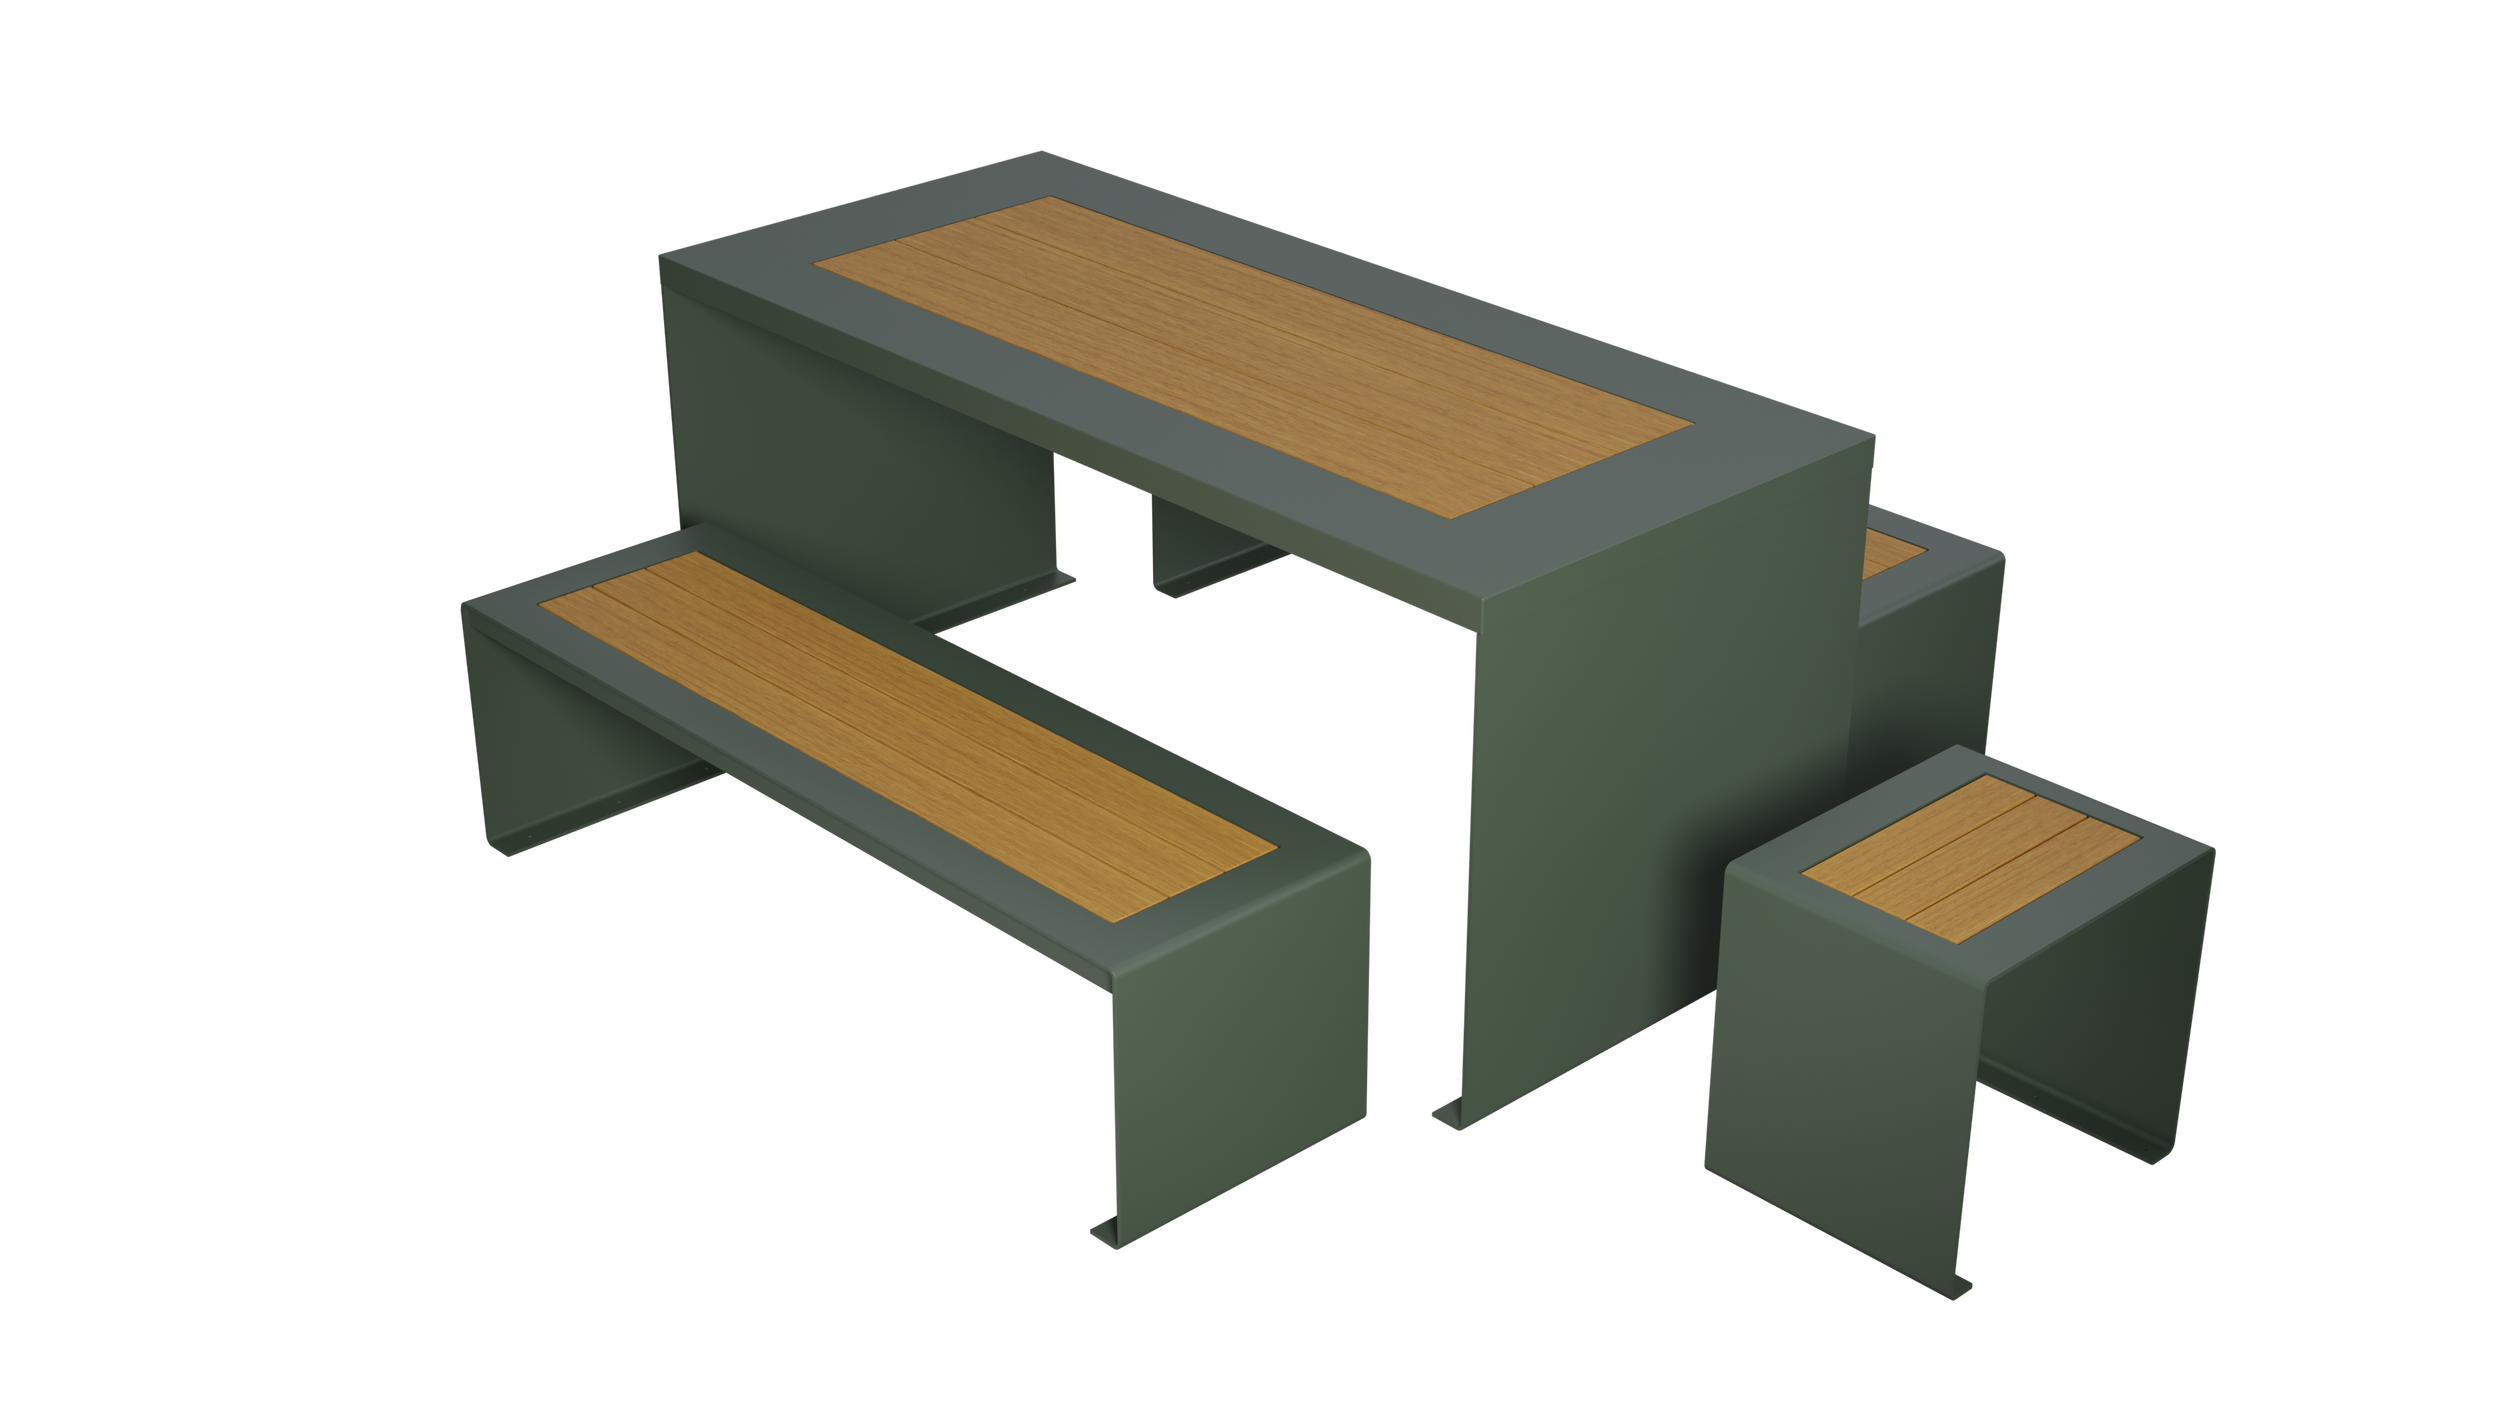
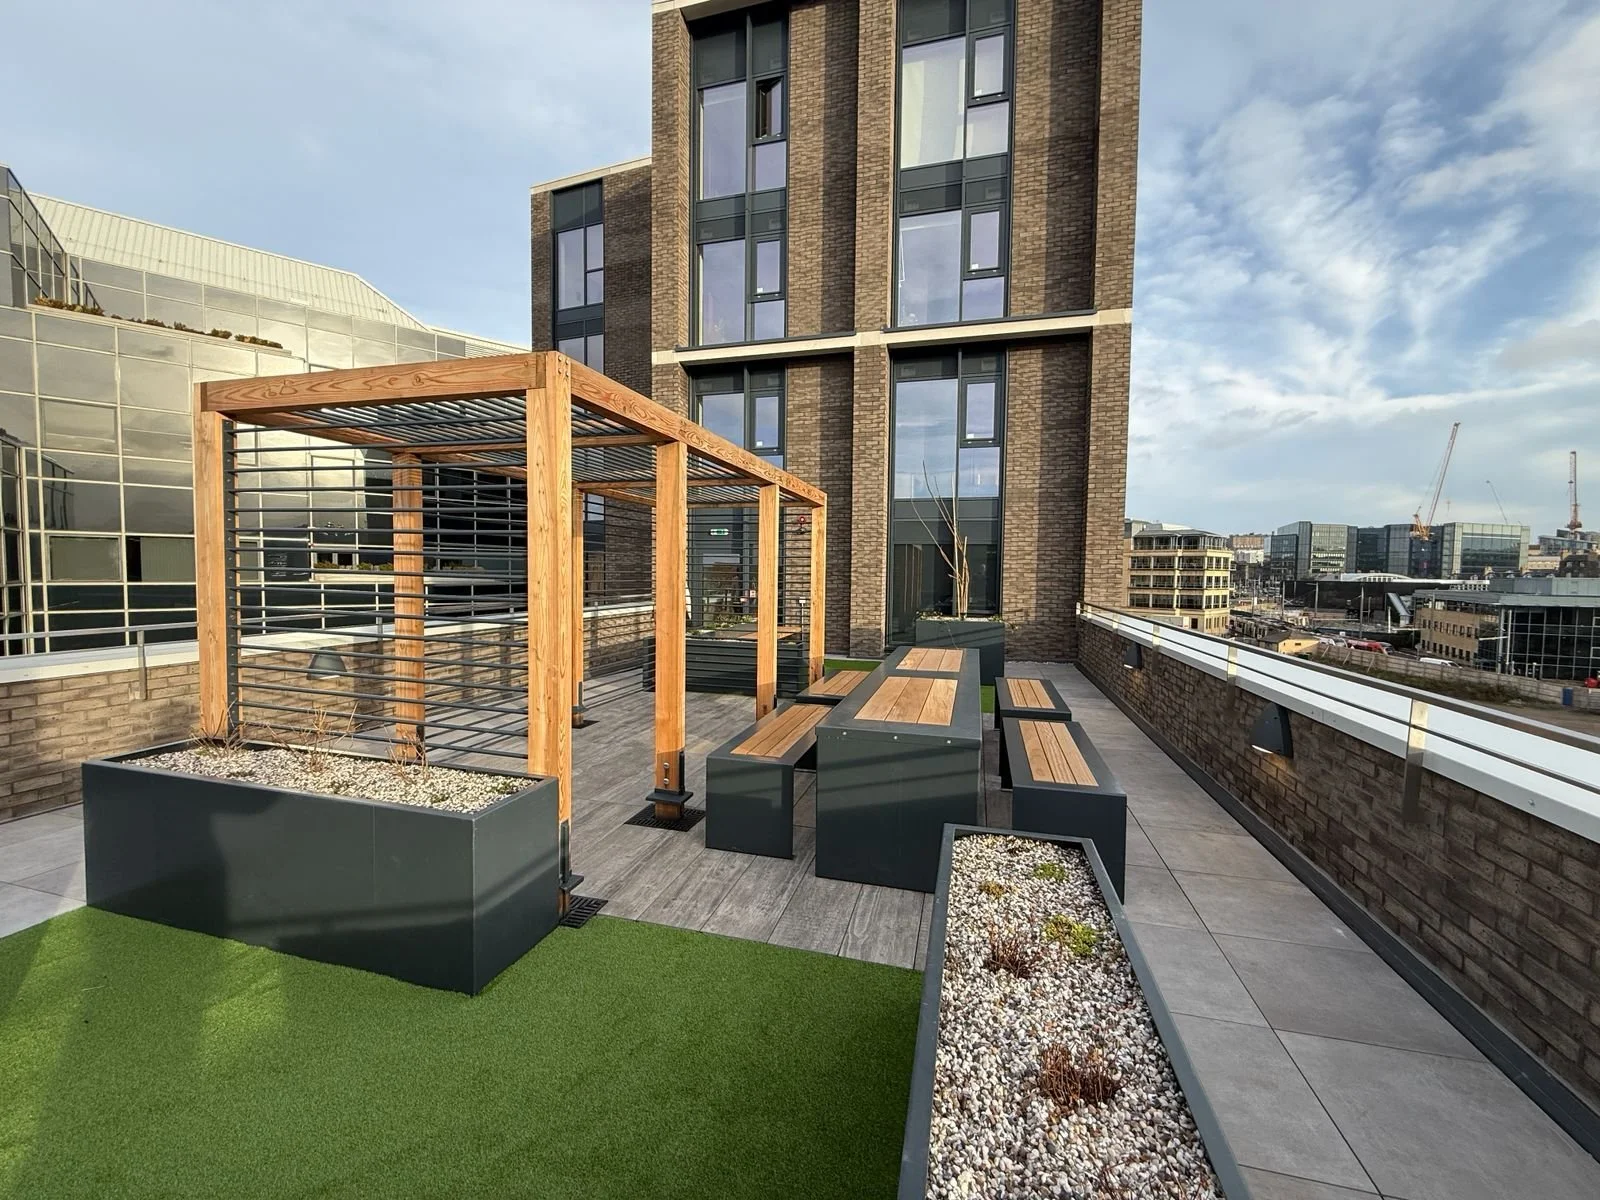
Manufacture and Installation.
The Products were designed to be made as cost-effectively as possible. This meant using as much on-site manufacturing as possible (steel sheet bending and welding). The timber assembly and brackets would be done at the local timber supplier due to FSC compliance, and powder coating was carried out off-site.
The table has to be bolted together at the time of installation due to weight restrictions.
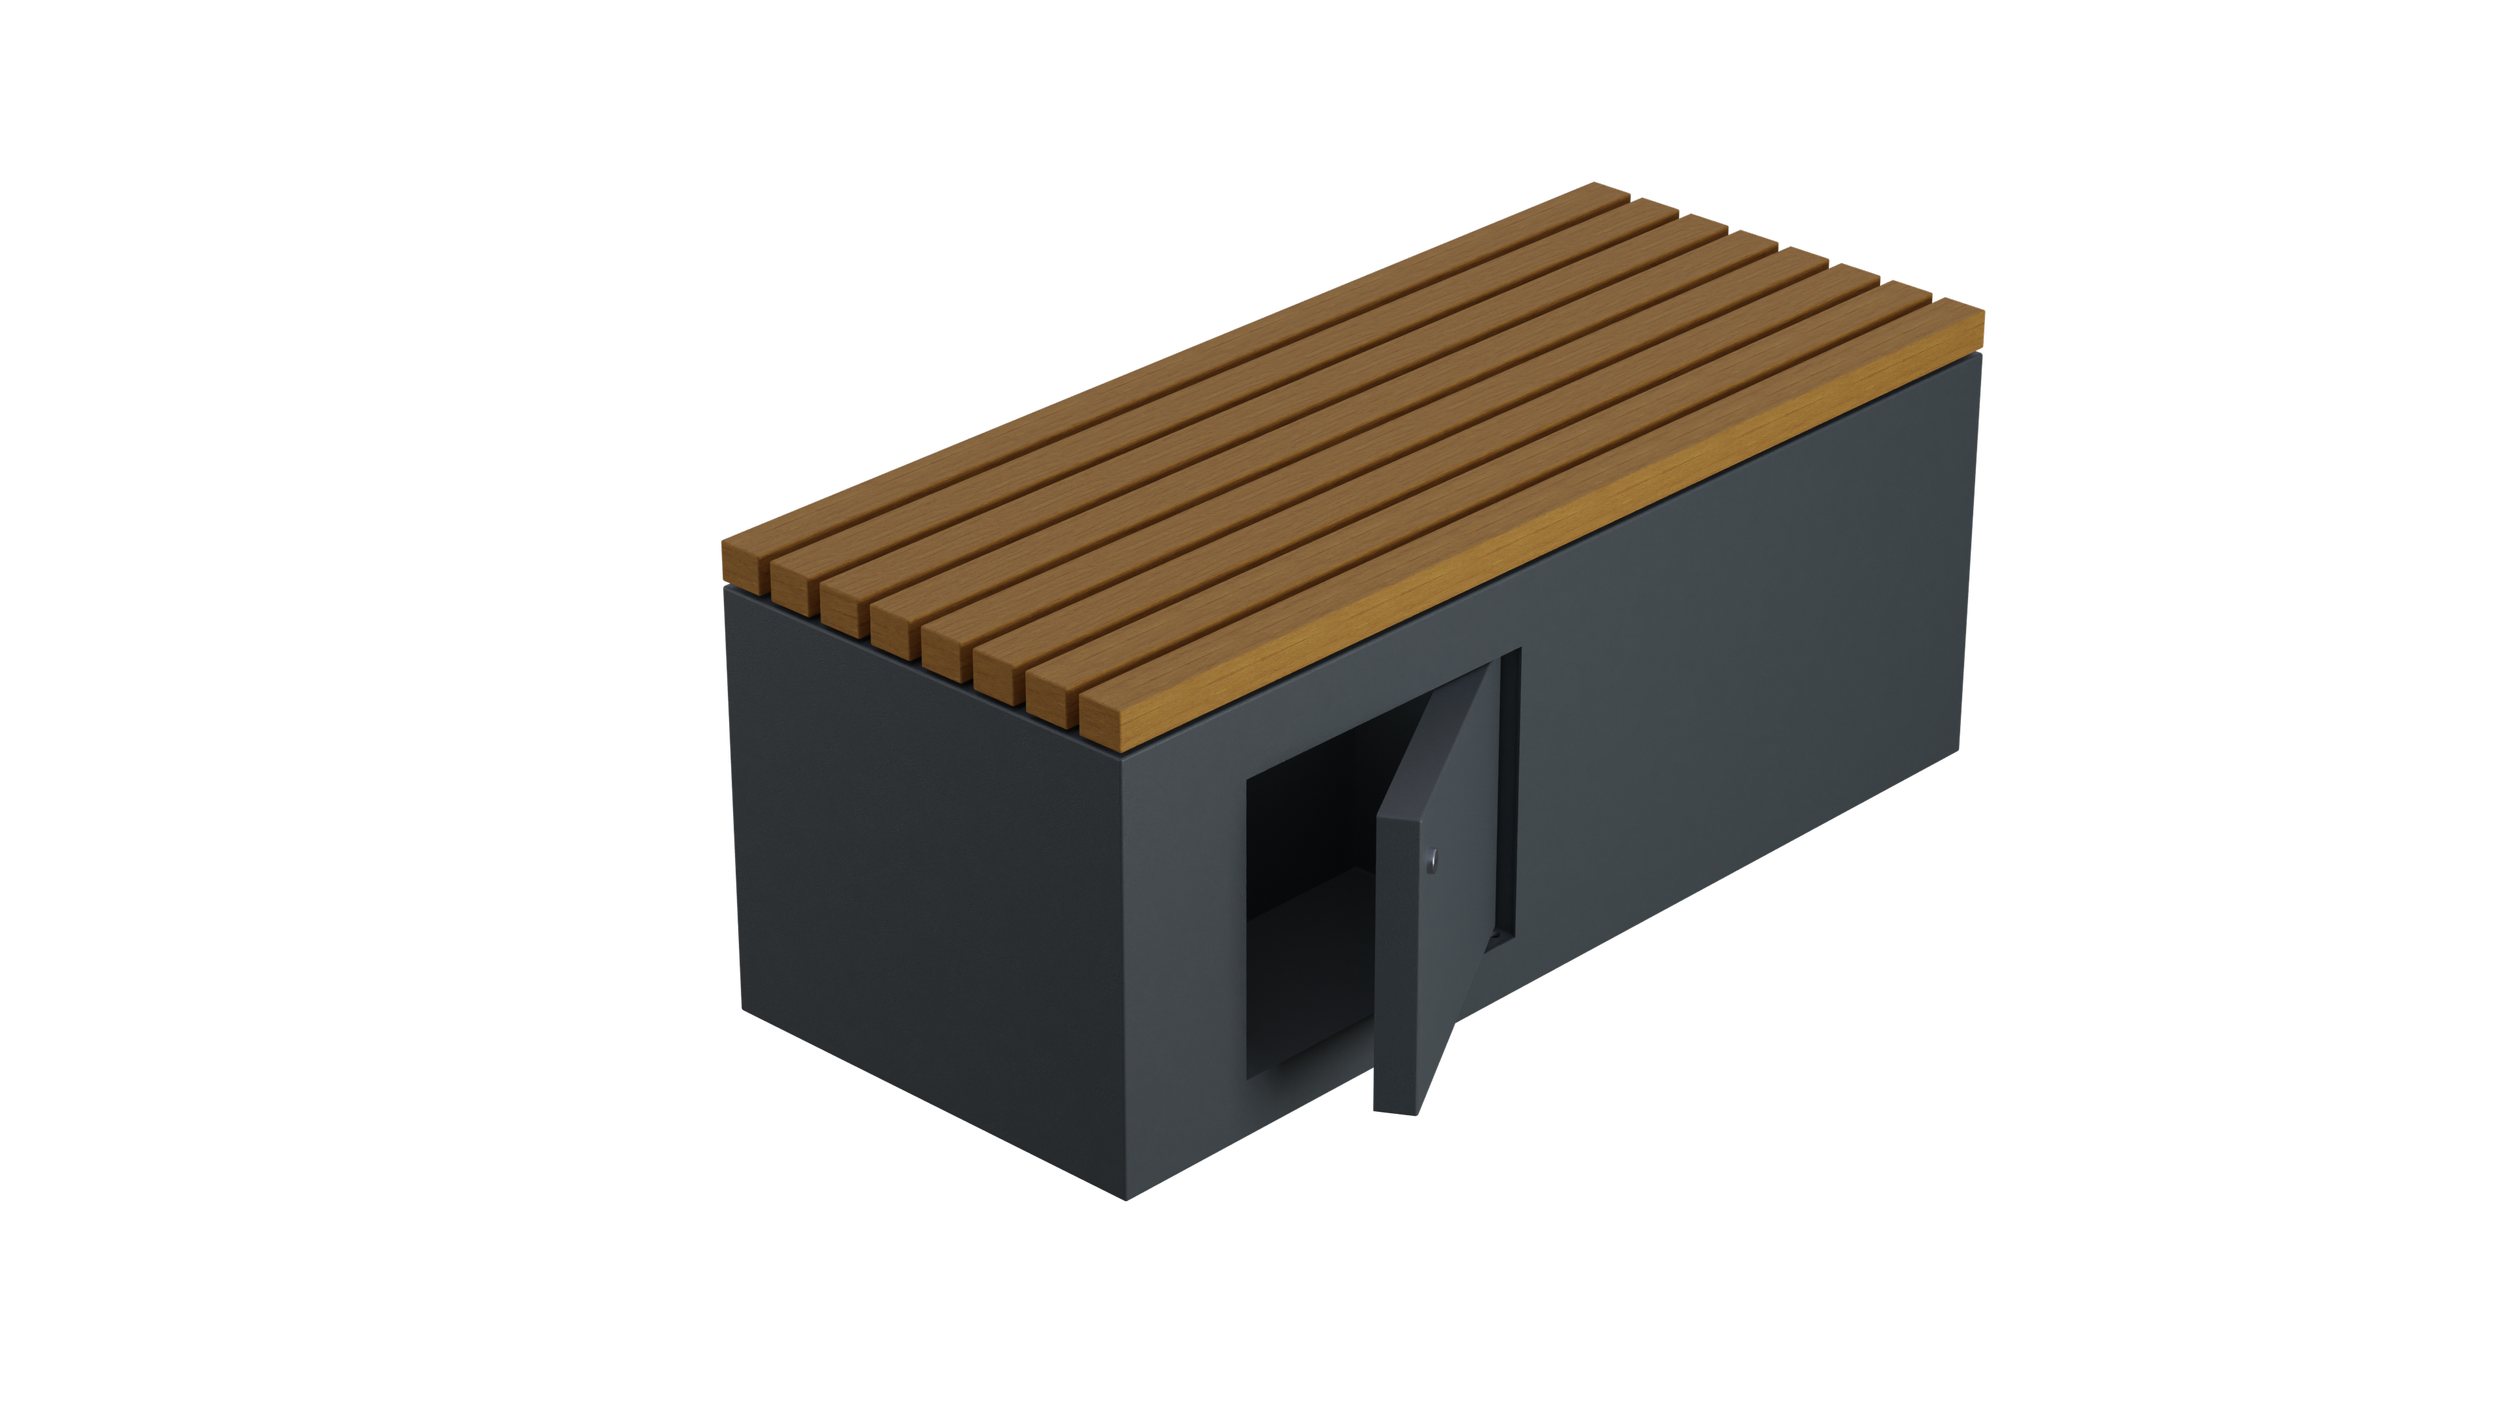
4.2. Modular Range
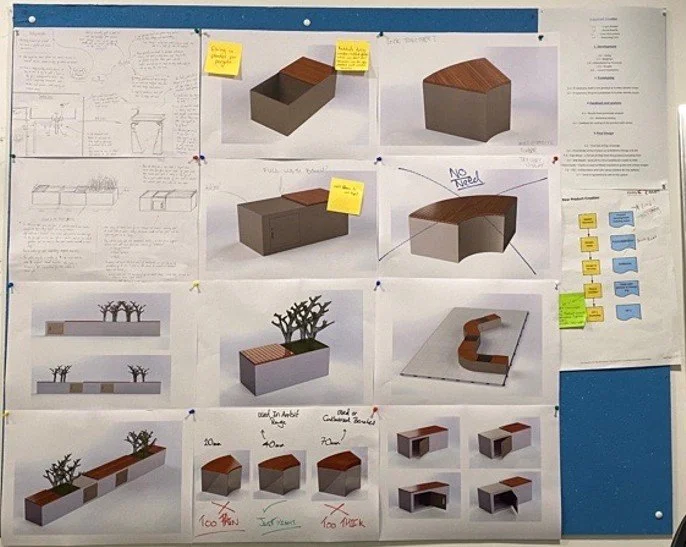
Concept Iteration and Development
Being able to use a pinboard to visualise the concepts has been a method I have utilised since University. It allows for clarity, whilst allowing others to see the path /direction you are headed. Sketching, annotations, and CAD were all vital to this process. The details observed in this stage were:
Materials, cost, size, weight, strength, market research, aesthetics, and manufacturability.
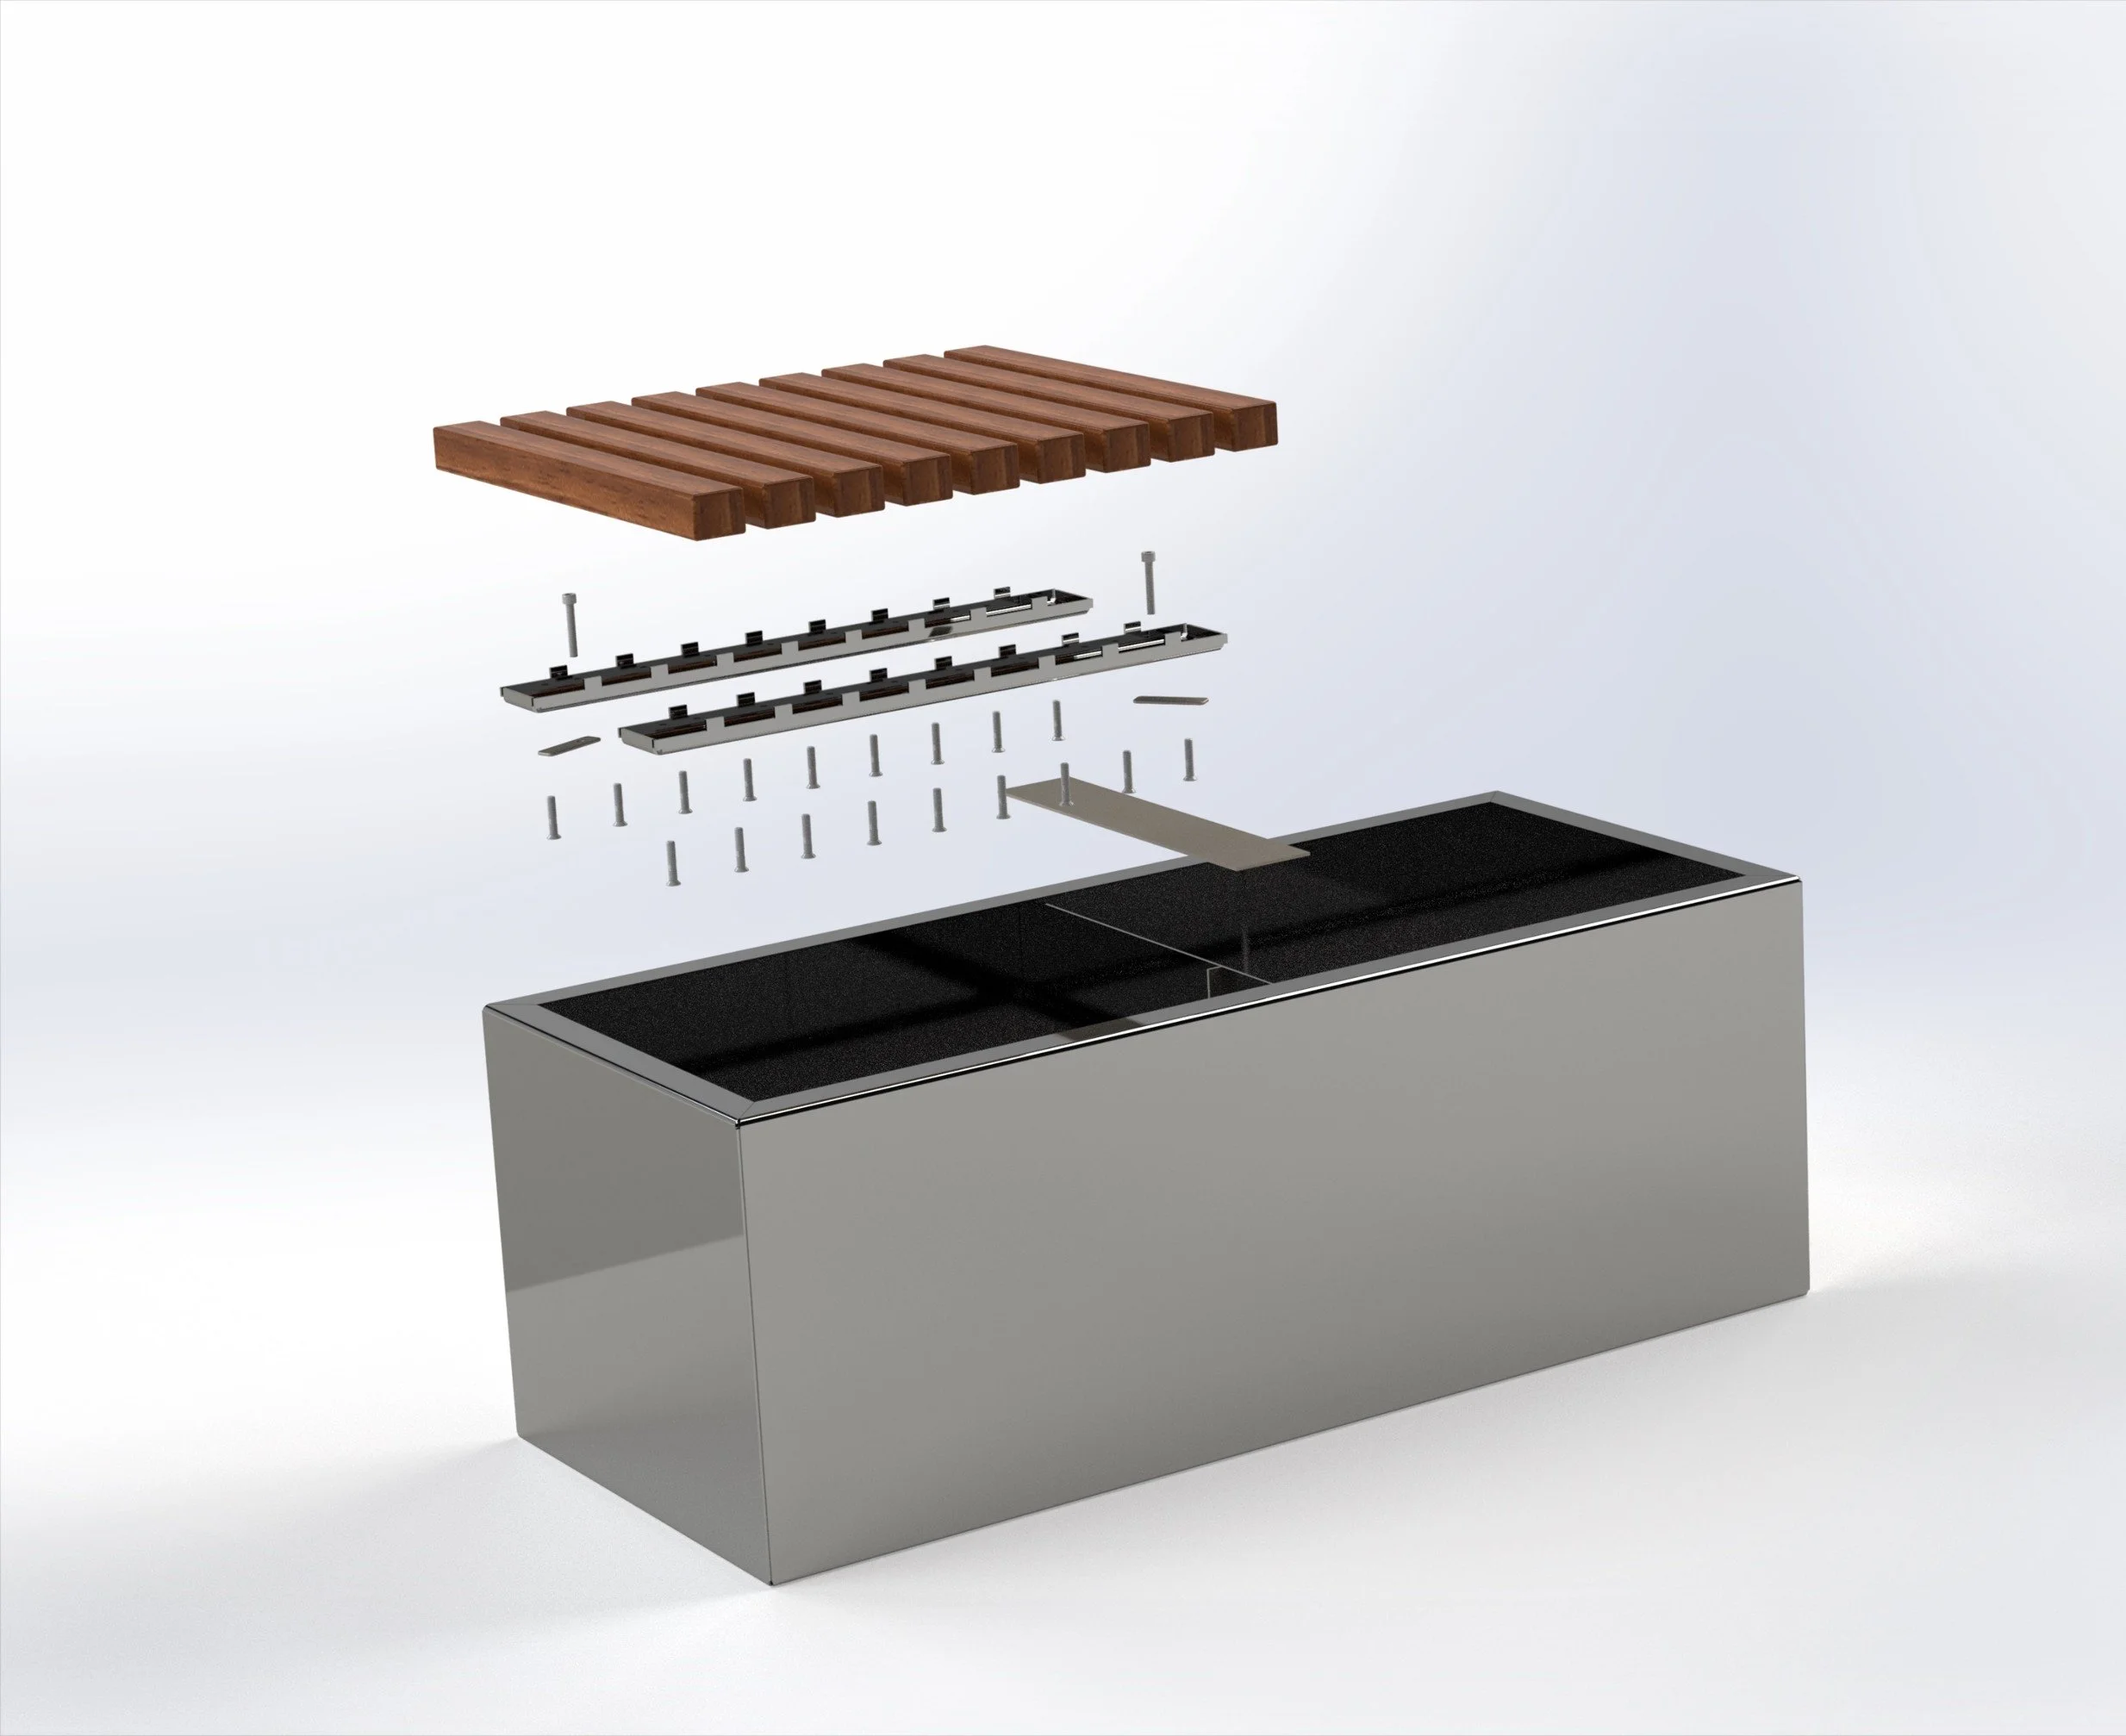
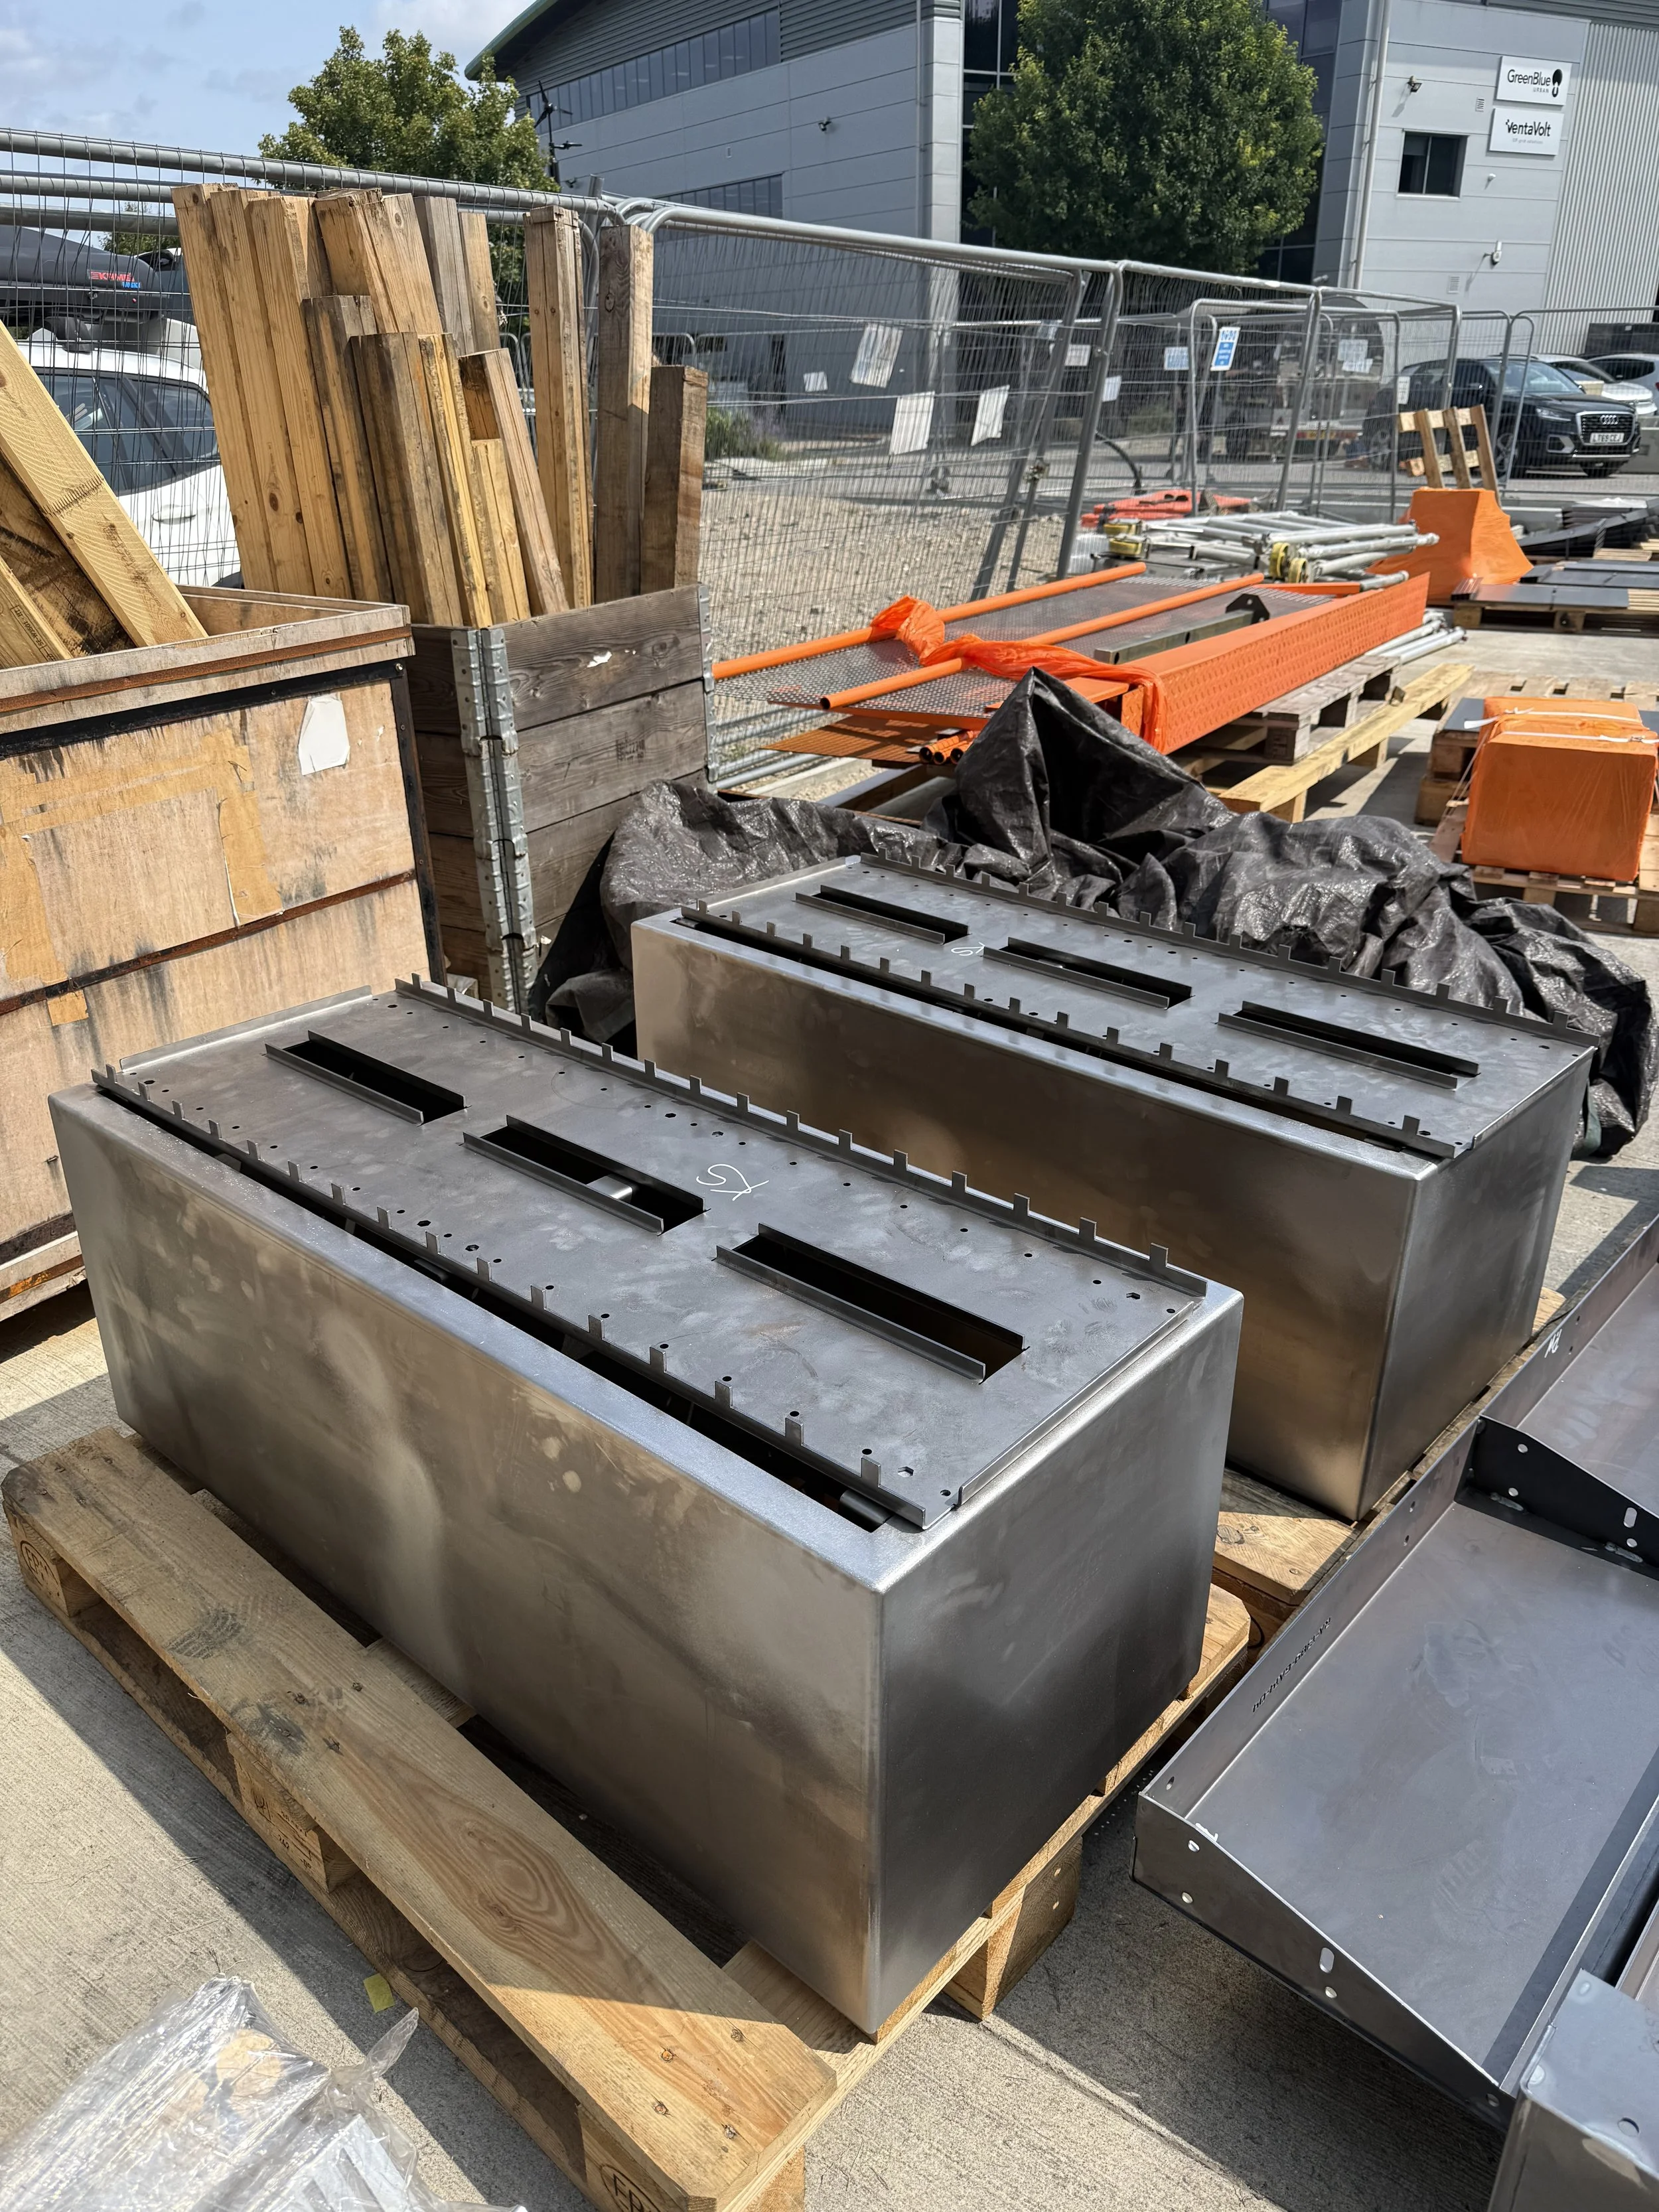
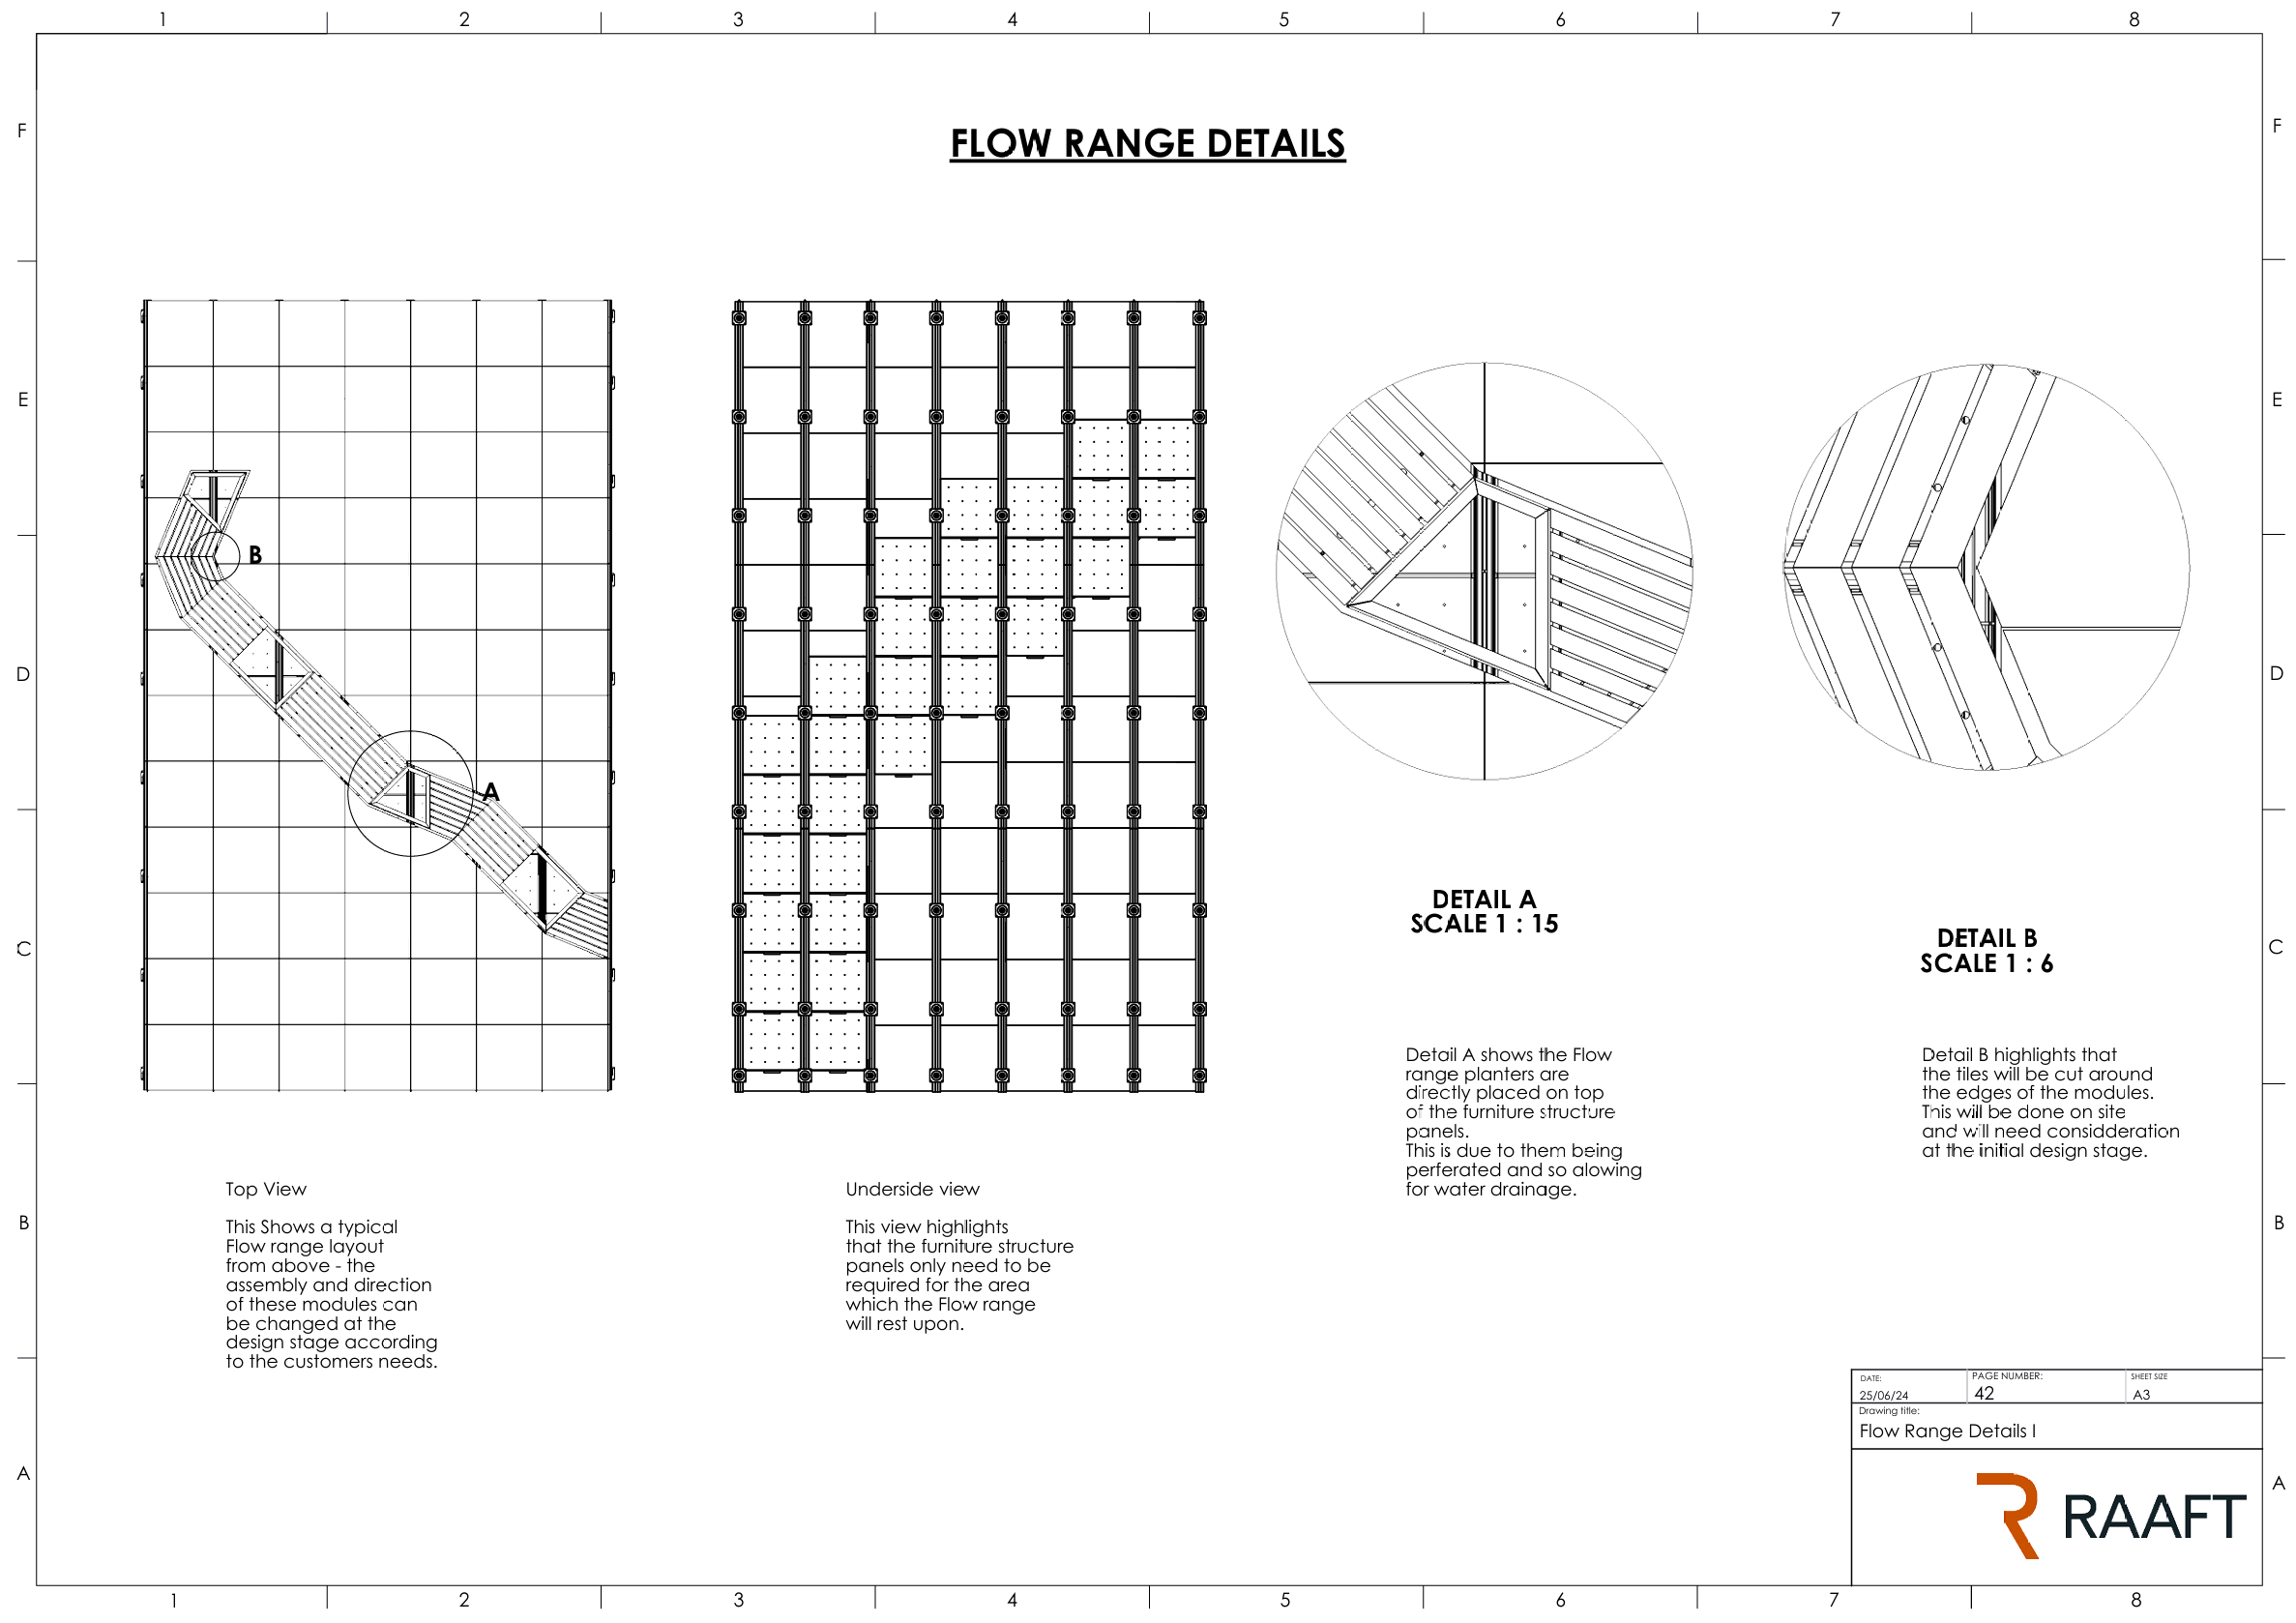
Testing & Manufacture
Once the final product had been developed, the fabrication workshop needed details for how it would be assembled. This was then provided alongside a drawing to illustrate how it would be placed on site.
Tests were done to understand manufacturing timescales, and once it succeeded on this, it was ready to be sent to marketing.
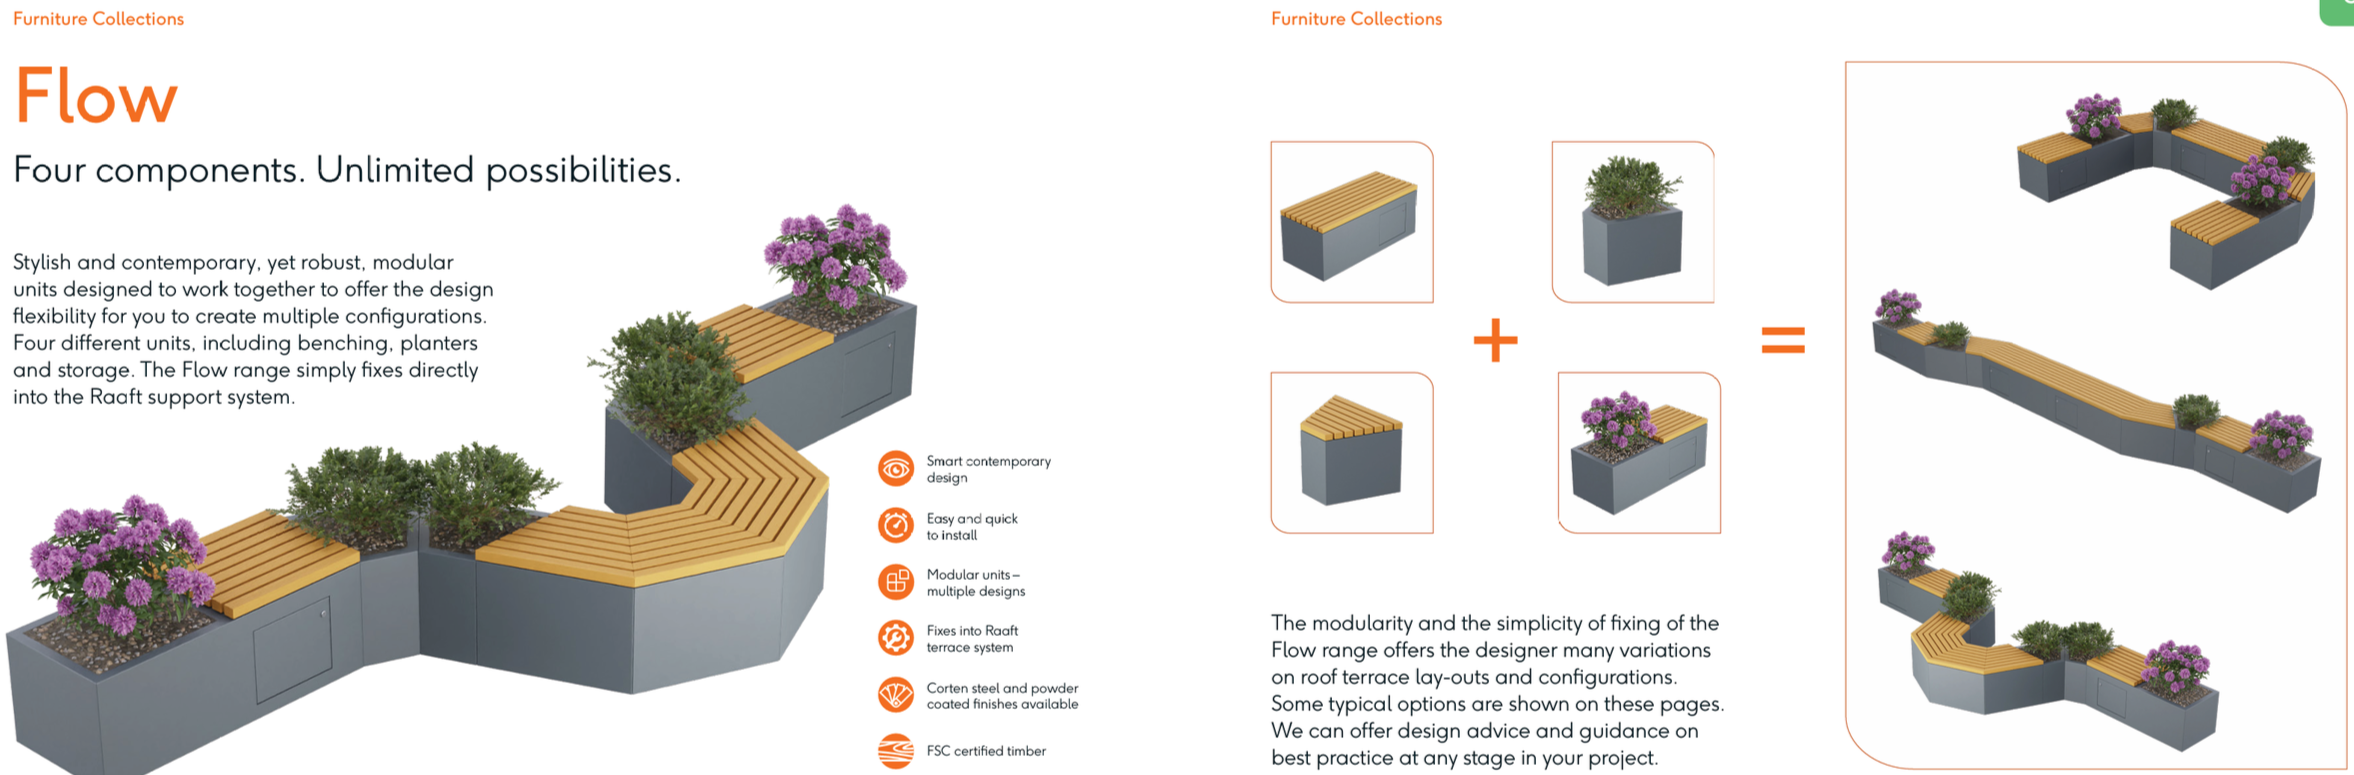
Marketing and Catalogues
Working together with the marketing department, images were made that would be used in catalogs and brochures for the product.
This gave me an understanding of how to develop a product for marketing purposes.
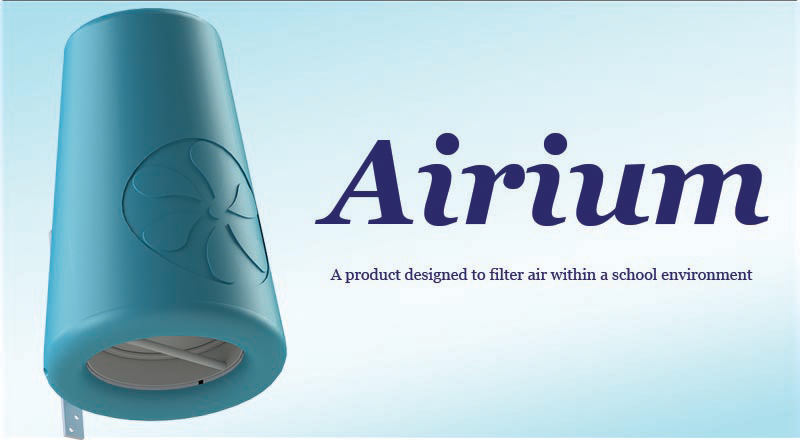
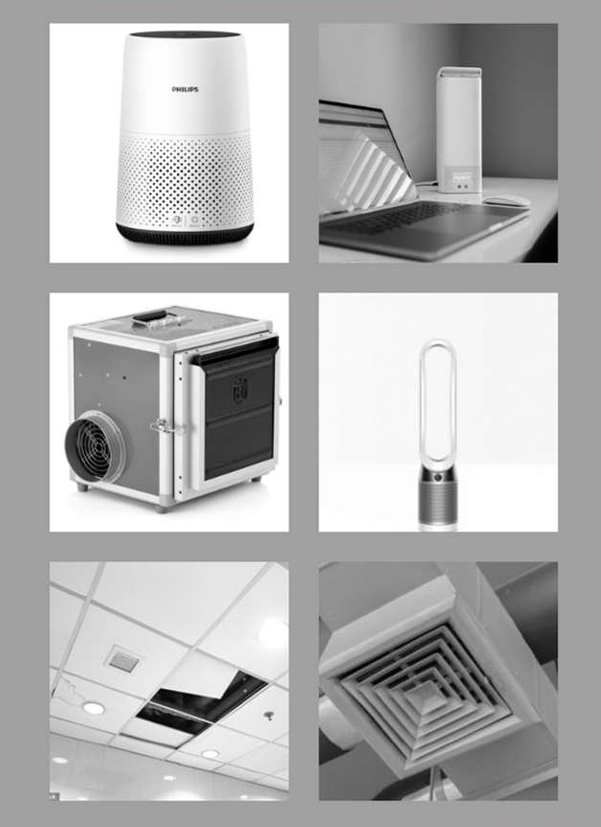
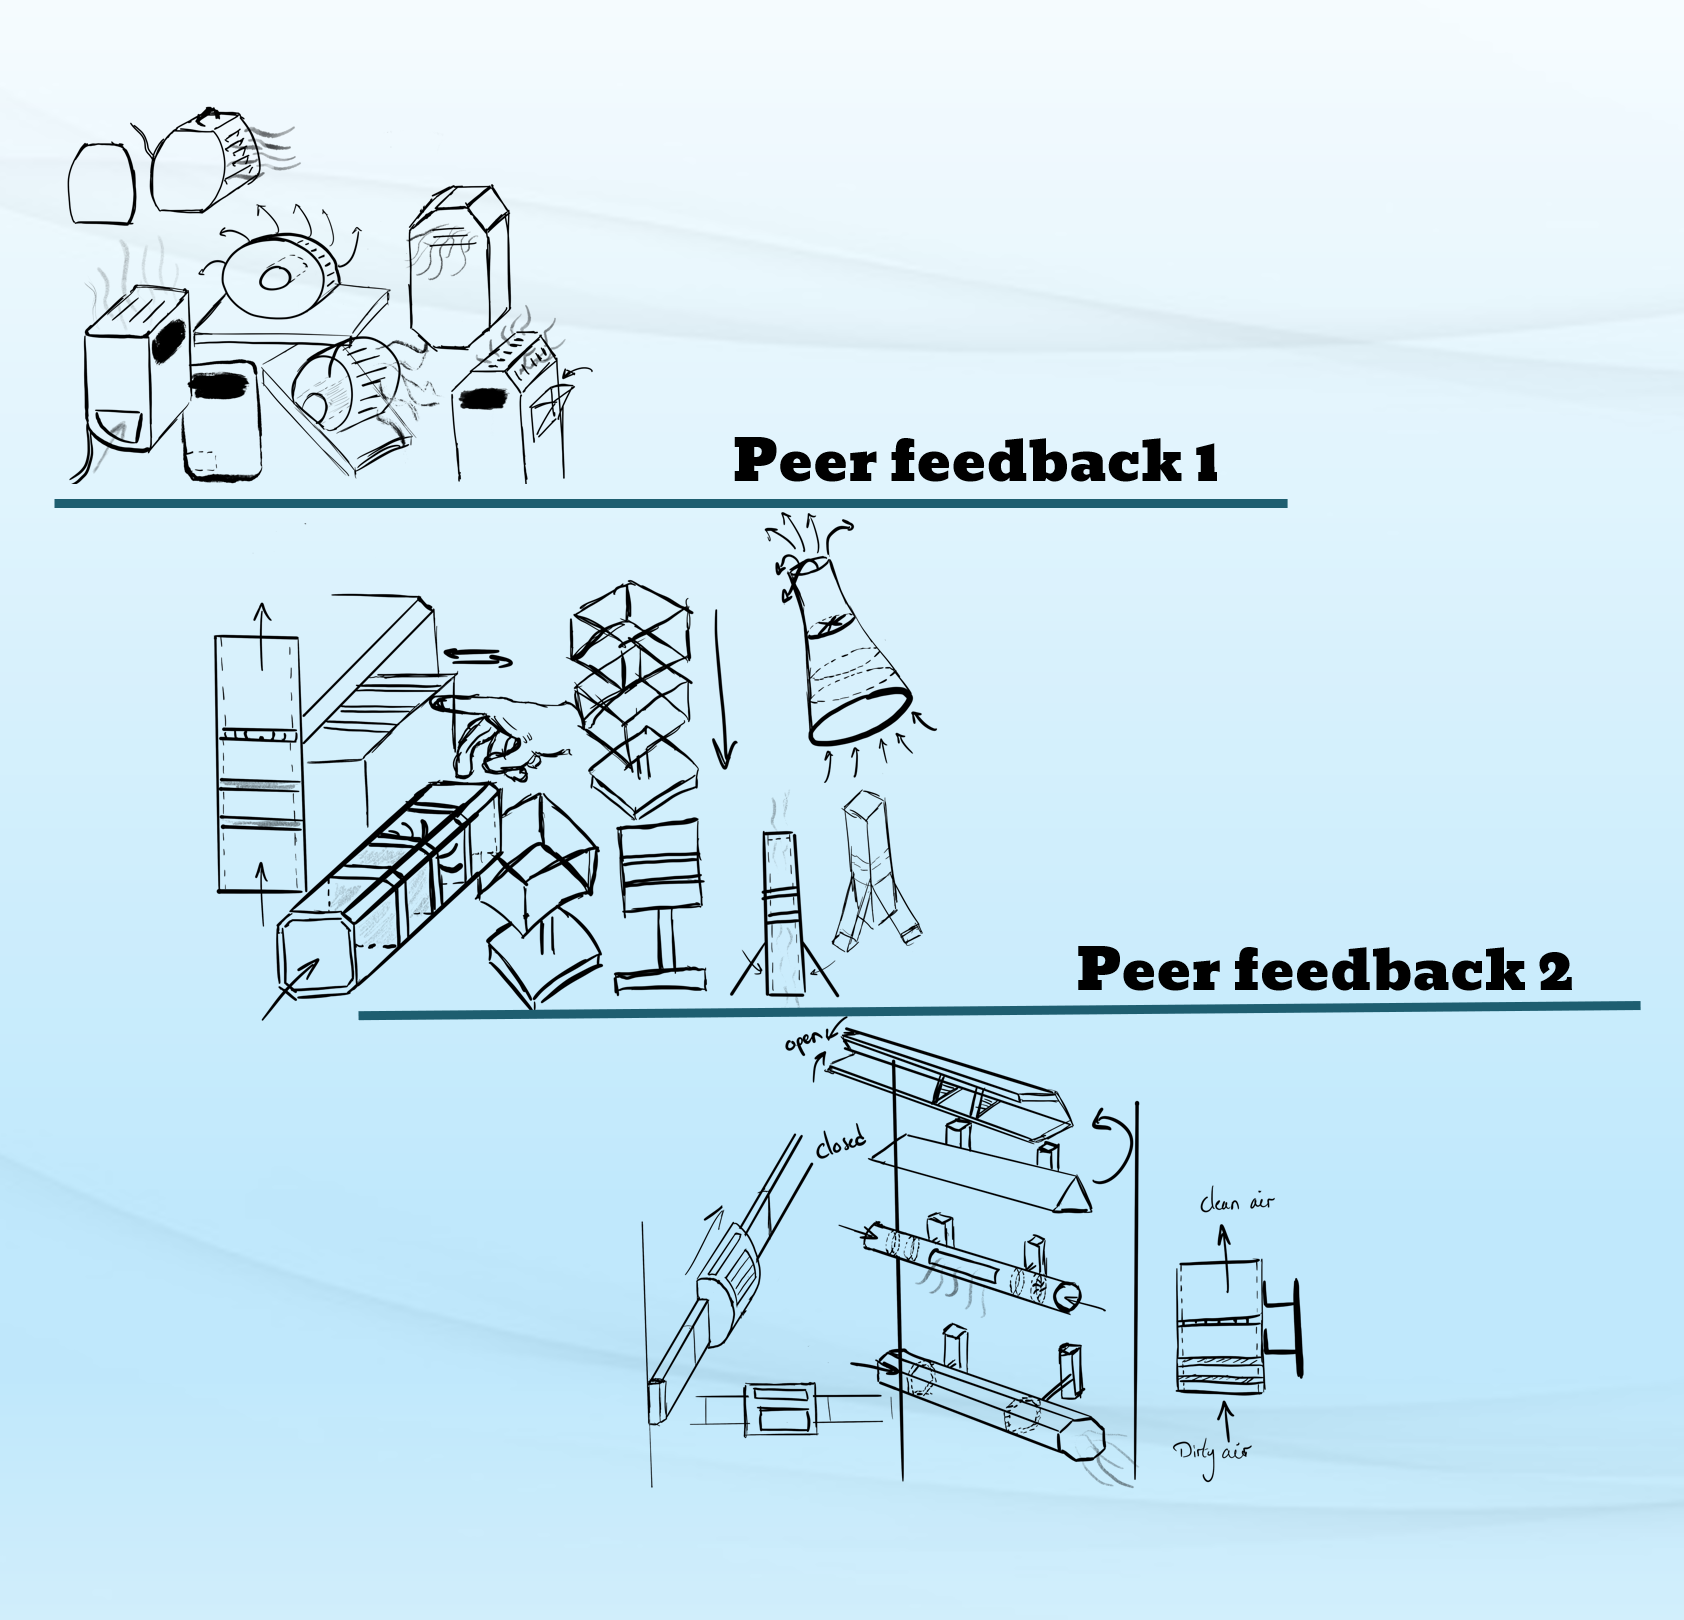
5. Third year main project: Airium
September 2020 - September 2021
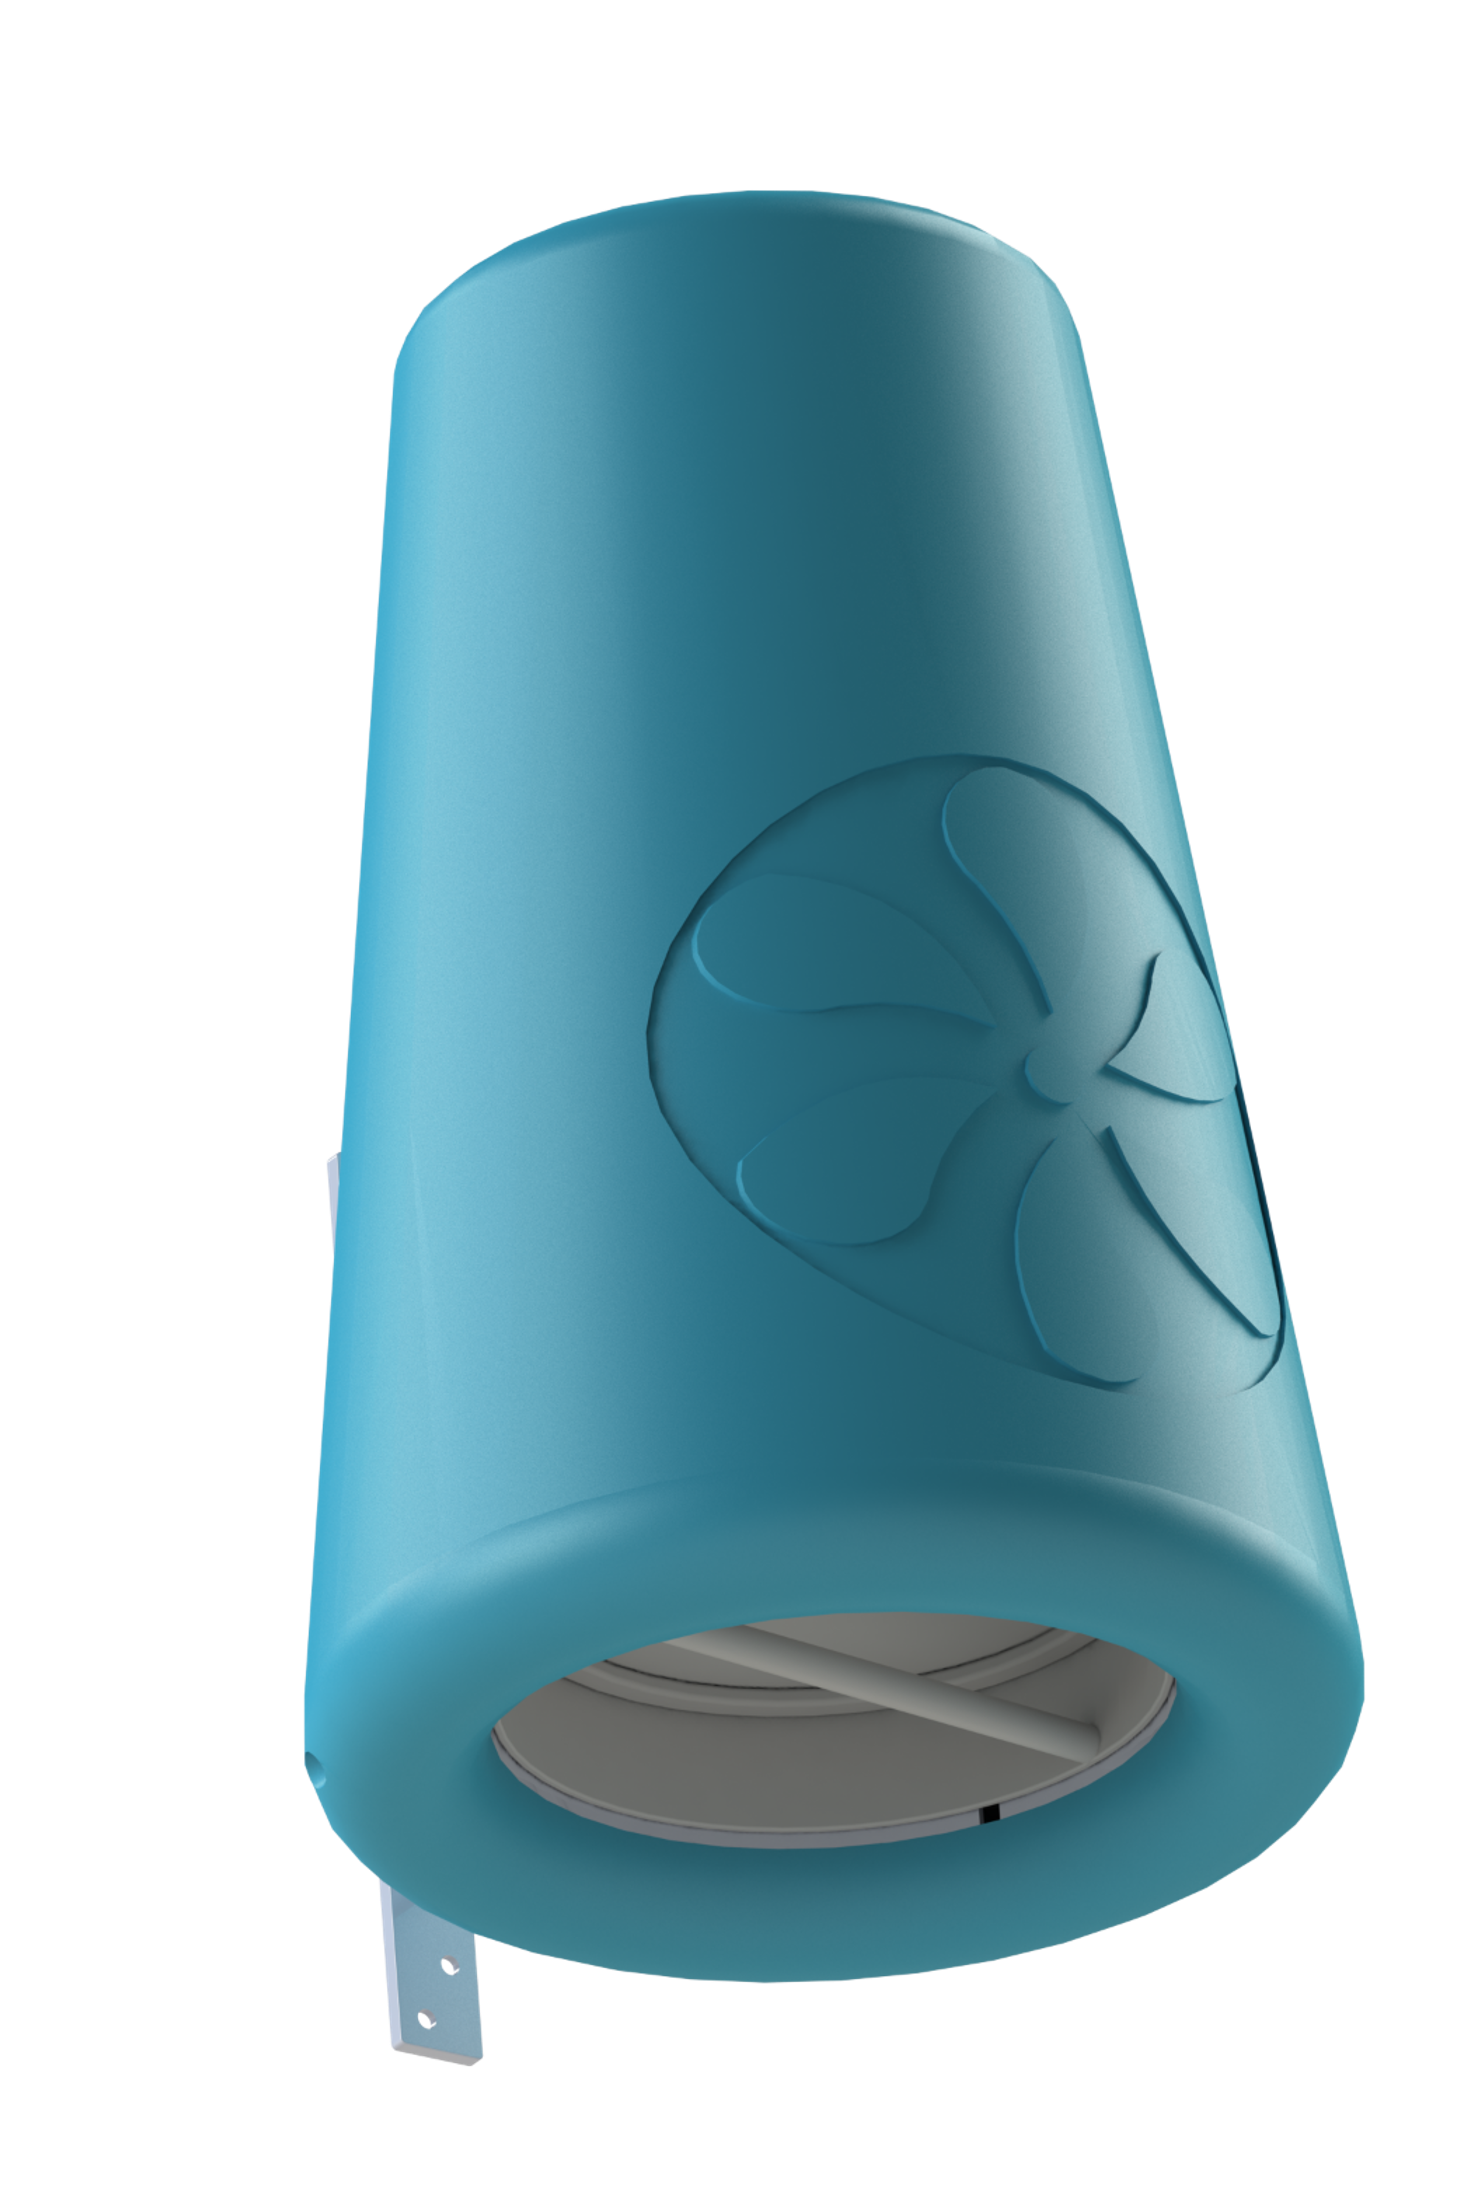
A product designed to filter air within a school environment

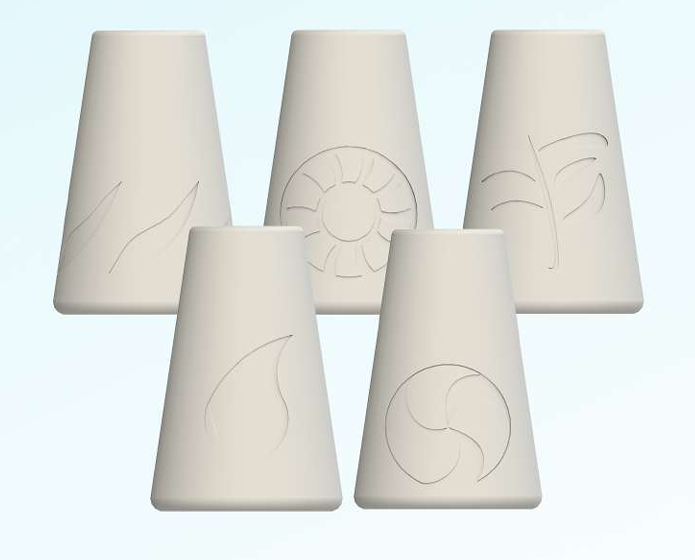
Final concept
Humanistic
Development
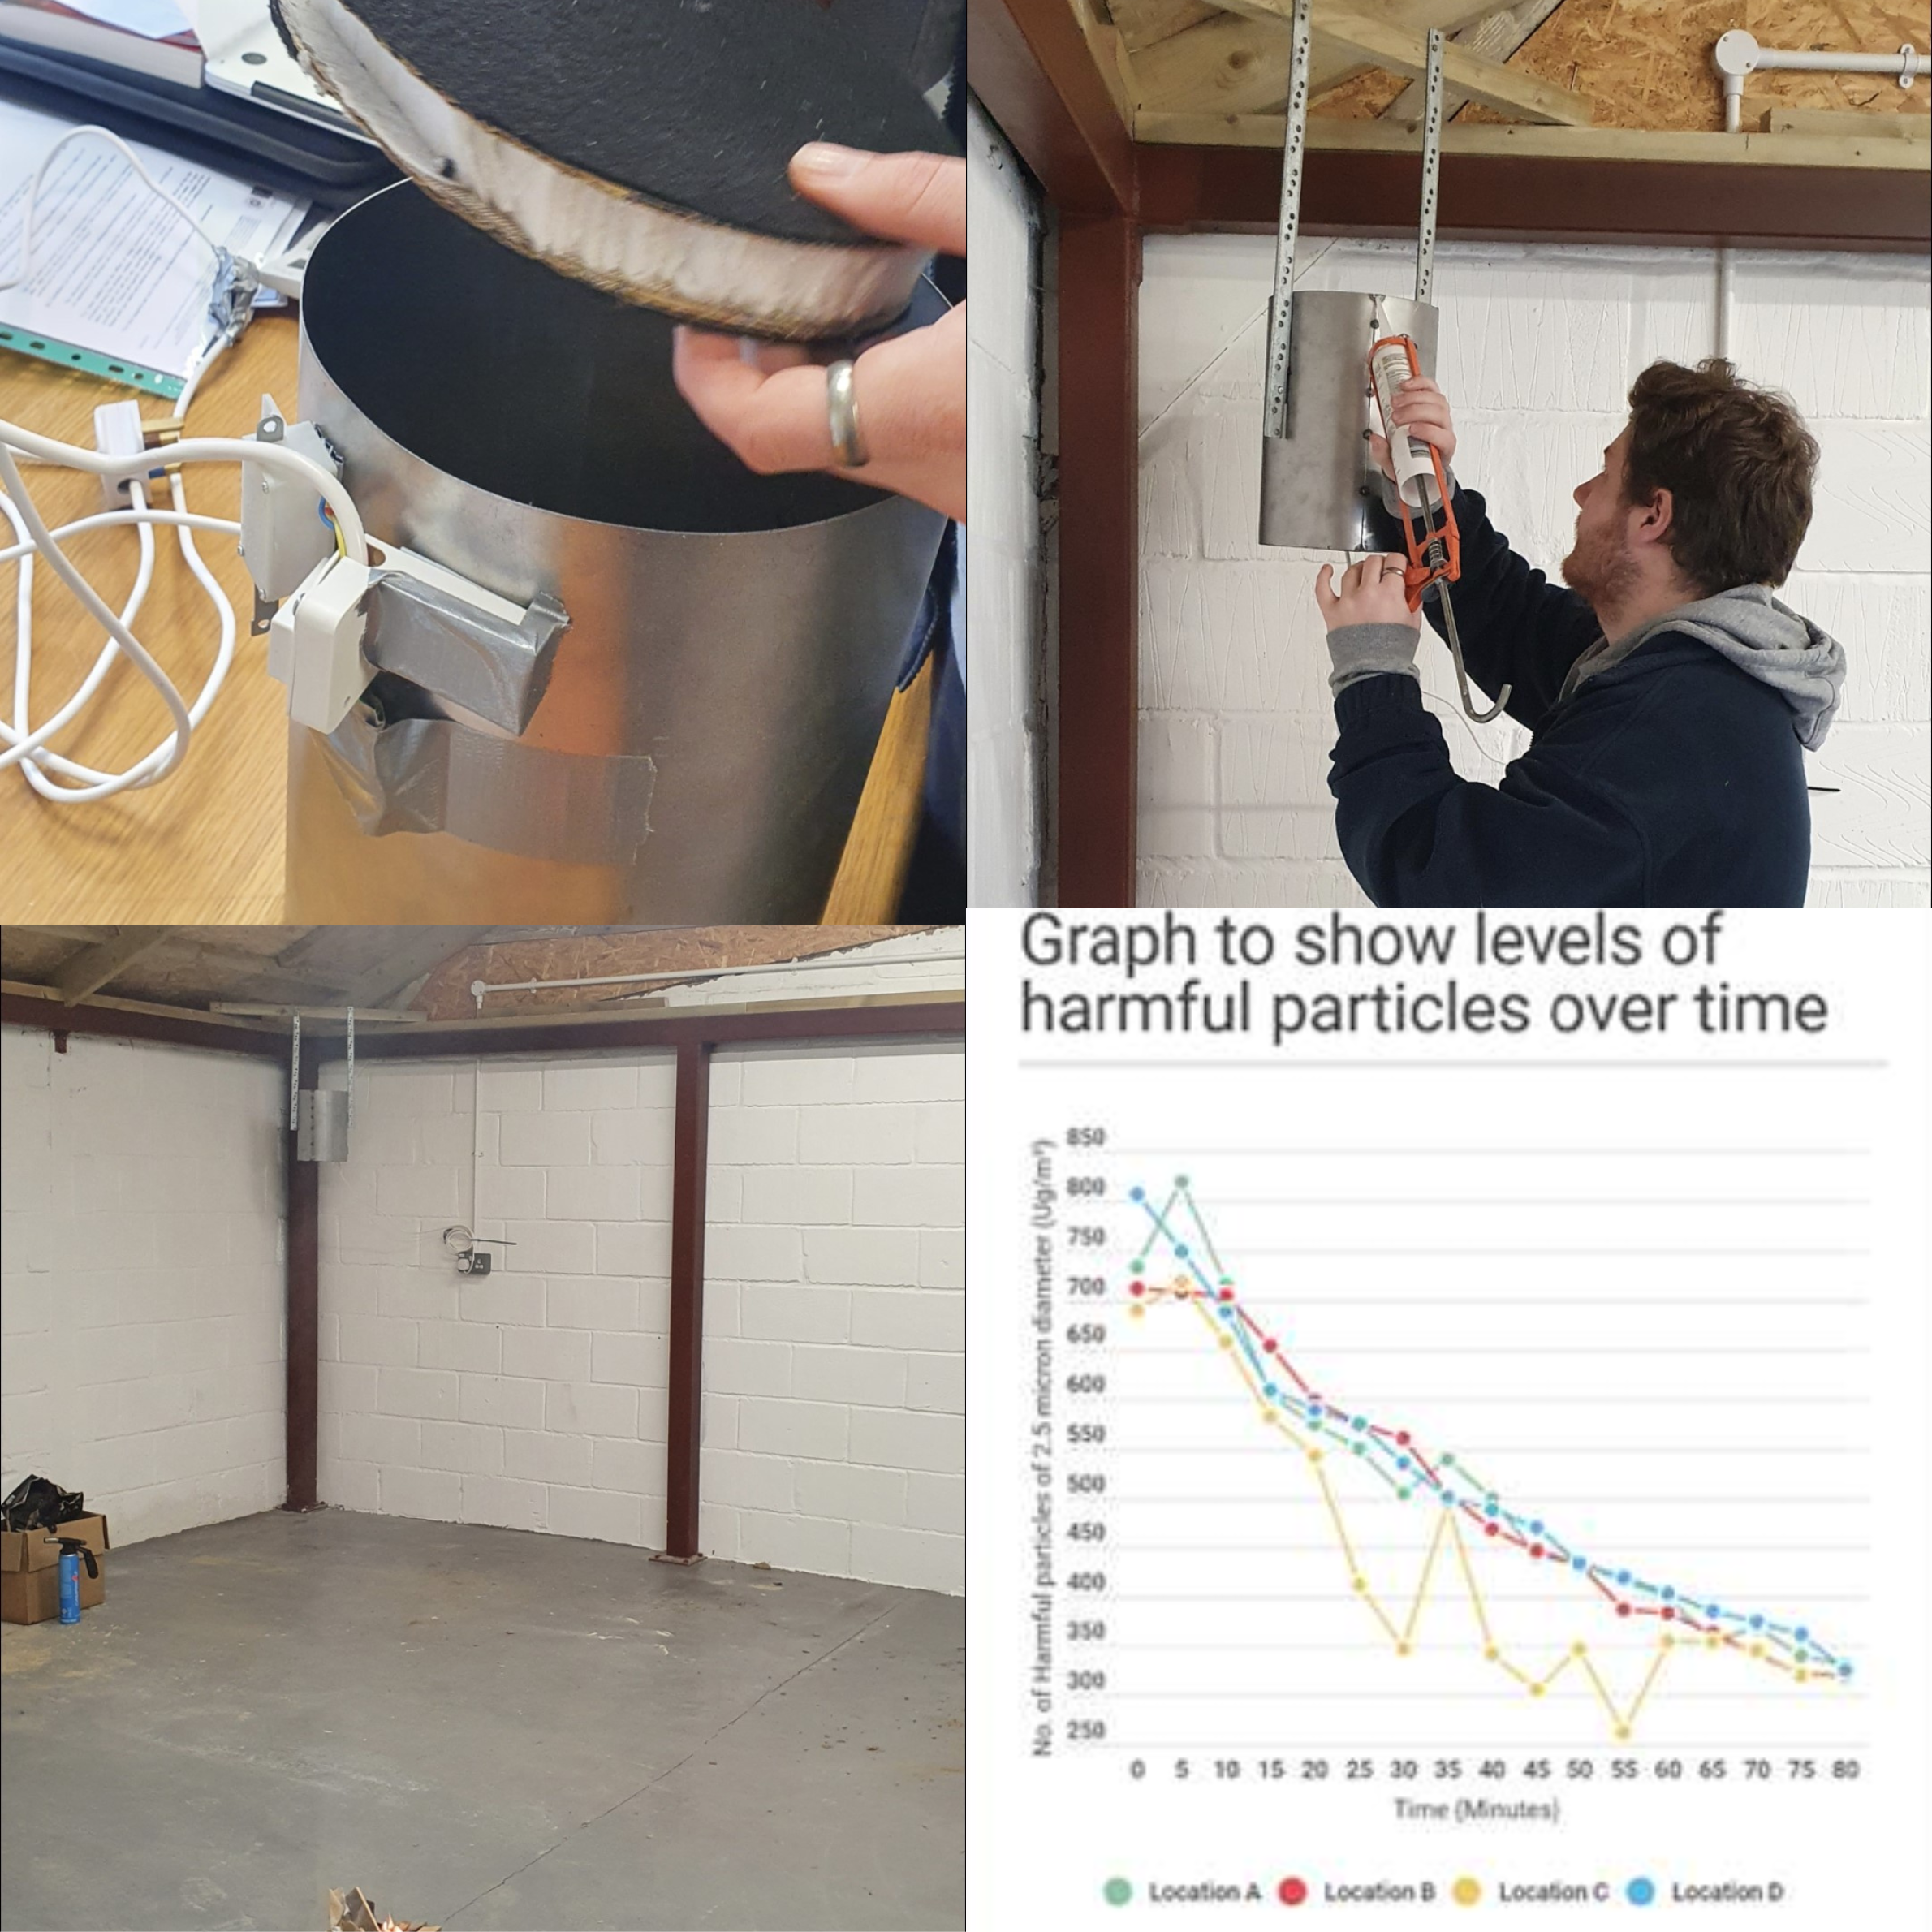
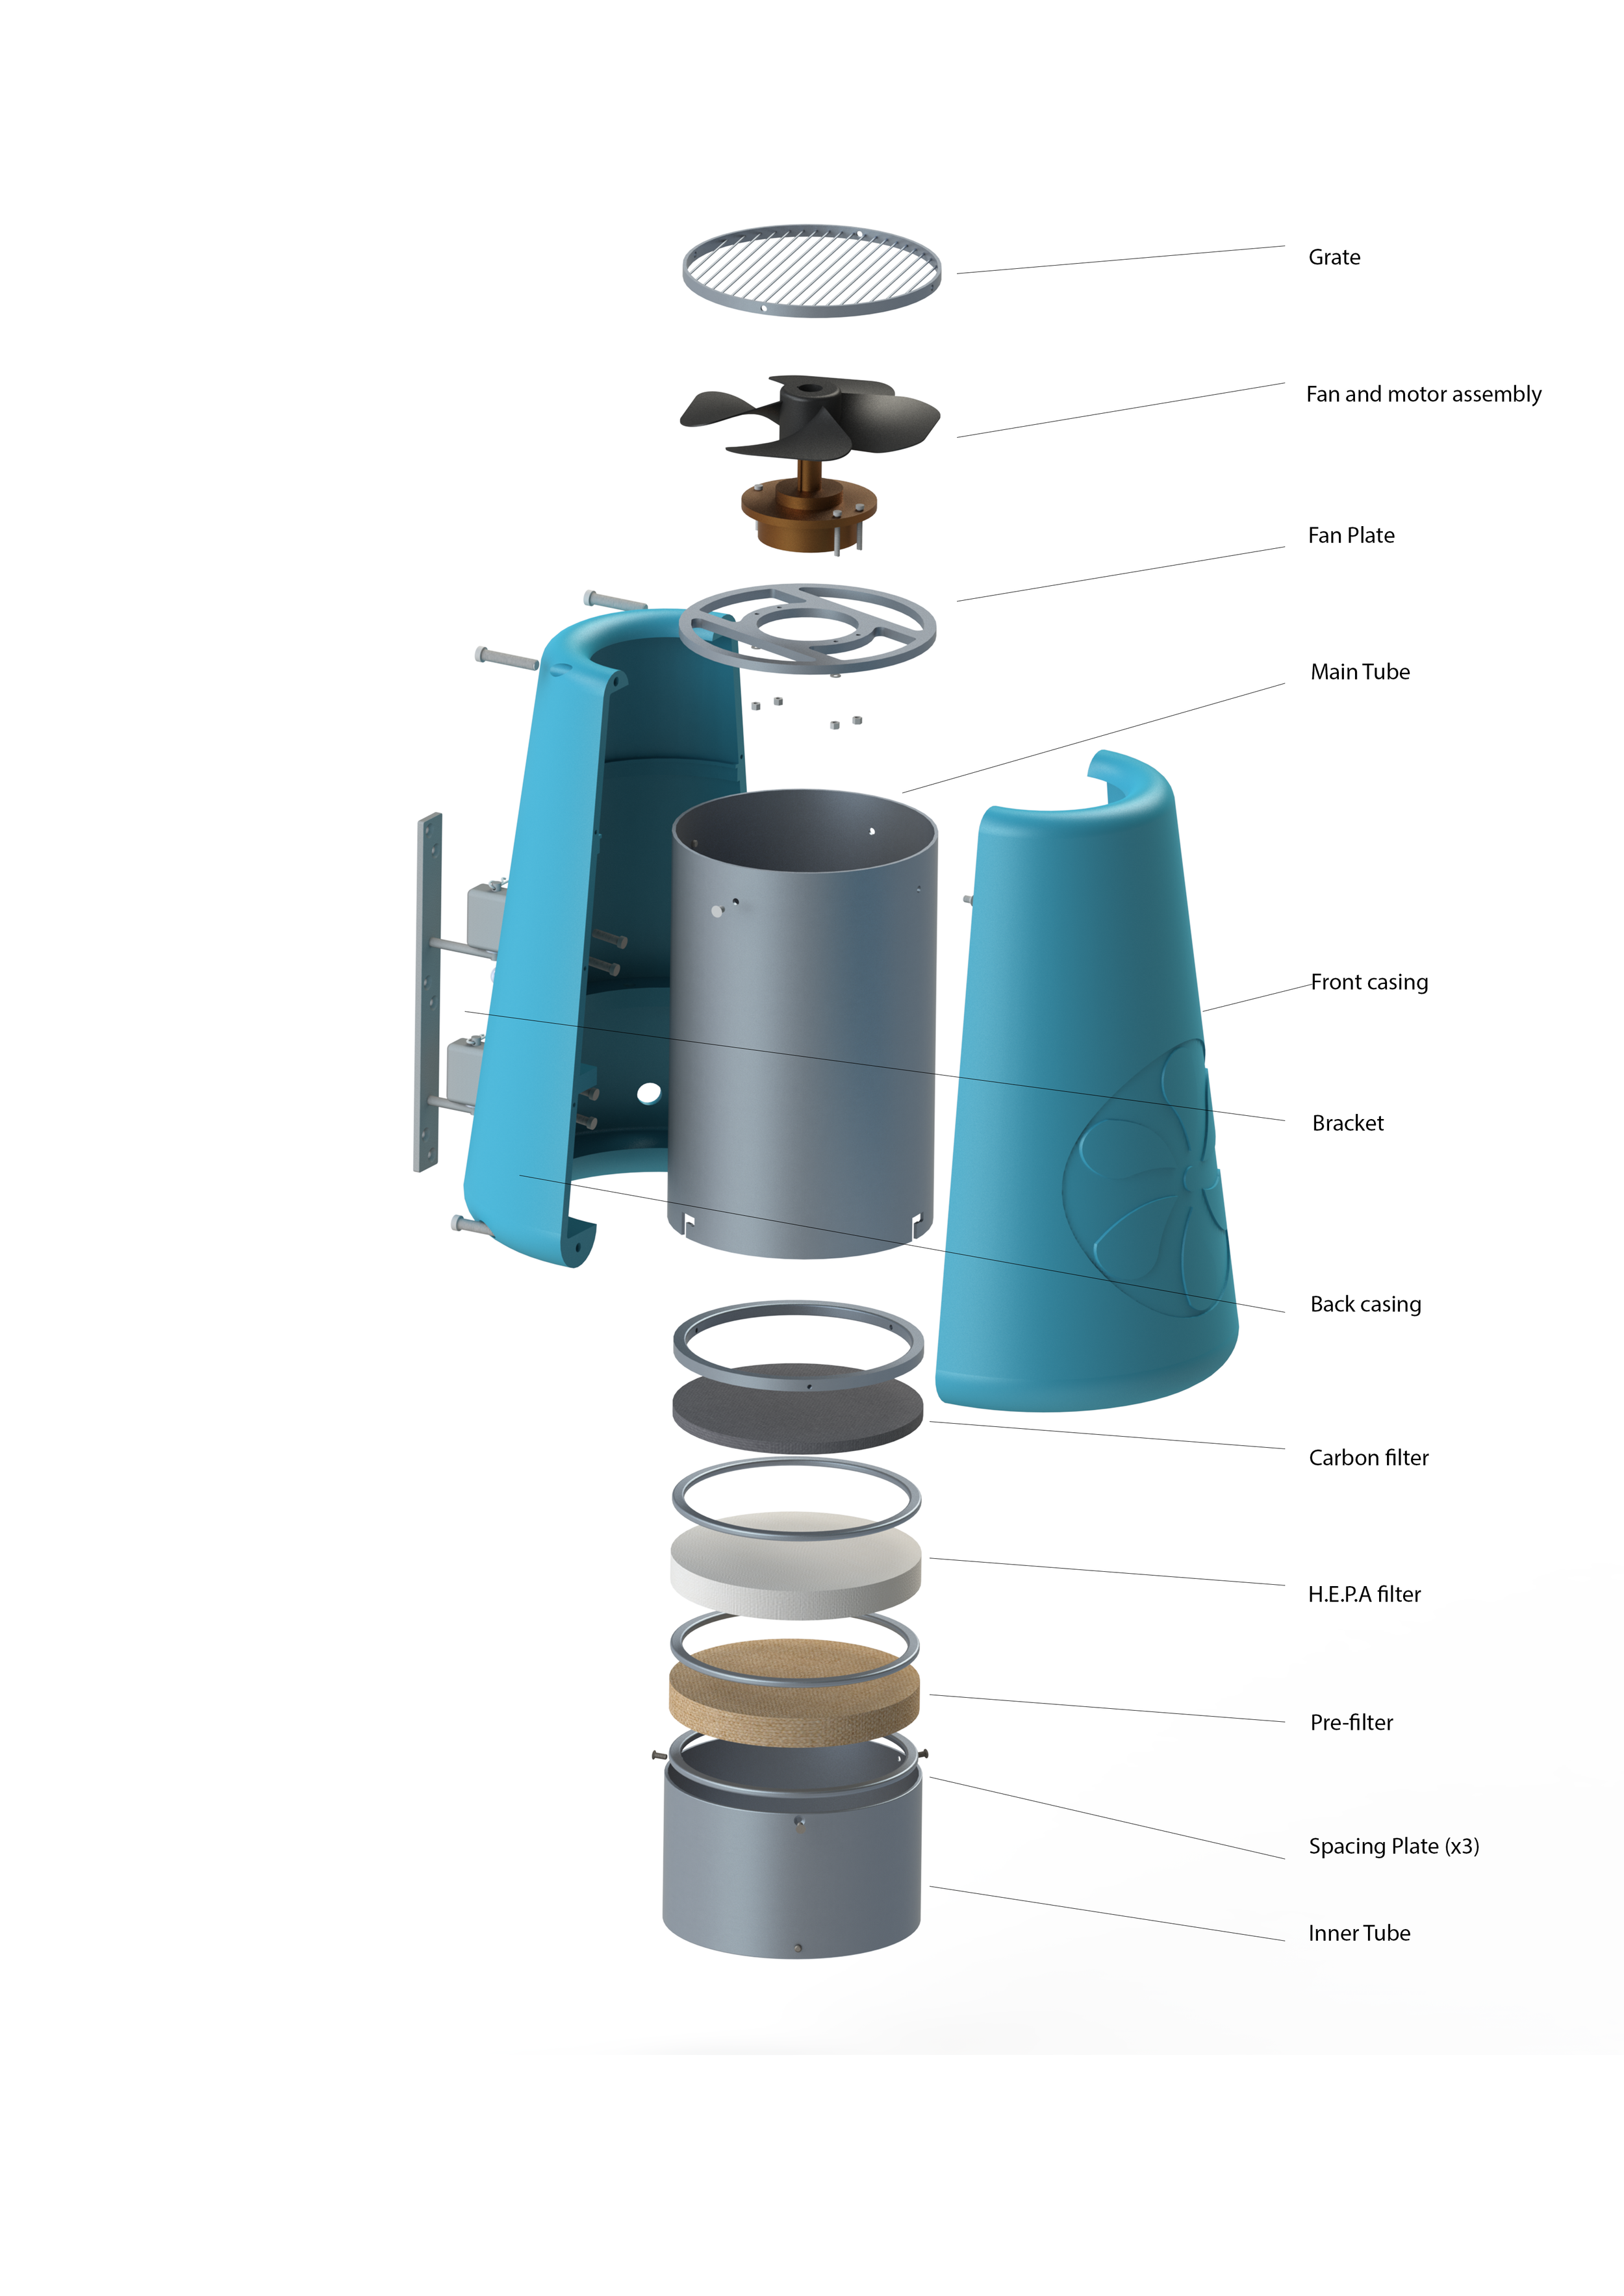
Technical
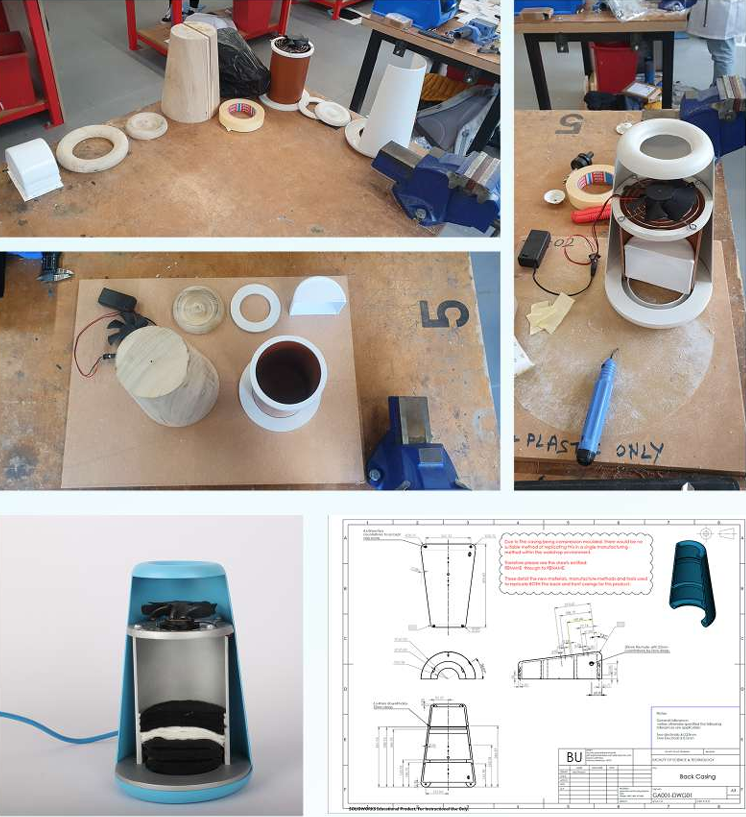
Prototyping
Final design
Iterations
Scenario
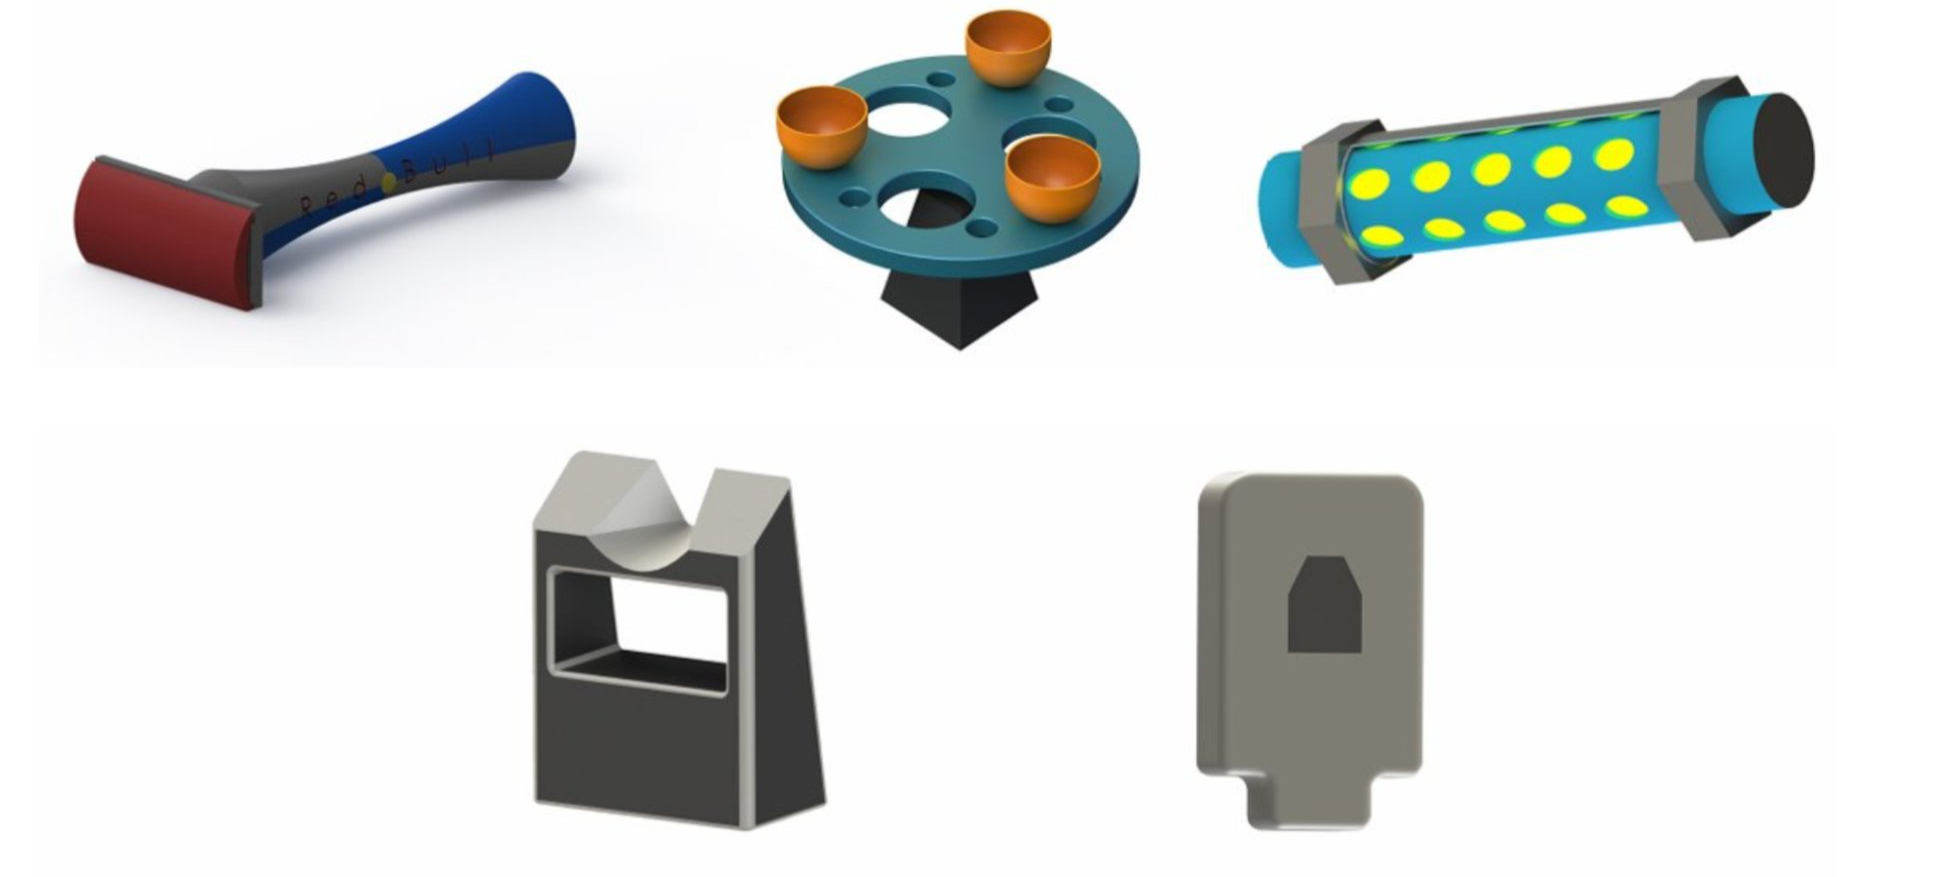
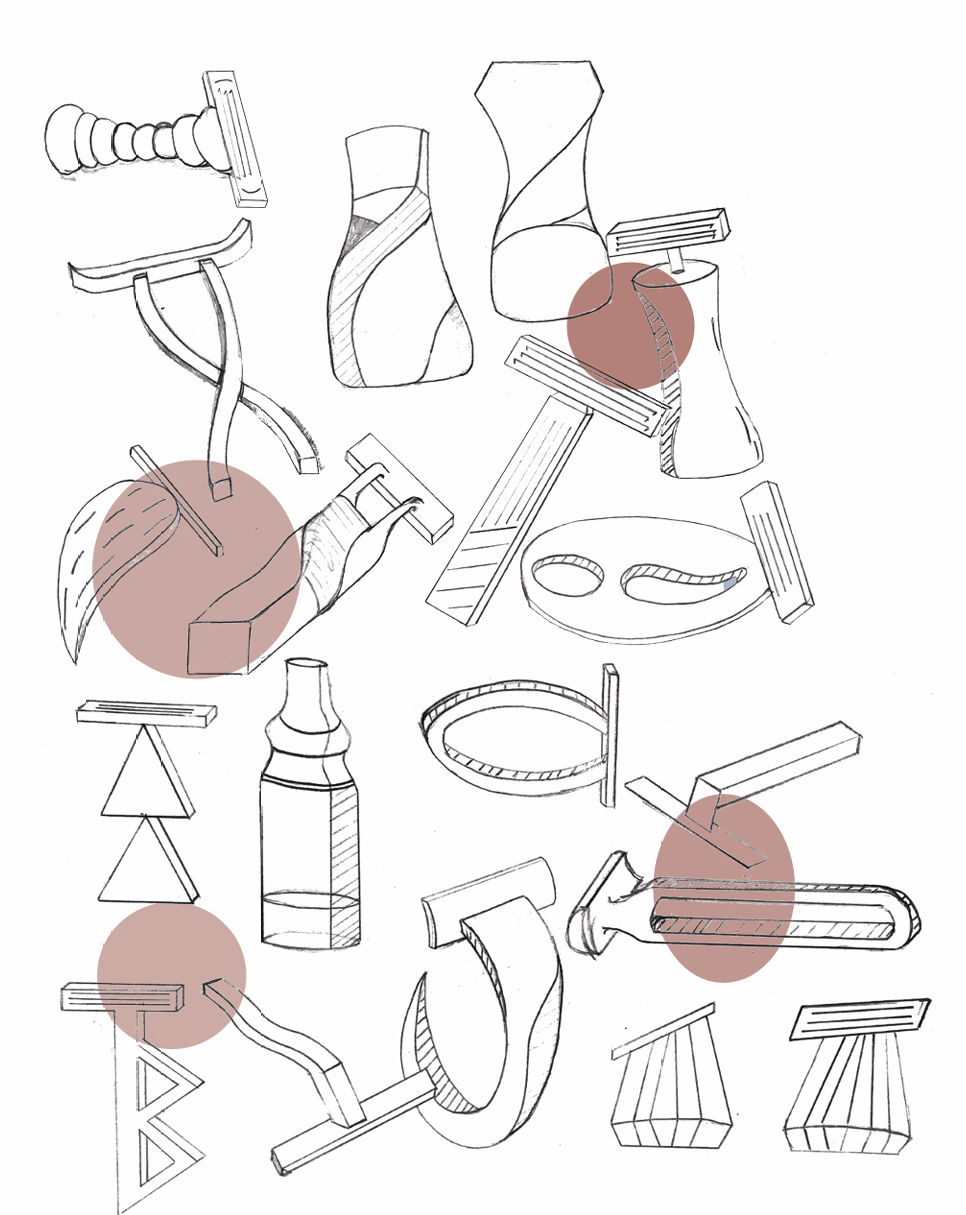
6. First year project 1 of 2: Branded razorblade
Brief: To design and create a disposable razor, with the additional task of implementing a brand and its associated values
Concept iteration
Several concepts have been hand-sketched, with a close eye kept on the various shapes and designs of a disposable razor. Ergonomics played a large part in this, and so ensuring it fit snug in the hand was key.
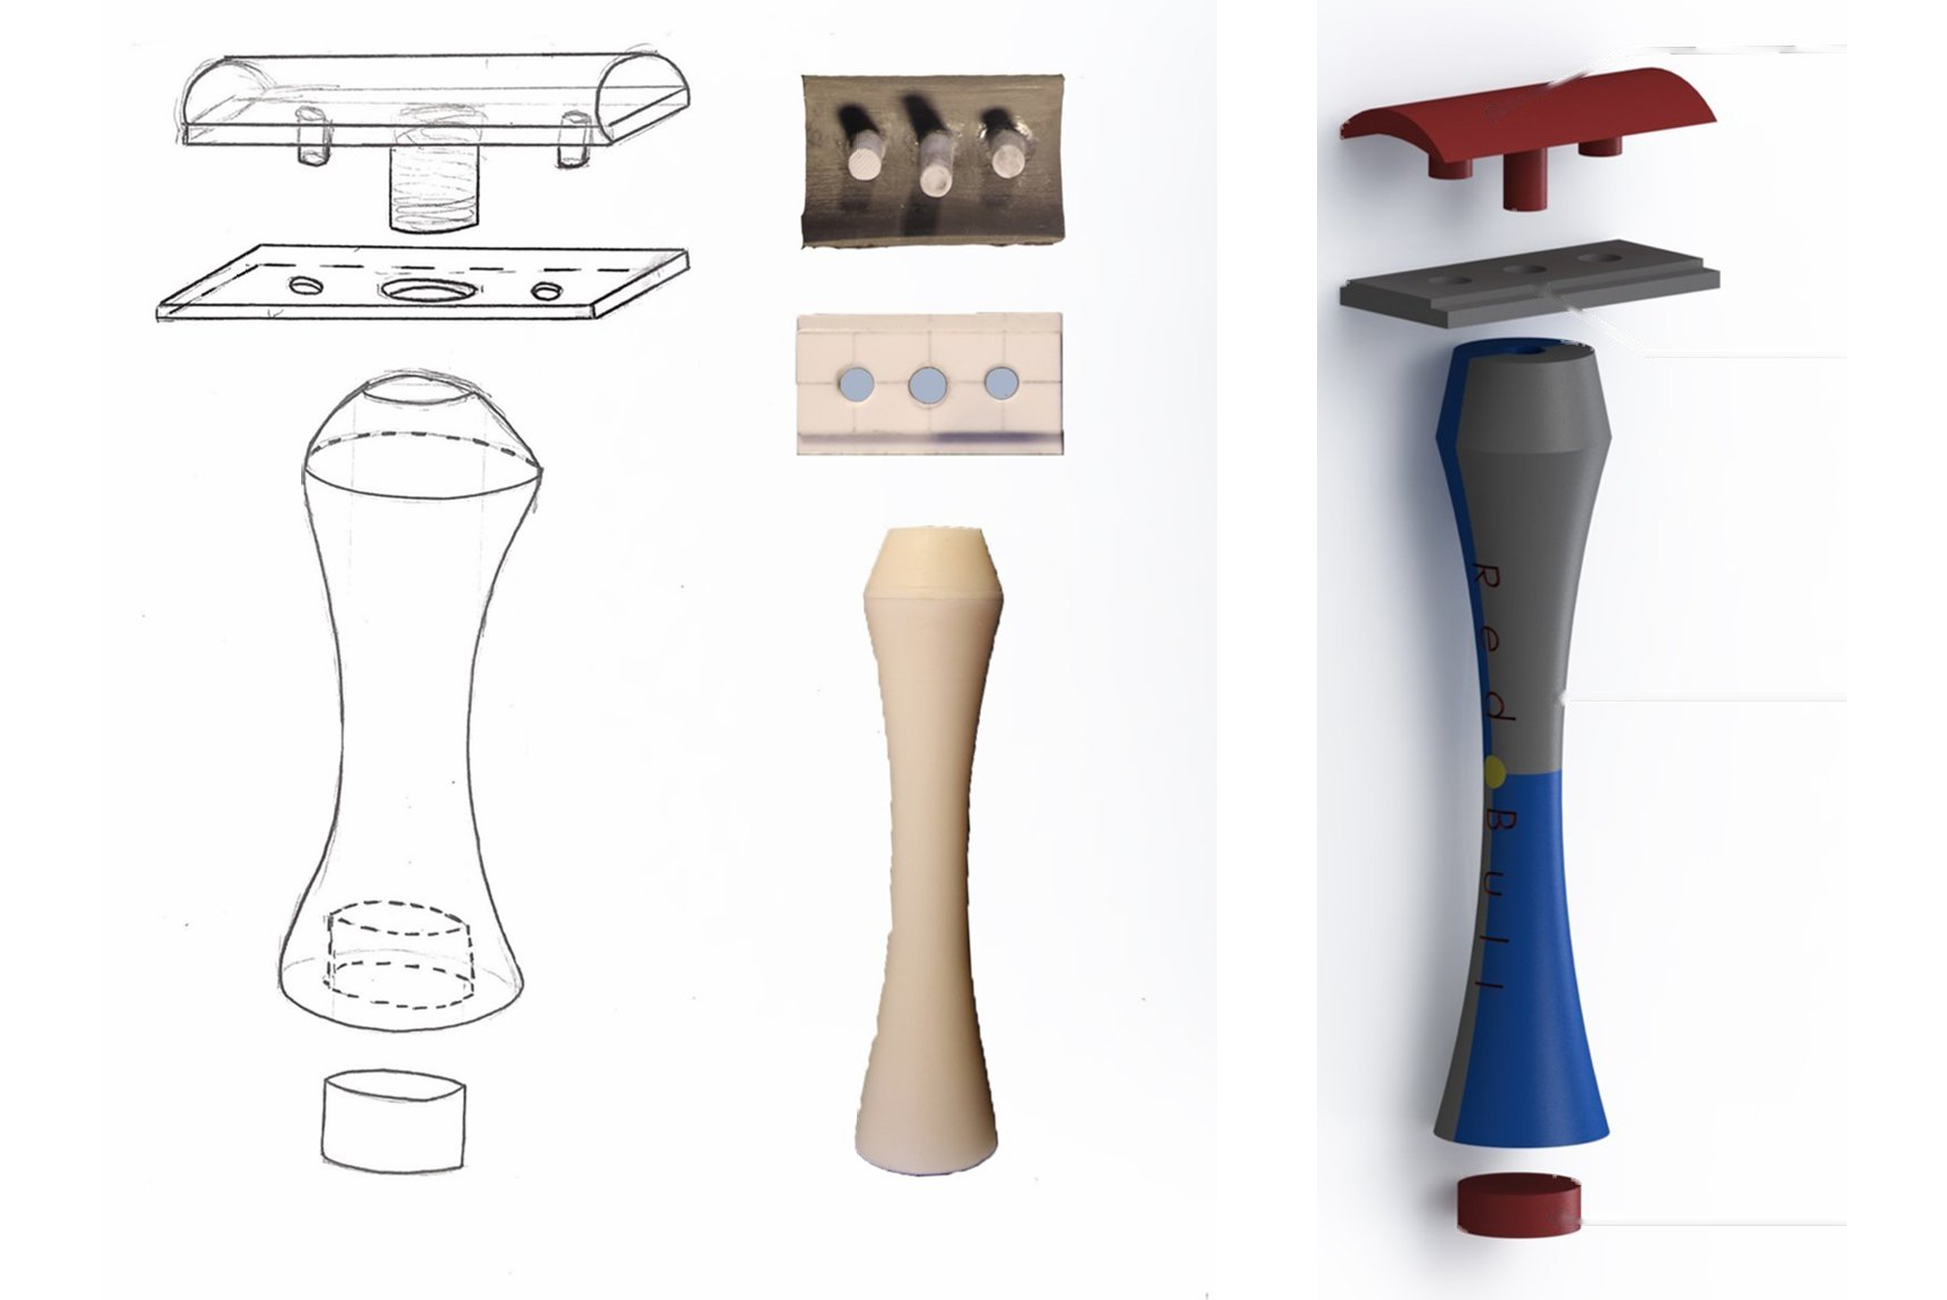
Brand integration
Looking at Red Bull as a brand meant exploring more than just the drinks it is most known for. Urban Street events and competitions seemed a more unique route to pursue, with dynamism and impact being key factors in the design.

Prototyping & Rendering
Key Skills shown here include using hand tools to produce a life-sized prototype, alongside the importance of using a 3D model and rendering techniques to provide important visuals.
6. First year project 2 of 2: Kinetic toy
Brief: To create a toy intended for a child ages 5 - 8, which involves some form of kinetic movement or action.
Concepts

A Toy that centred around spinning and rotation was my starting point. A ‘Tidlywinks’ style game, where the player flicks counters into spinning cups around an axis, became the focus, and concepts were drawn around this.
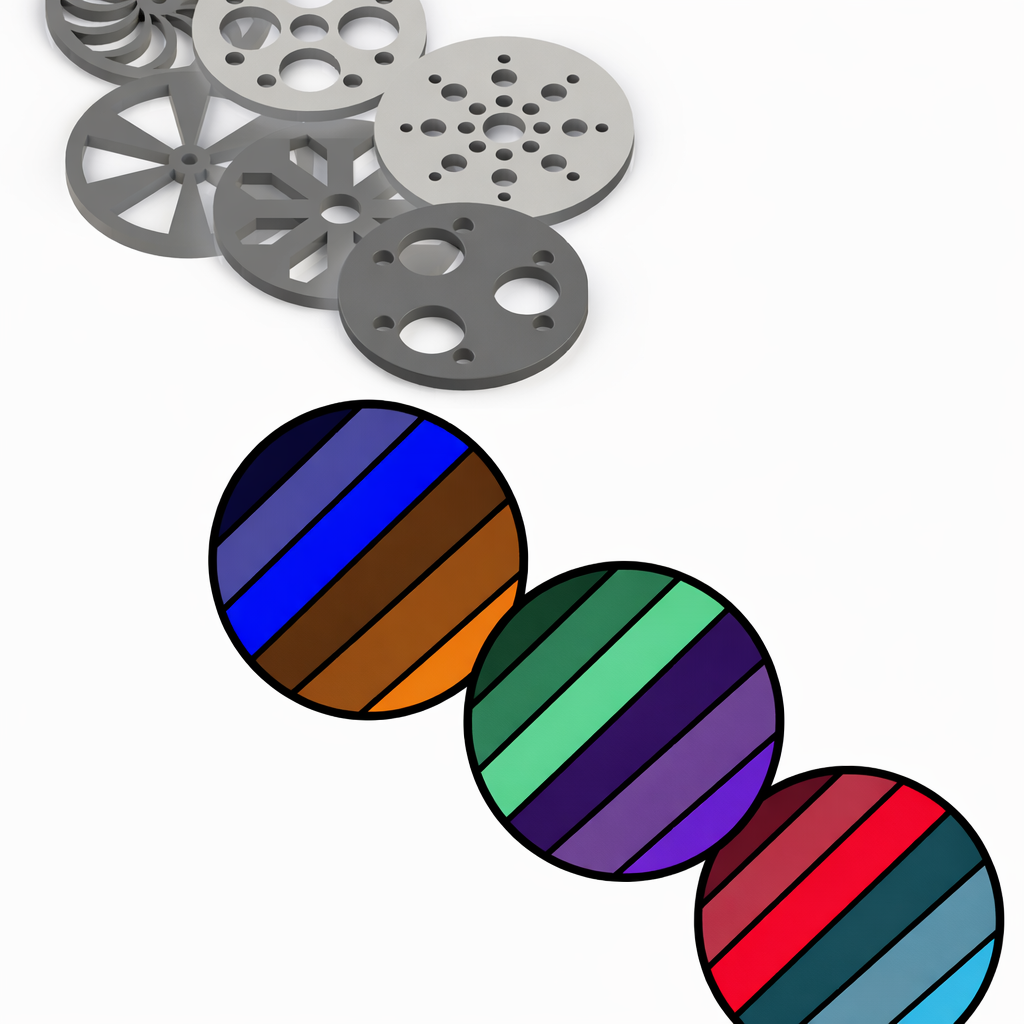
Development
Flywheel design and colour were explored in development. Flywheel design determined angular acceleration and rotation, whereby colour determined appropriate aesthetics for the age range.
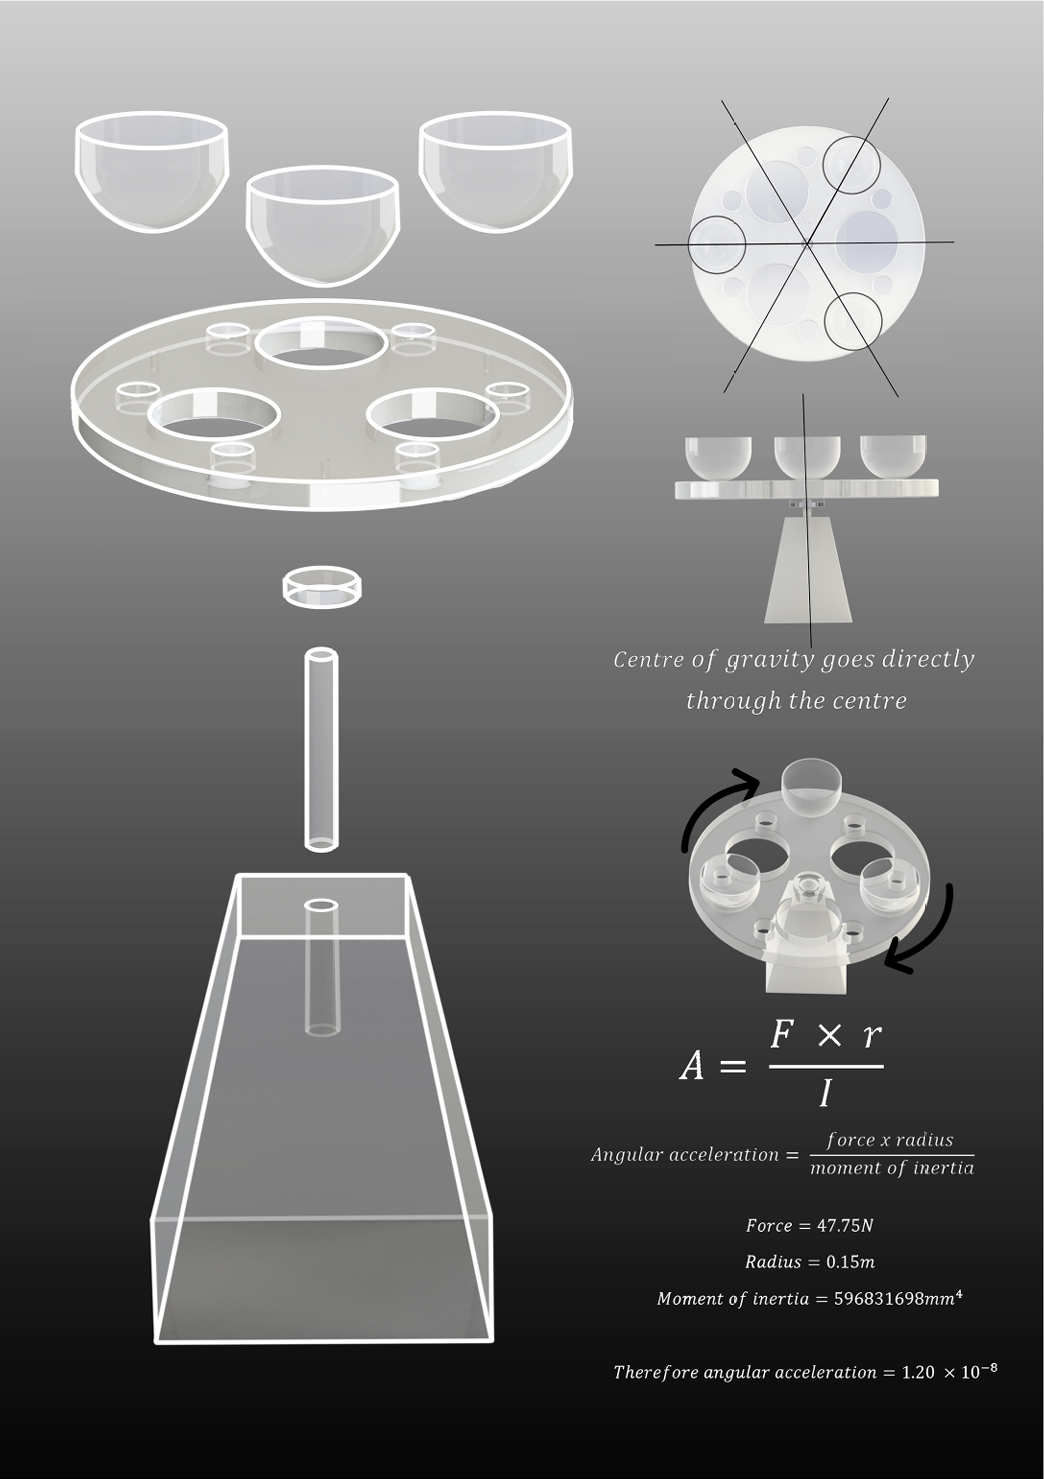
Mechanics
For a Midway presentation, the focus was to create a poster on the mechanics of the product. Highlighting the centre of gravity and angular acceleration were key themes here.
Prototyping and Rendering
Workshop skills have become essential now, with material selection and manufacturing processes tested. Machine tools were now being used, with boring and turning processes being used.

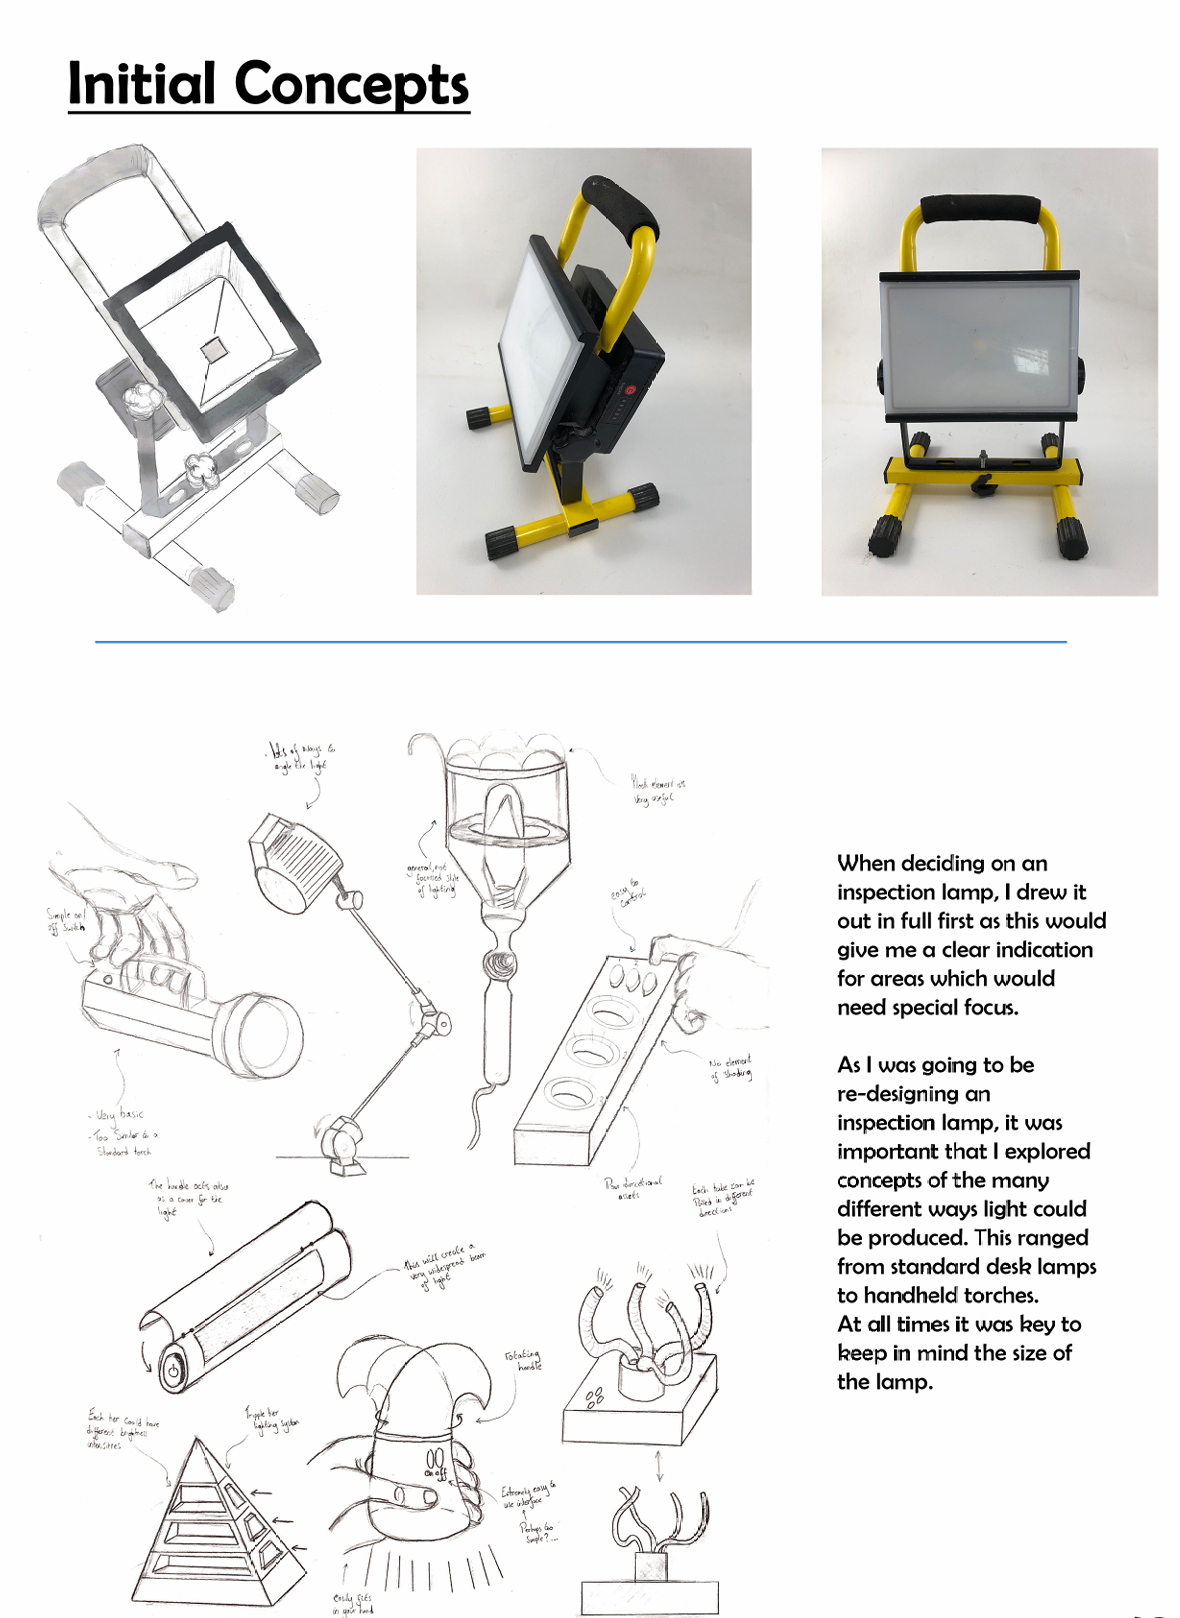
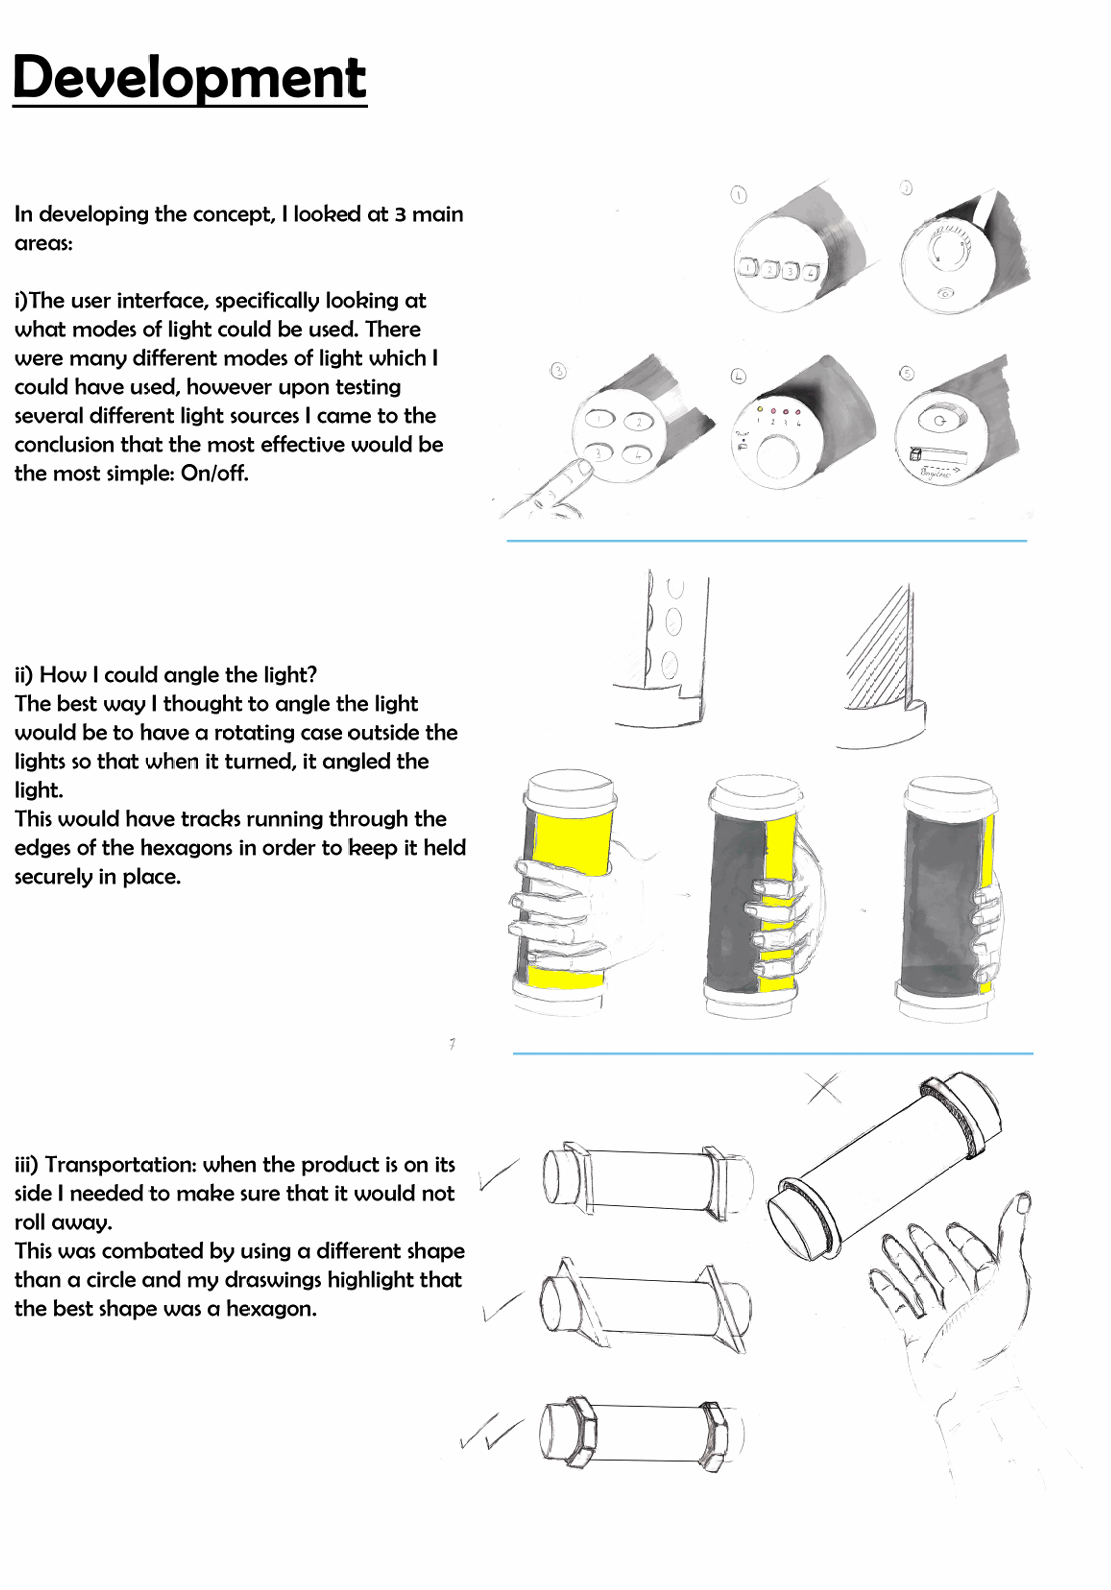
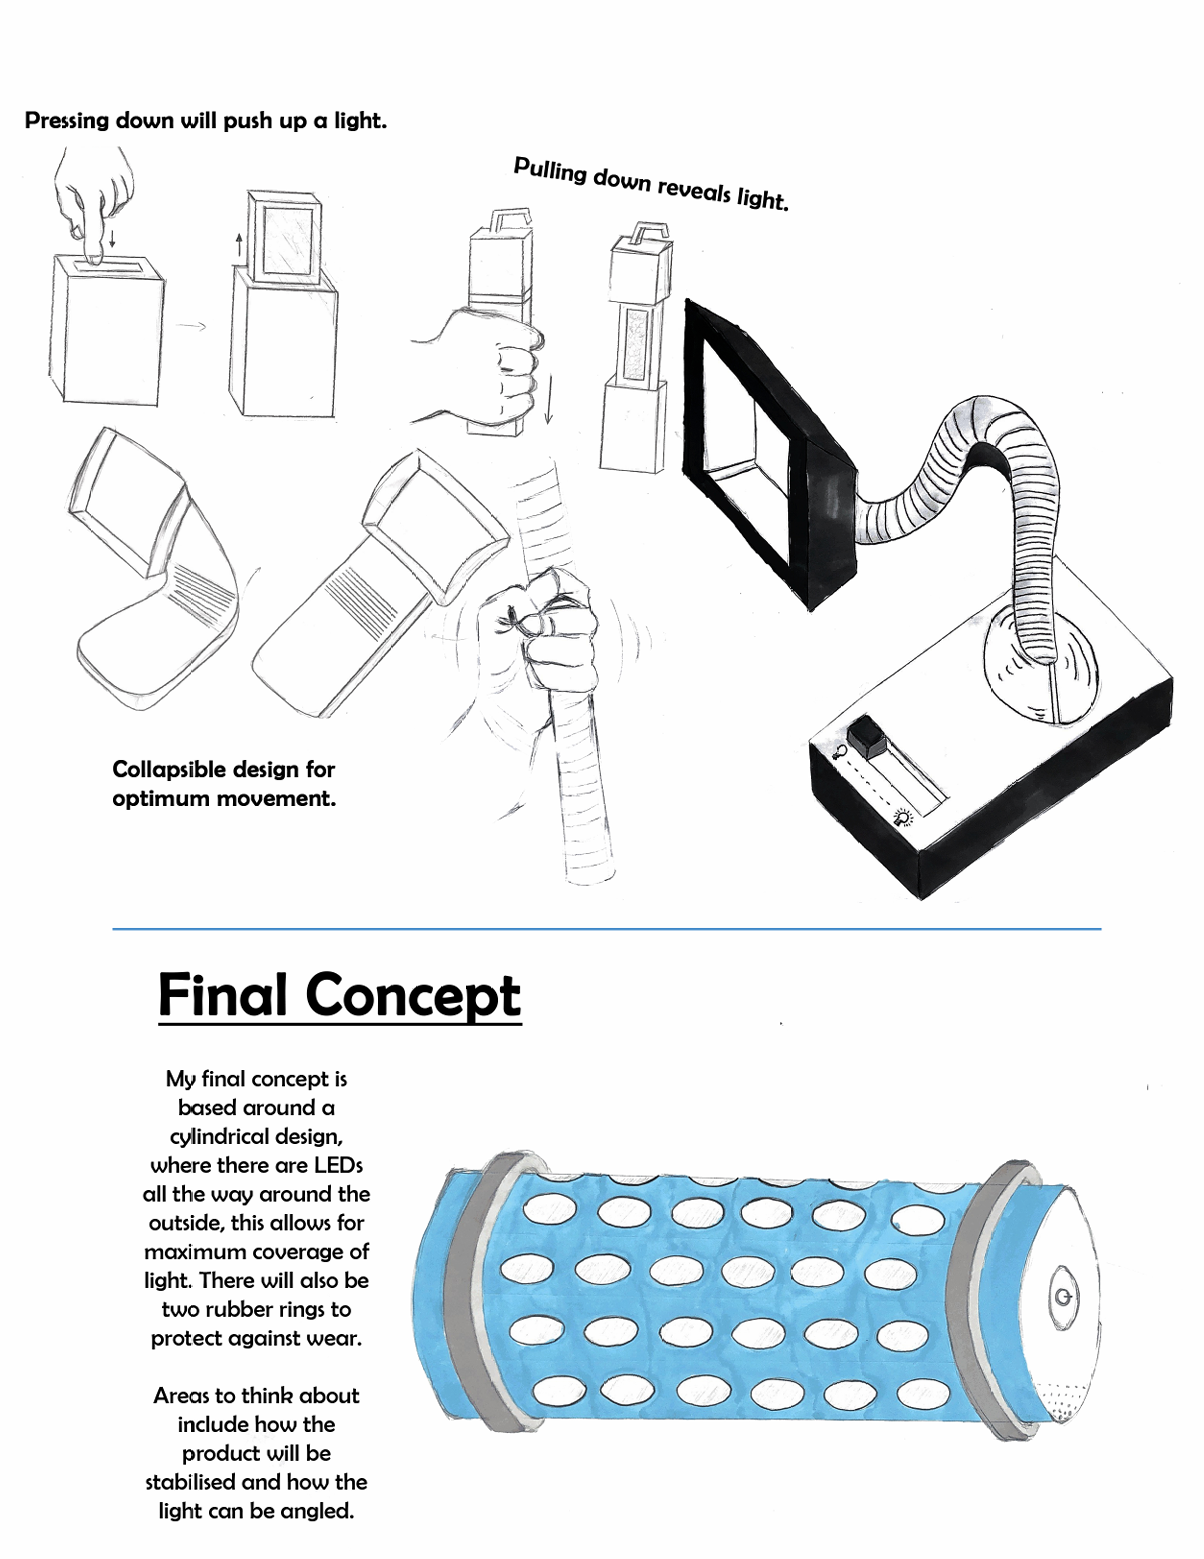
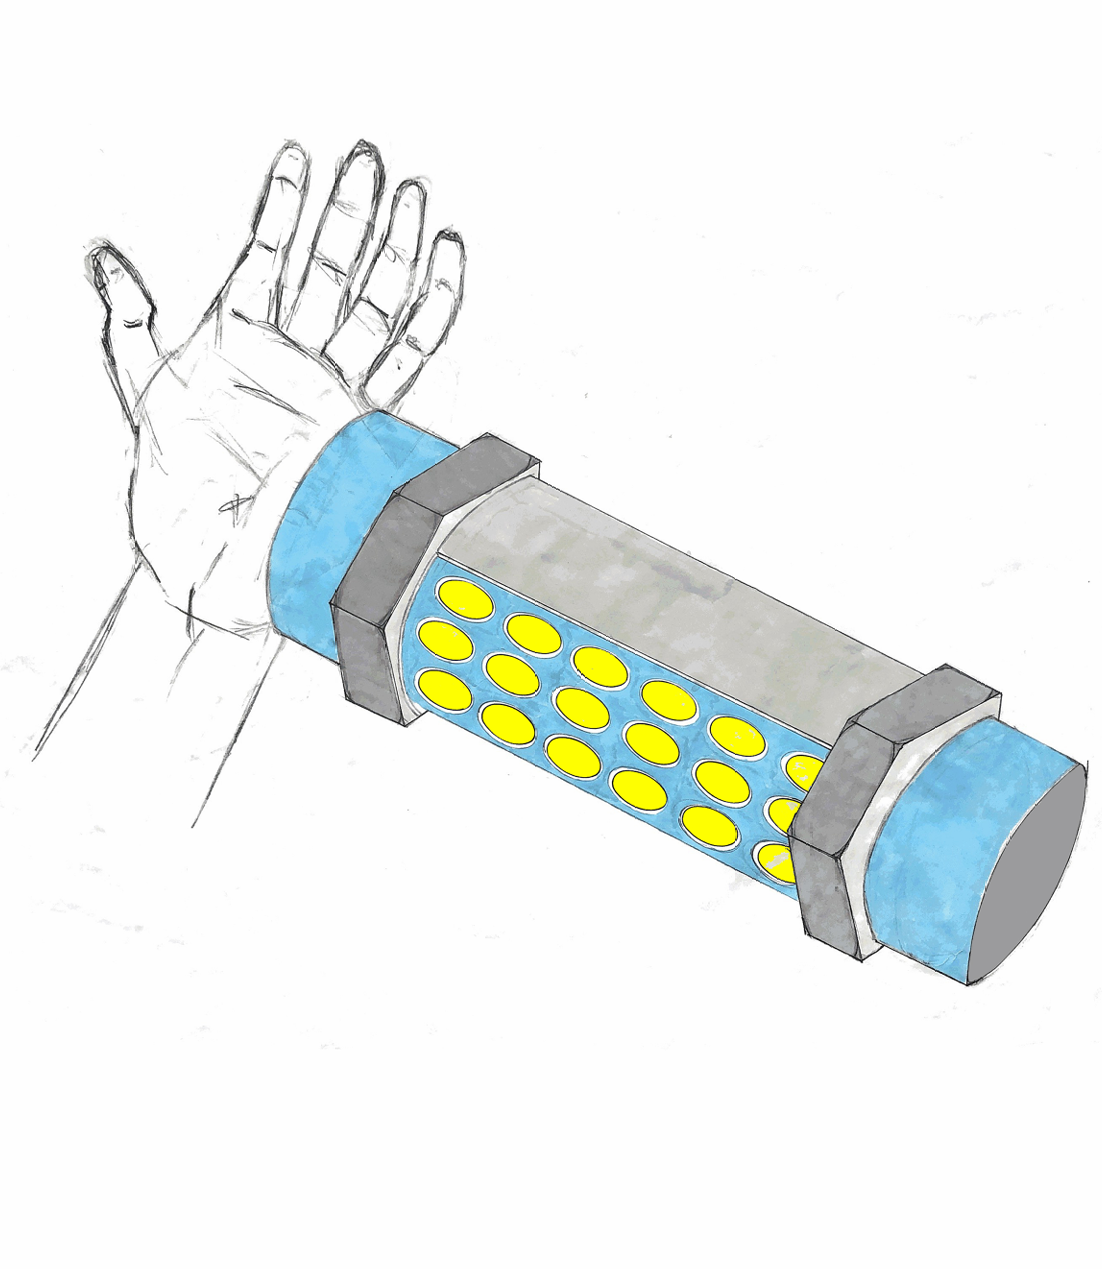
6. Second year project 1 of 3: Manual design skills
Brief: To redesign a product of your choice using only manual representation.
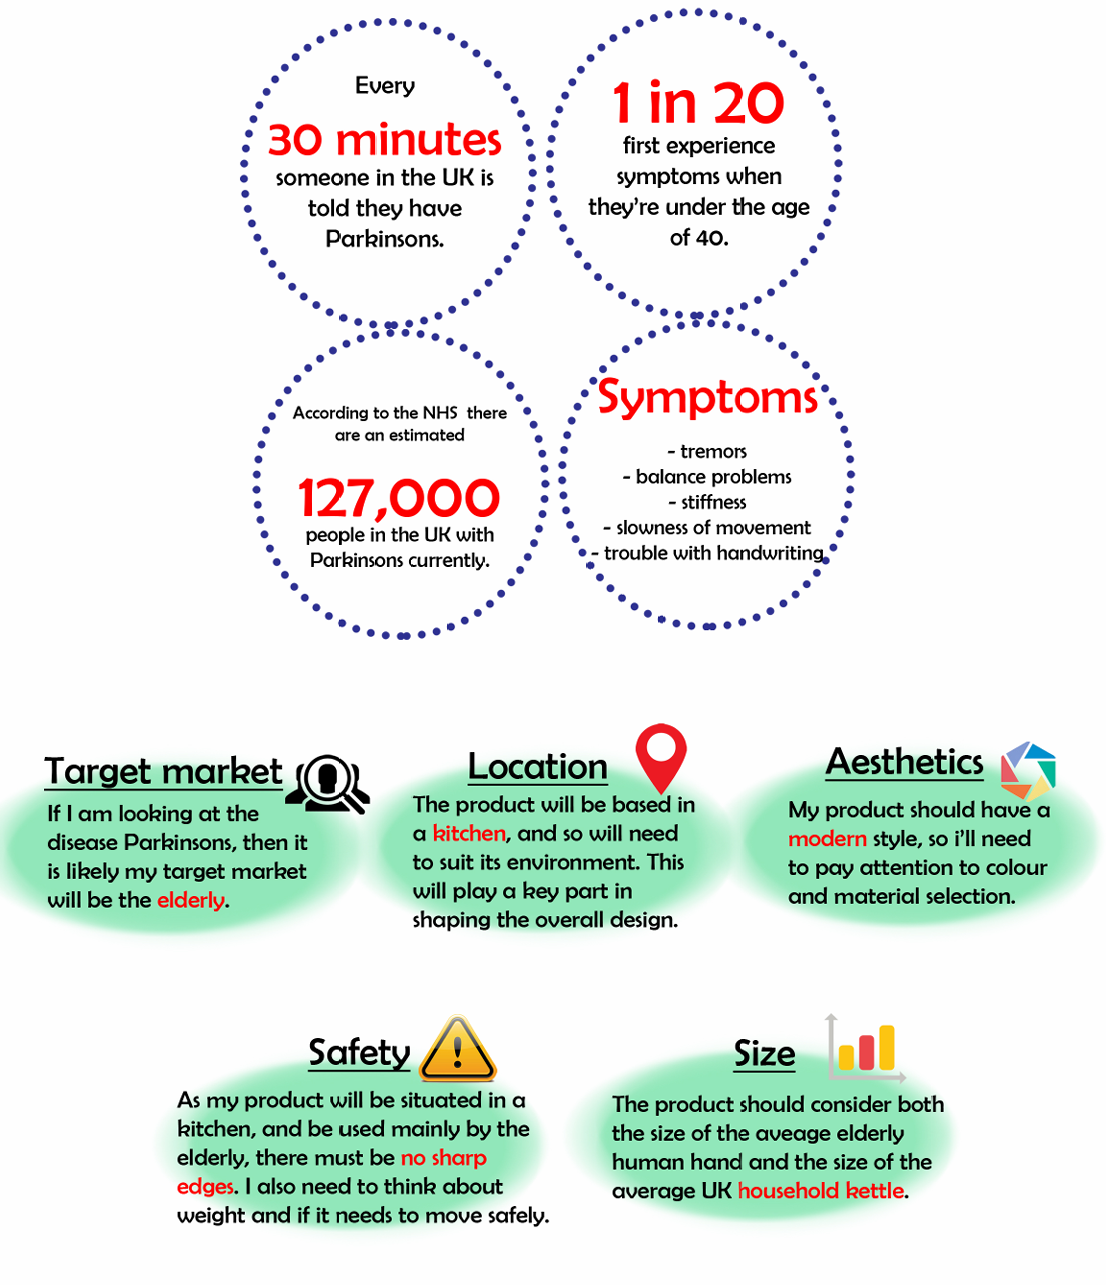
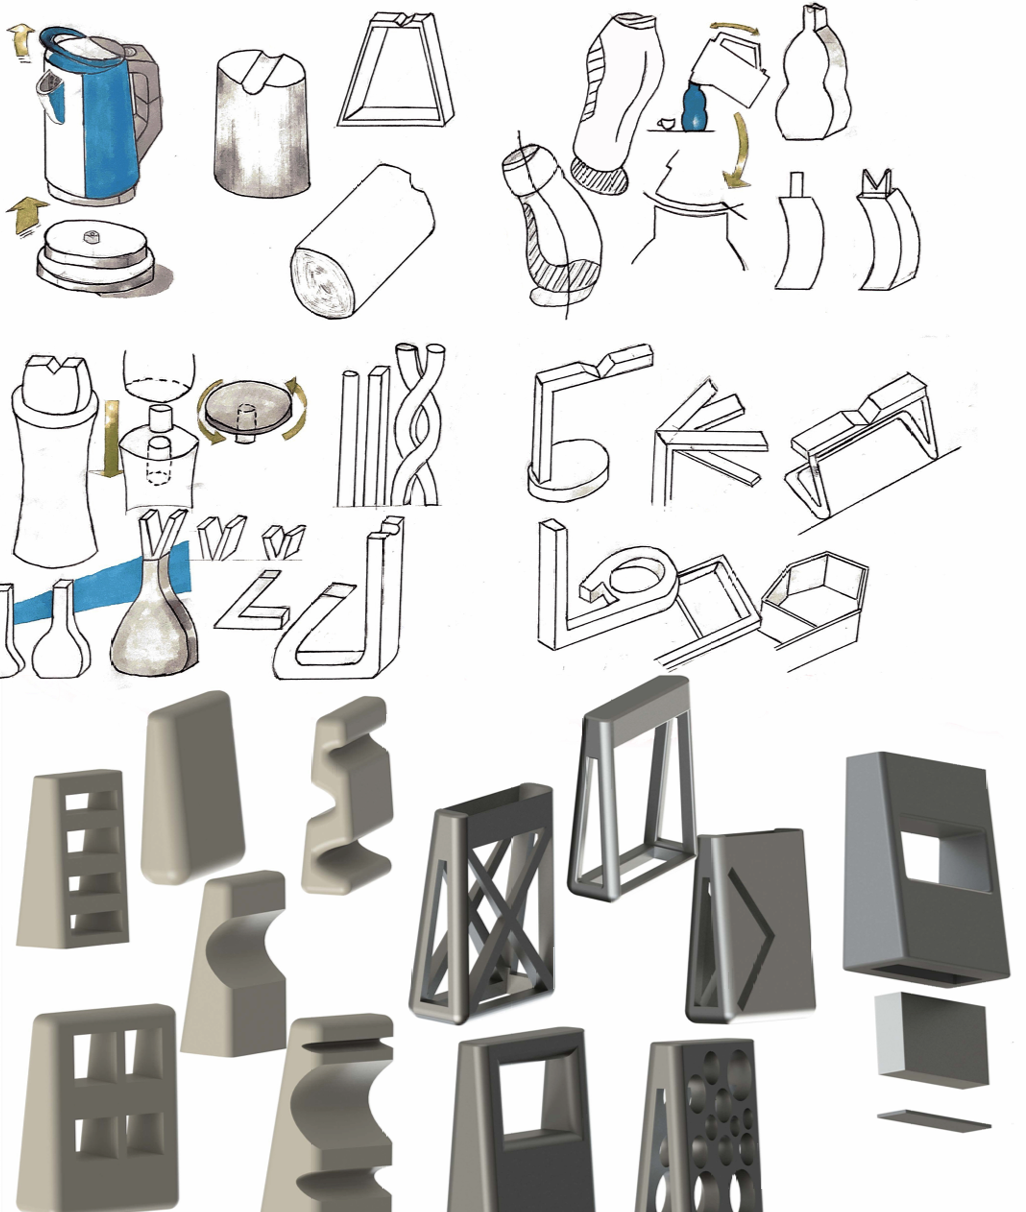
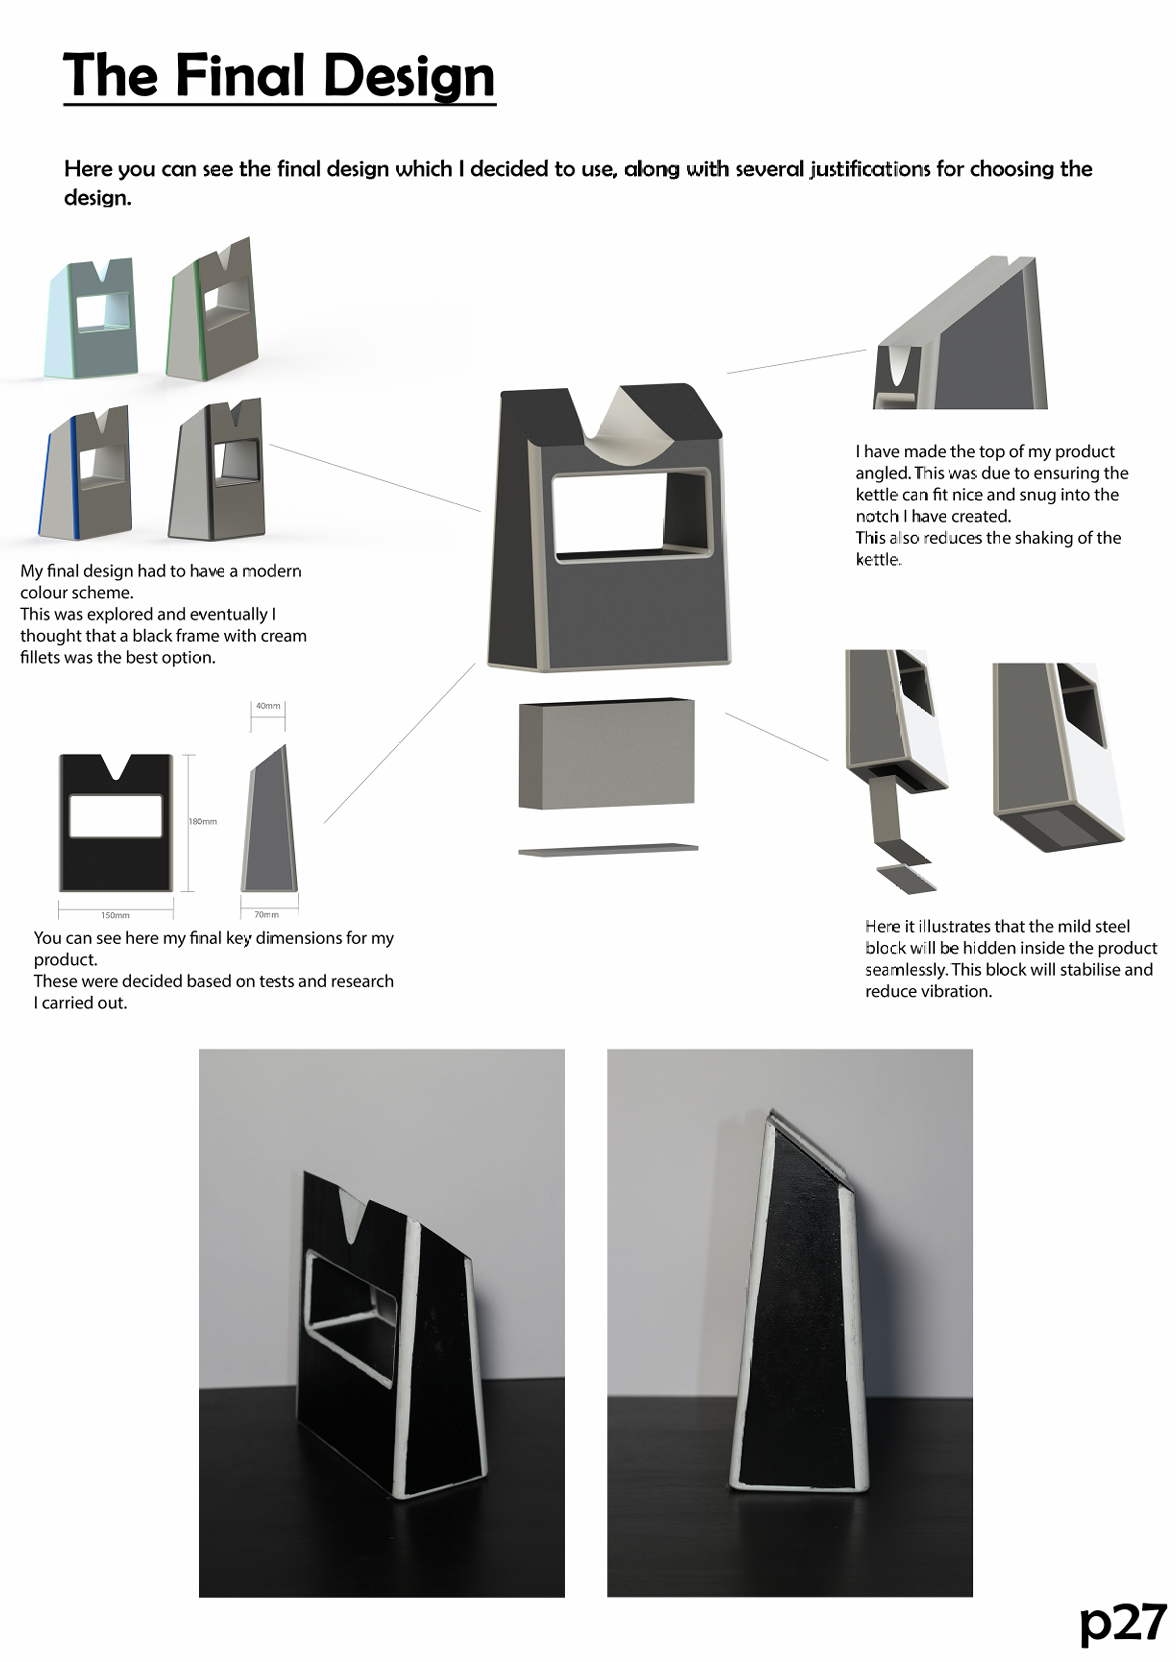
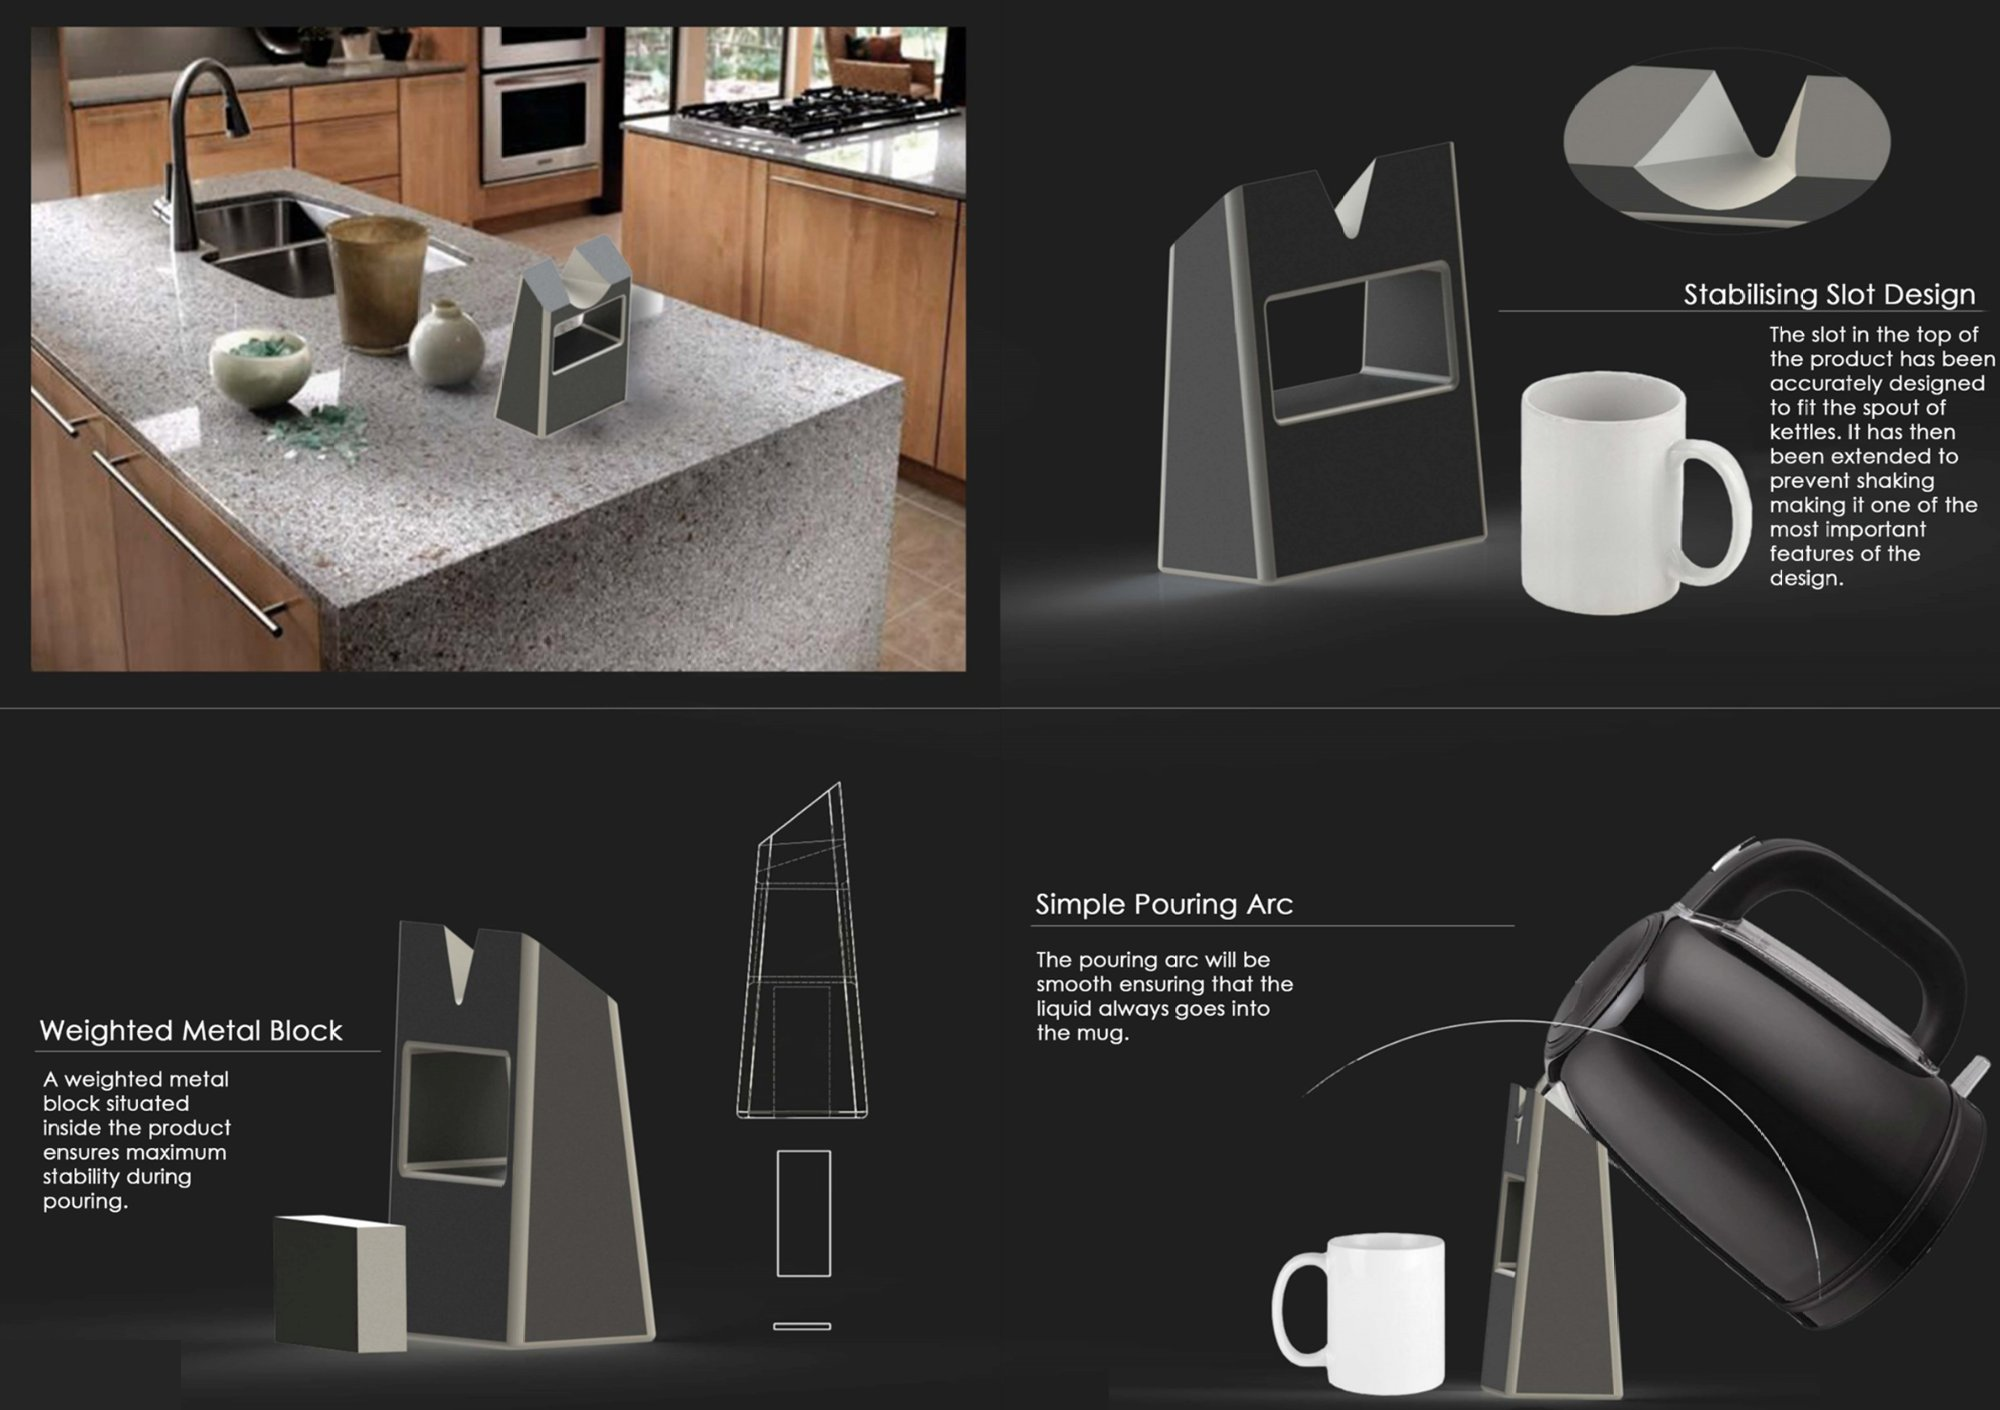
6. Second year project 2 of 3: Parkinson's Kettle Stand
Brief: To identify a problem and then create a product to solve it. The Product must move and/or shake (something) without the use of electronics.
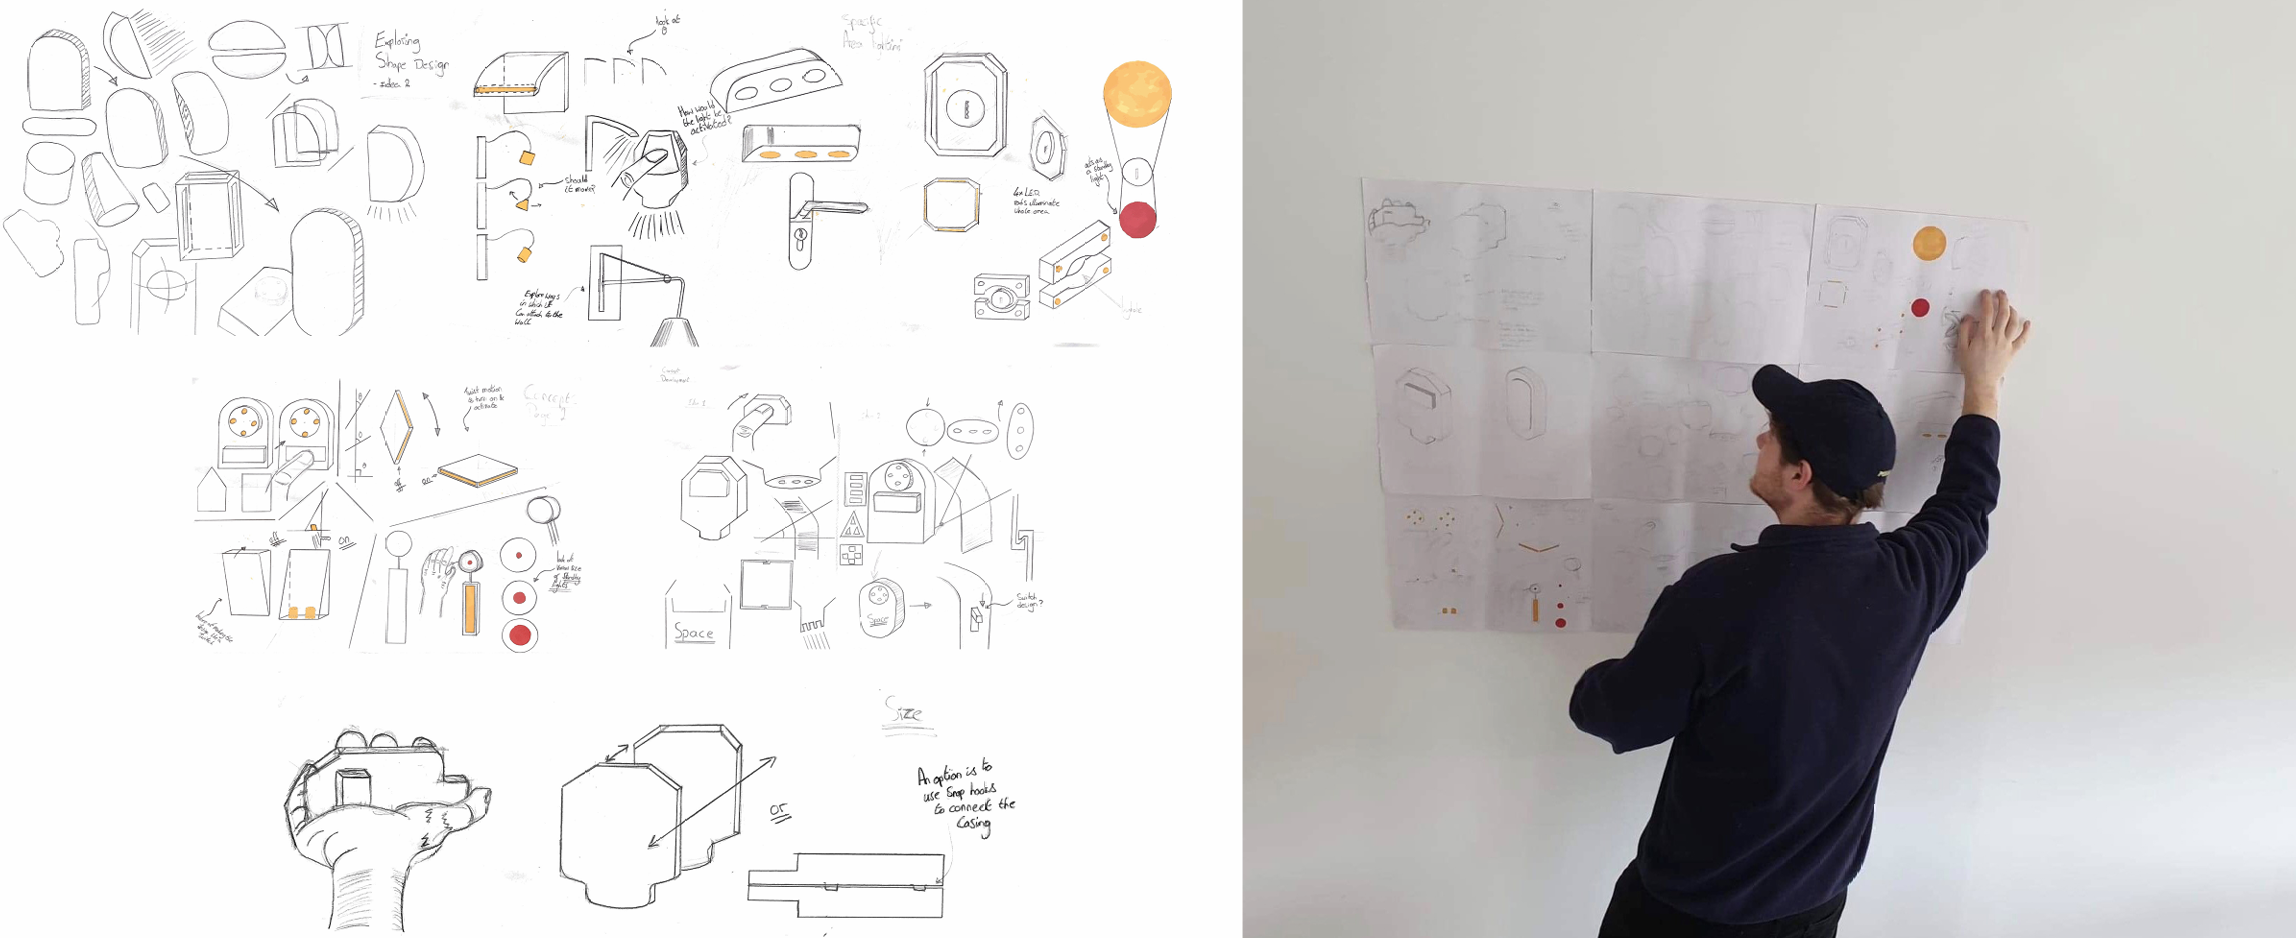
6. Second year project 3 of 3: Keyhole lighting
Brief: To design and create a light-based product involving one of the 4 electronics schematics for an SME.
Concept ideation
Illuminating a keyhole so that keys could be found in the dark was the concept, and so I began by sketching, then reviewing the details for how the product would look.
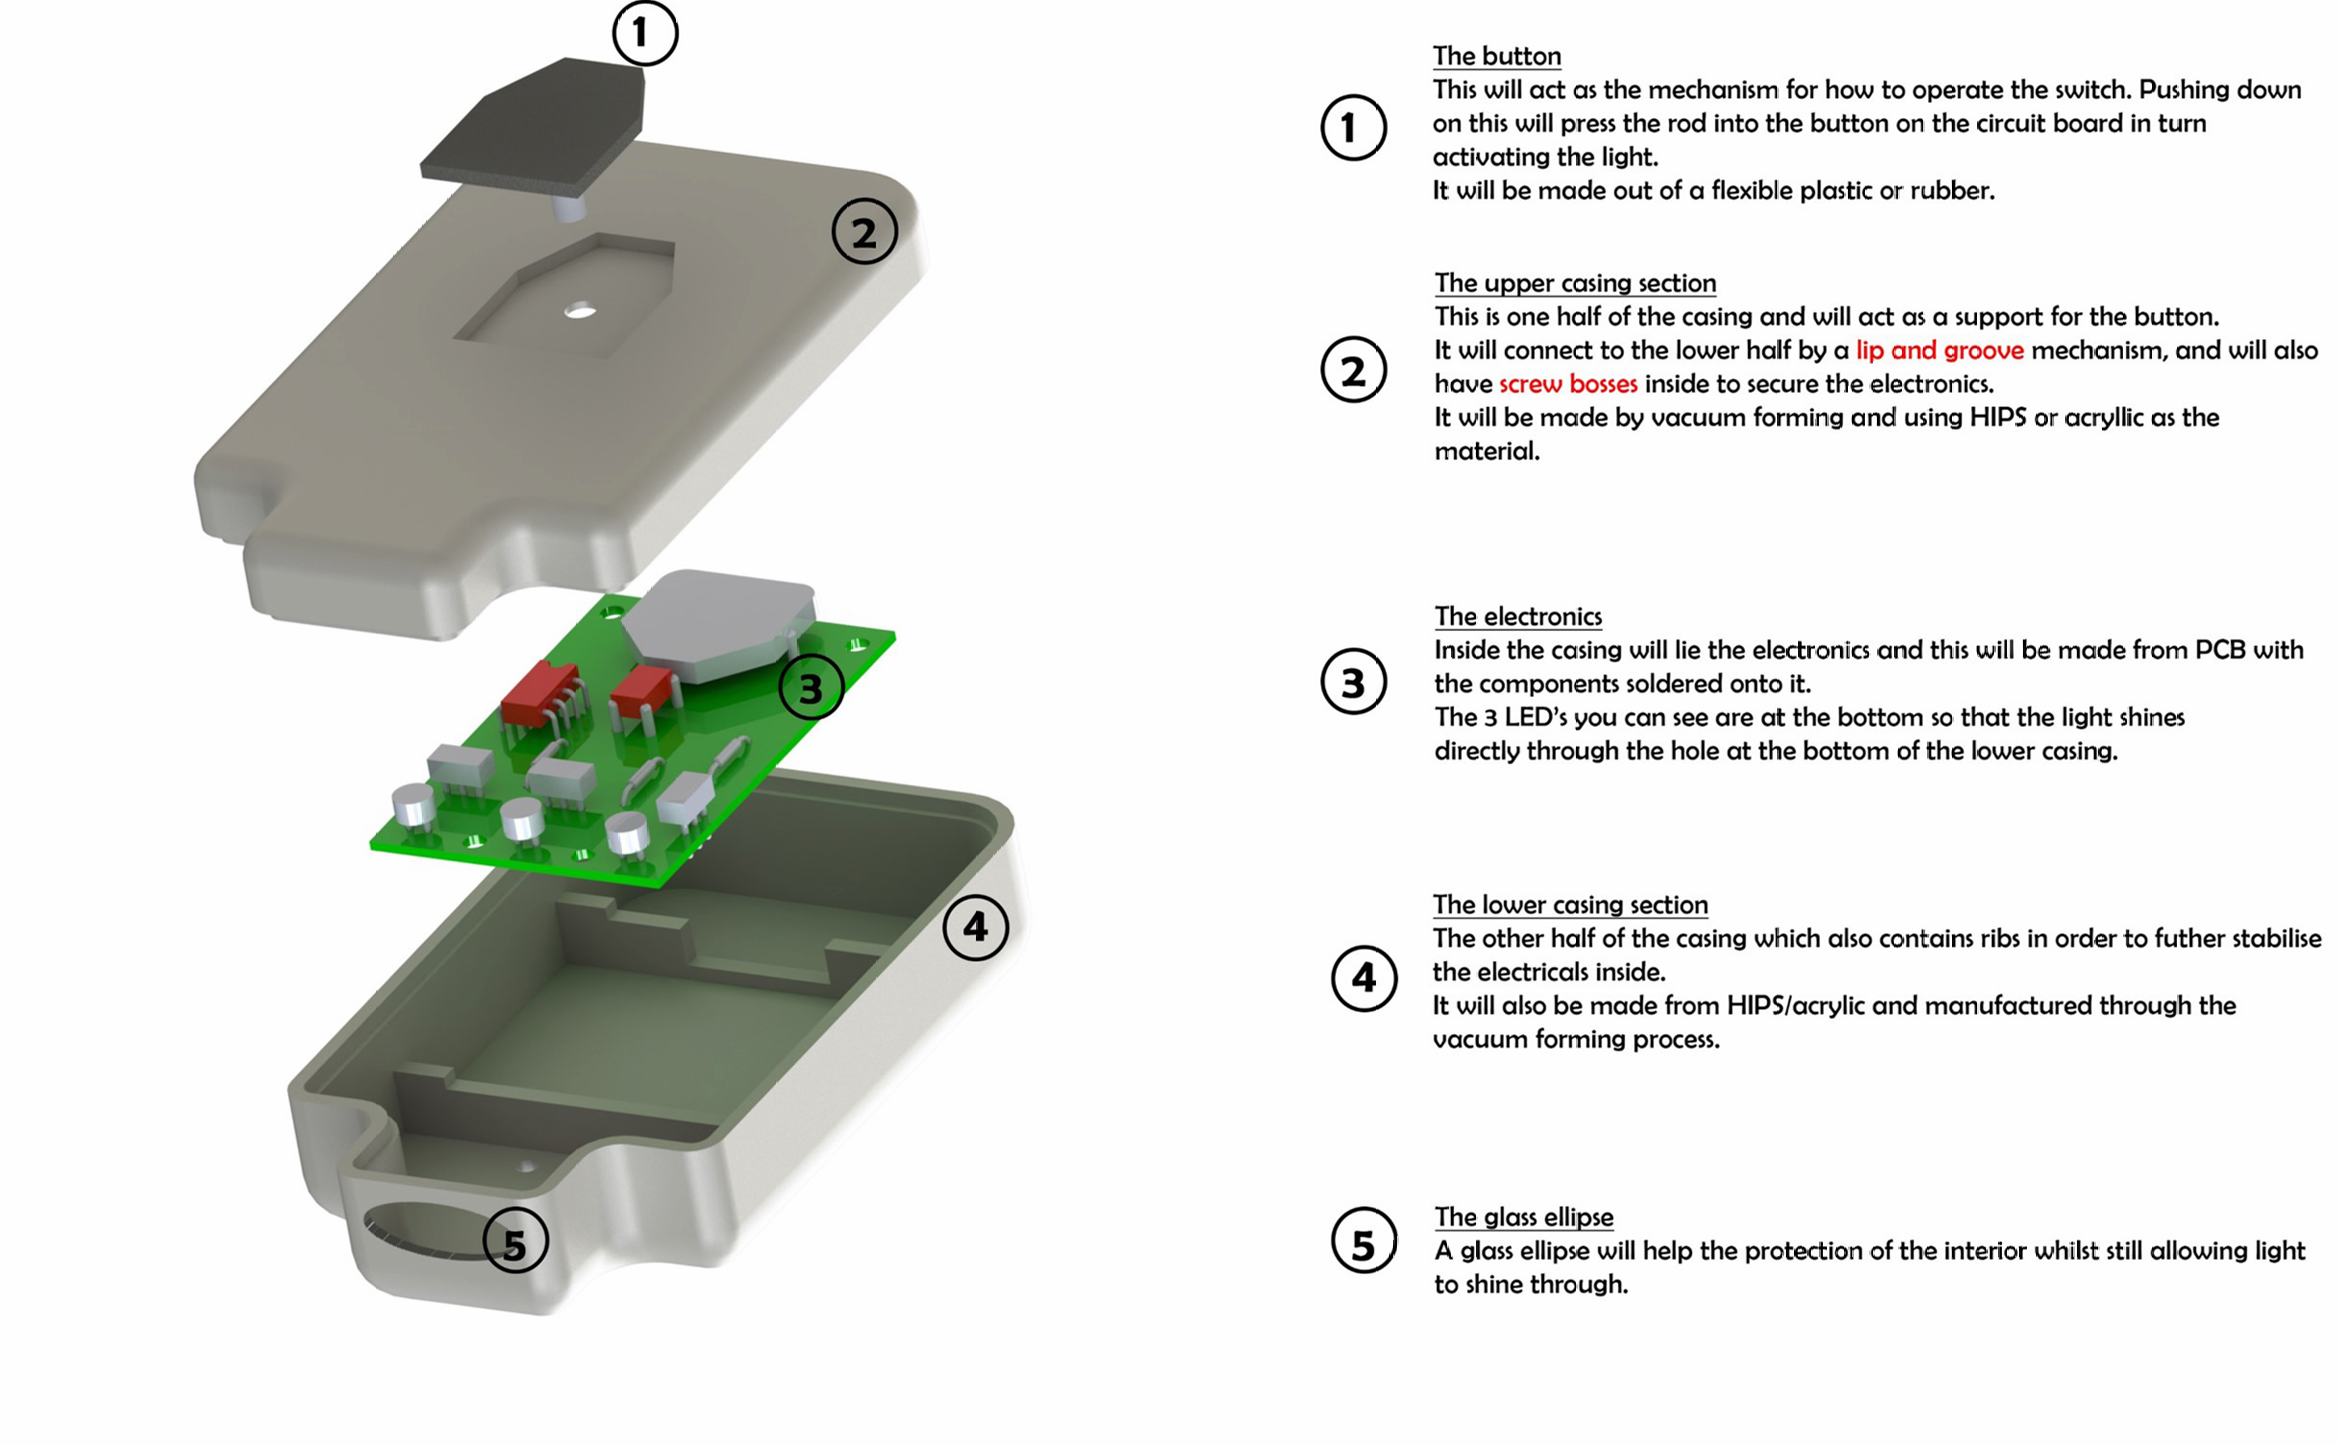
The design settled on was a plastic housing that push-fits together and holds the electronics securely within.
Electronics
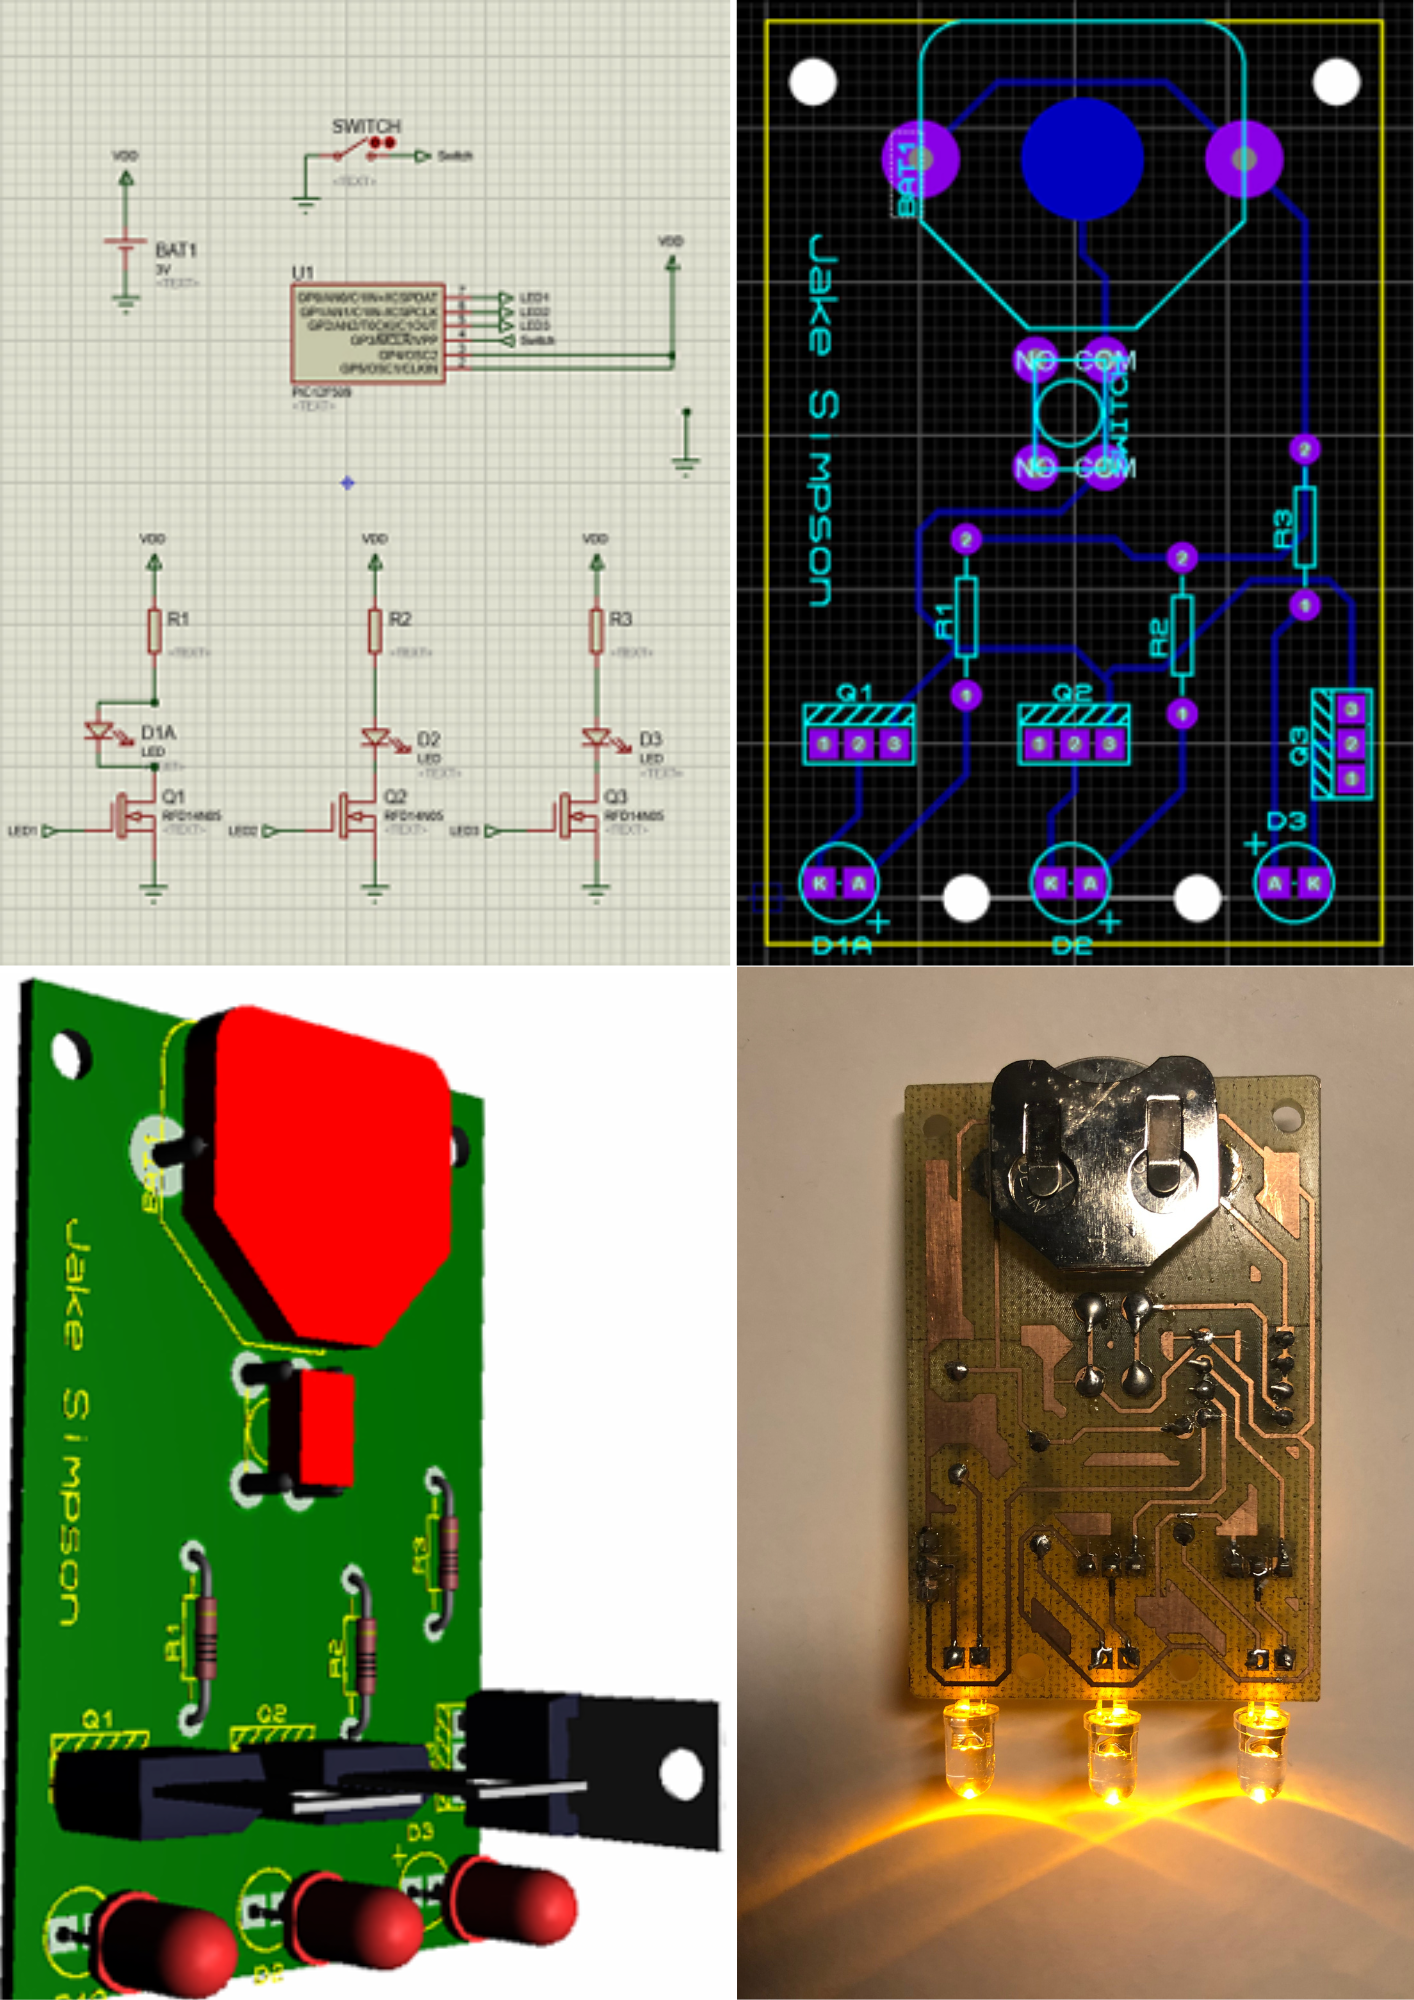
The focus of this project was to use and integrate a small PCB unit into our designs. This included learning the schematics, the software Proteus, and then using SolidWorks to gain further 3D detail of the PCB.
Workshop skills
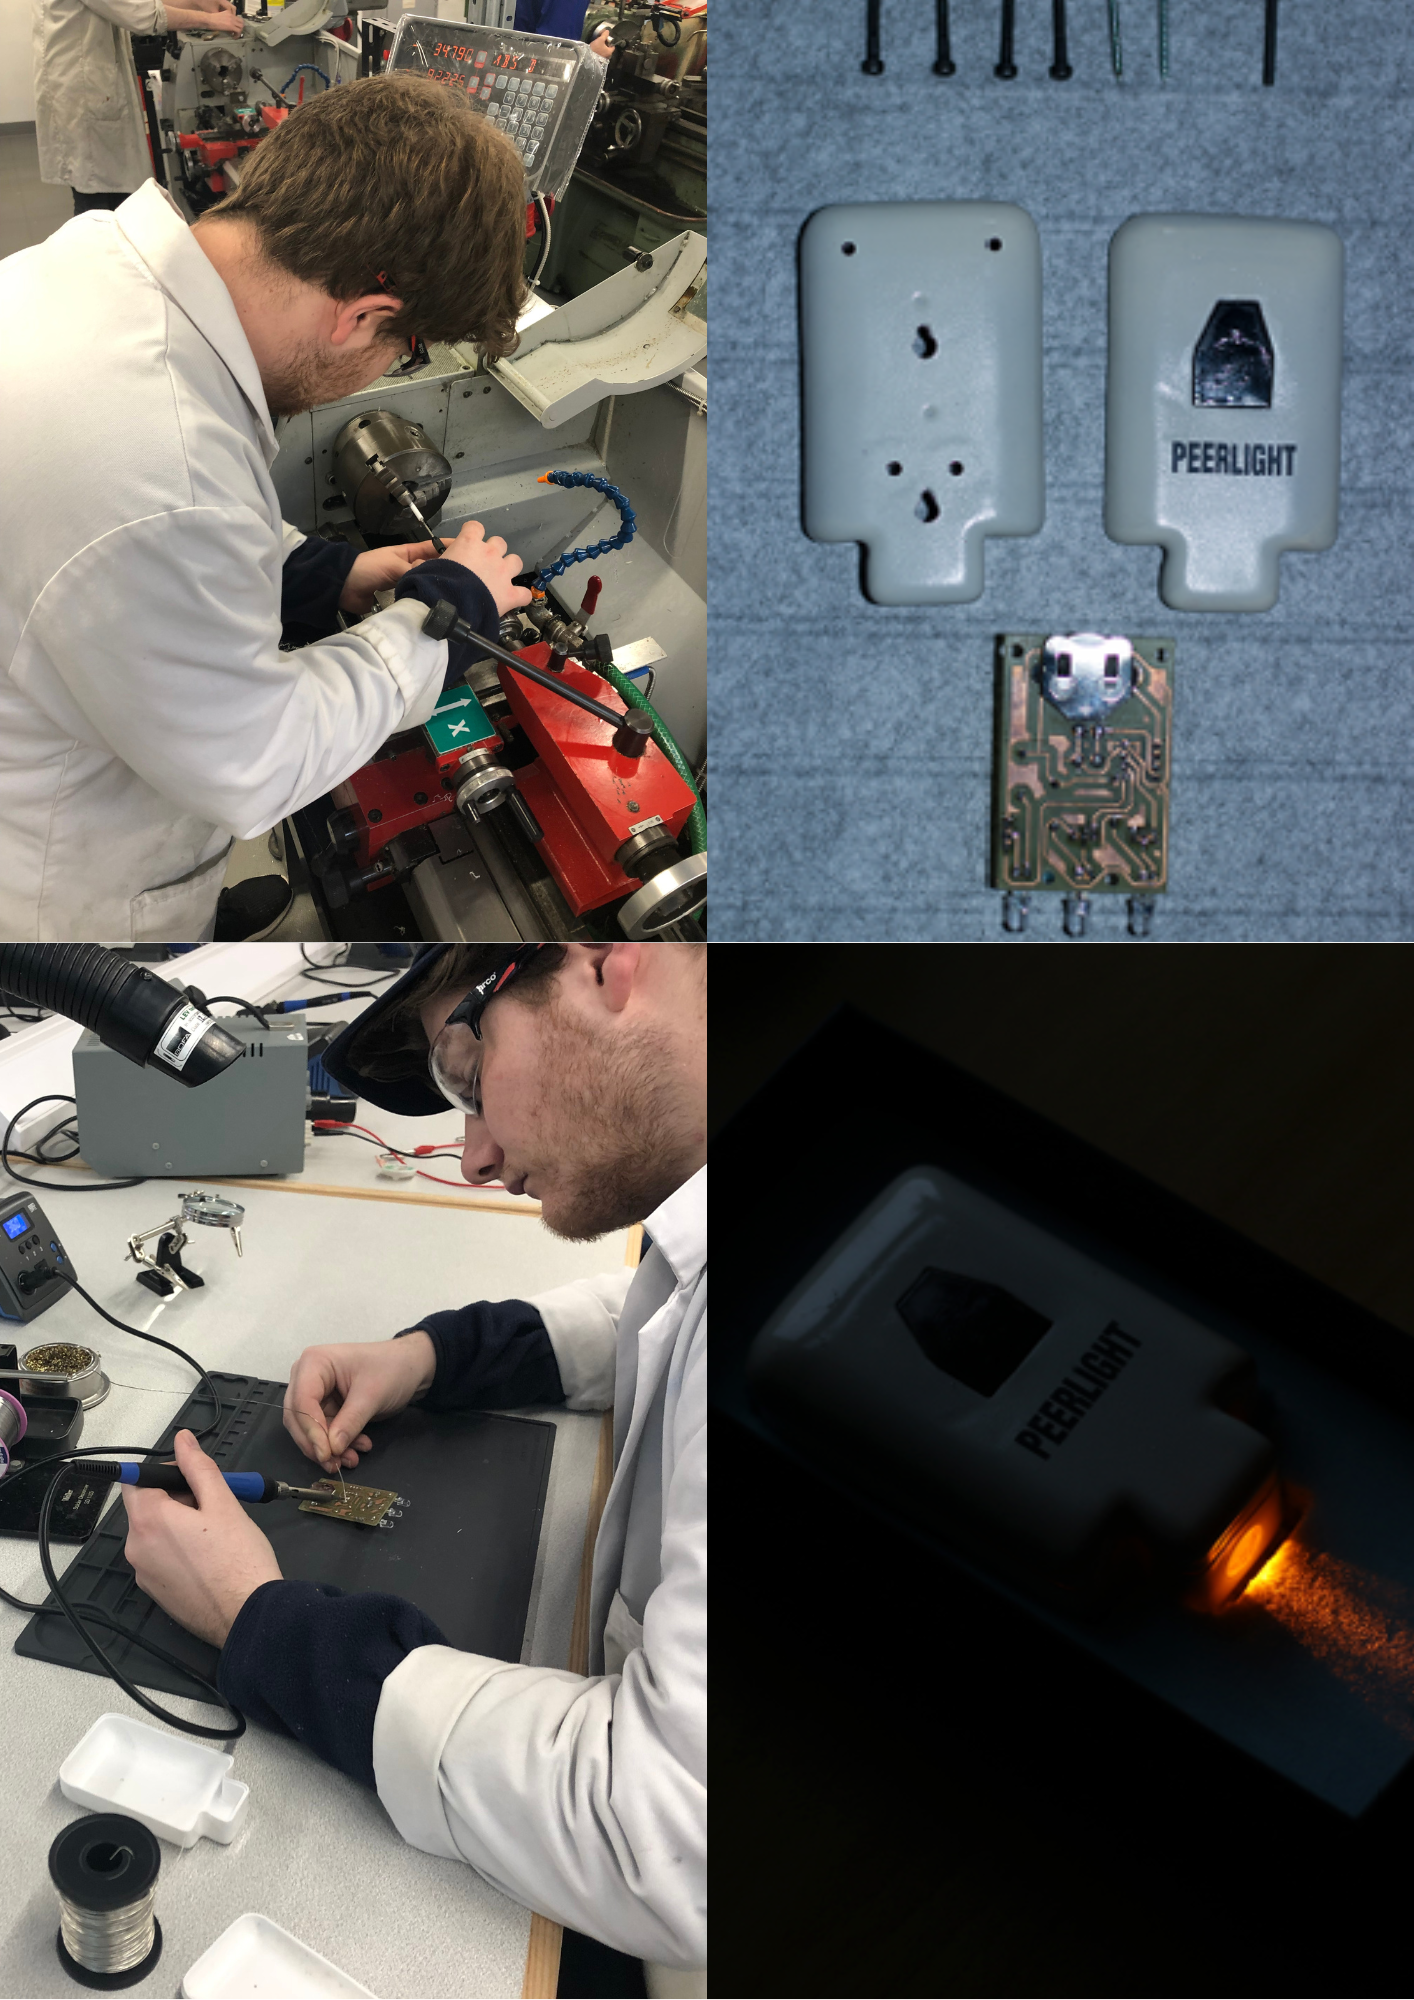
Being able to create a working prototype here was also important, so that the finished product could be reviewed and tested. Lathe work and soldering, as well as vaccuum forming and handheld tooling skills, were all tested in this project.